Now lets take a quick look at the tools available in Photoshop touch. Obviously the tool bar is the ideal place to start. It is fairly sparse but at the same time is the essence of Photoshop and I rather appreciate the streamlined nature.
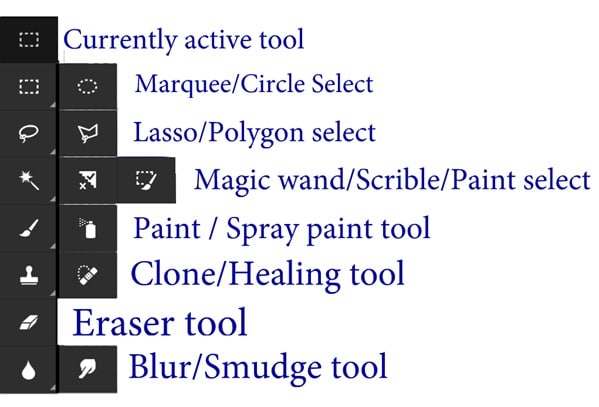
Here is a graphic of all the tools expanded:
Almost everything here works exactly like it’s desktop alternative. Selection is pretty straight forward. The top most icon represents currently active tool, while selecting a new tool is simply a matter of clicking it. For hidden tools, touch and hold until it expands then slide your finger to the tool you want and release.
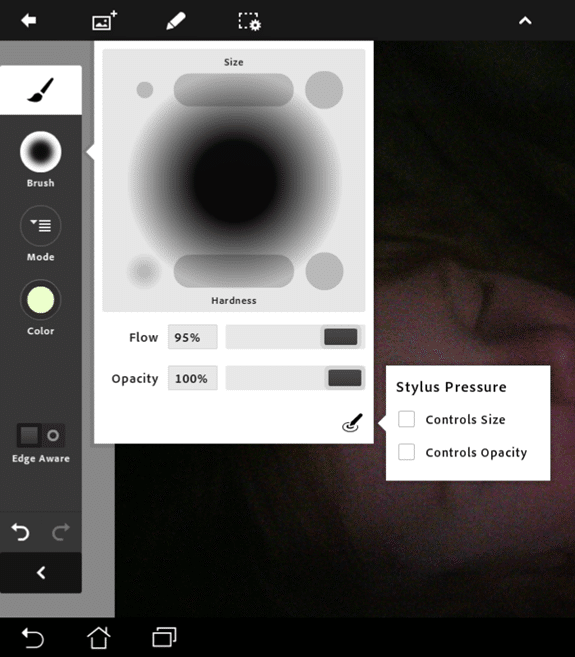
Once a tool is selected, the toolbar is instead replaced with tool options. Here for example is the Paint brush tool selected:
A couple things of note here. First, when you are done with a tool you click the selected tool at the top and it brings you back to the tool selection bar. As always Undo and Redo are front and center and the < button will minimize the panel. Next you will notice the tool is pretty sparse. For the most part, Photoshop isn’t really about creating art, but modifying it. If you are looking for a sketching tool, Autodesk Sketchbook is probably a better fit. Here you basically just have control of the brush diameter, hardness, transparency and flow rate and that’s about it. You will however notice there is Stylus support on certain tablets! I have this stylus on order, but I completely forgot Black Friday so it didn’t arrive in time. I may do a follow-up post when the stylus arrives.
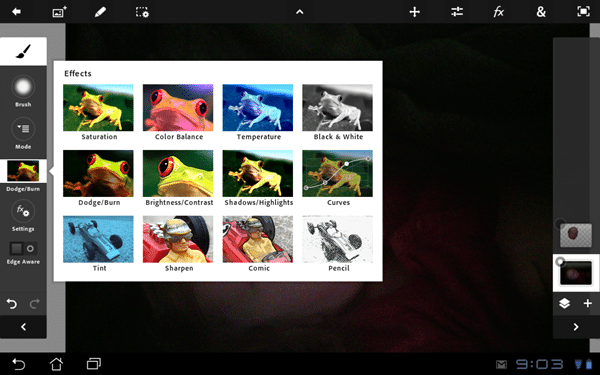
Back to the paint tool, you may have noticed the “Mode” button on the left and are wondering what that is all about. There is quite a bit of power behind that button, as Mode allows you to paint with any of the built in effects. Here is the mode option expanded:
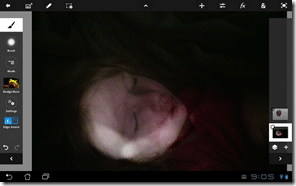
Here for example is painting with Dodge/Burn making my daughters pic a whole lot creepier!
There is quite a lot of power packed away behind that little button! Lastly with the Paint tool, selecting Color brings up your color selection dialog, like so:
Photoshop Touch does a good job of hiding tools away from you until you need them. In this particular case, this is the only location where you can select the color picker tool, which keeps the UI clean. To sample a colour from the active layer(s), touch and hold the color picker then drag it to the pixels you want to sample. The 3 right hand buttons allow you to select the color selection mode, the two not displayed modes are a traditional values slider option and a grid of colour icons. All told, it is pretty streamlined, but is the essence of Photoshop distilled. There are no options for custom brushes or various brush types, which is a bit of a shame and hopefully will be added in future releases.
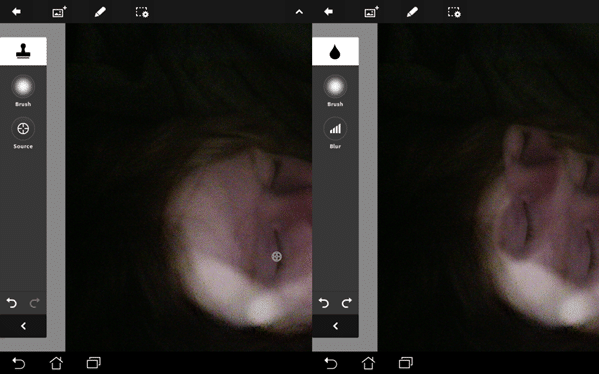
Most of the remaining tools work pretty much exactly like their desktop counter parts, with one extremely annoying exception, the clone brush! Here is the clone brush in action, quickly giving my daughter another set of eyes:
As you can see, it works pretty much like the desktop version, pick a source, then paint somewhere else and the source is copied. This is a tool I use heavily while texturing and is an area where other apps always seem to let me down. Here it works exactly like you would expect… almost! You can’t clone across layers. I am really hoping I am wrong about this and I am seeking clarification, but it seems like the source and destination need to be on the same layer! This is exceedingly annoying.
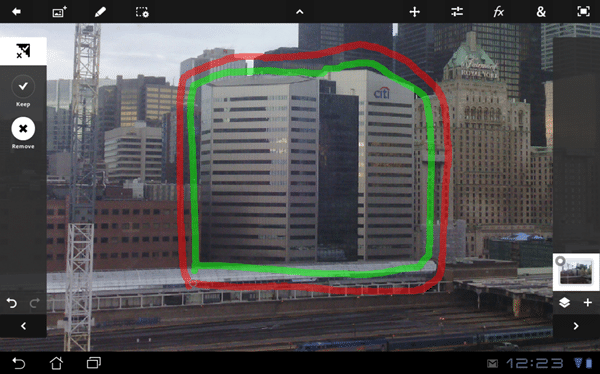
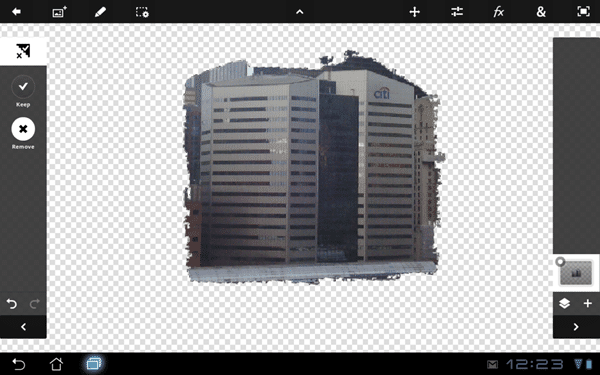
So, we’ve covered a number of things that Photoshop does the same as the desktop, what does it do differently? Well one new addition is the scribble selection tool. This works exactly how it sounds. First, you scribble what you want to keep. Then you can click the Remove button and scribble what you don’t want. Basically keeps are highlighted in green and removes are highlighted in red, once done it creates your selection mask. You can continually scribble more Keep’s and Remove’s until you have exactly what you want.
Scribble the area you want to keep(green) then the areas to remove (red) like such:
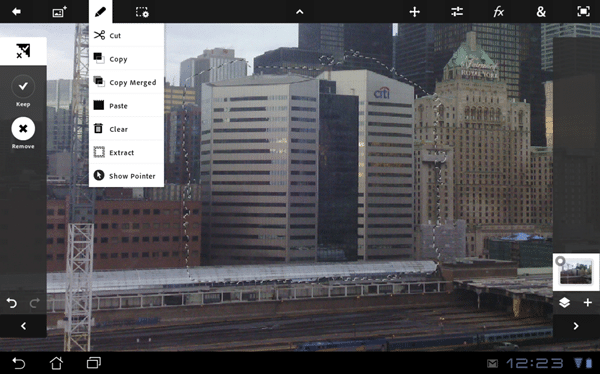
Once you have marked an area to keep and an area to remove, it will automatically create your selection mask:
At this point, you can continue to scribble with either Keep or Remove selected to refine your selection. Once satisfied with your results go ahead an click “Extract” and presto!
Granted, it is not much different than the traditional selection tools, but on a tablet it does feel very natural.
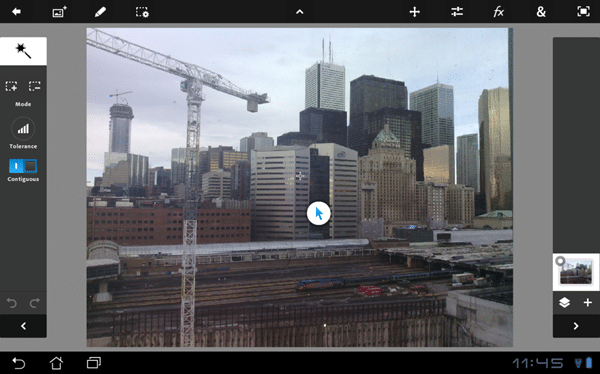
One last thing to cover before moving on, the tools are very natural and working with your finger is amazingly close to working with a stylus on a desktop with one major problem, what do you do when your fat fingers are getting in the way of the image? Fortunately there is an option for that. At the top of the screen click the pen icon ( like in the image above ) and select show pointer. This allows you to work in an offset manner. Here is show pointer in action:
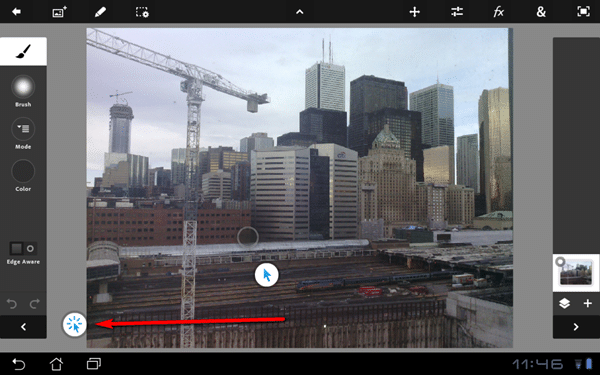
Once show pointer is clicked, you will get a visible pointer on screen as well as an offset pointer icon. Sorry lefties, it is always offset to the right by the way. By placing your finger on the white cursor icon you can now move it around the screen. Once you have the icon pressed, another icon will appear on the screen:
You can basically consider this second icon as your “left mouse button”. It is cumbersome at first, as you now need to hold your tablet, use one finger to move the cursor and another to enable drawing, but you quickly get used to it. It is extremely handy for making precision edits where your finger would generally get in the way.
Obviously there is more to the tools section, but most of the remaining functionality works more or less exactly as you would expect. If there is an area I glossed over that you want to know more about, let me know and I will revisit it. Otherwise lets move on and take a closer look at the actions available across the top of the screen.

