Blender added Geometry nodes back in Blender 2.92 and support has been steadily improving ever since. With Blender 3 and going into the future, Geometry Nodes are a becoming both more capable and more important. Geometry Nodes are special as they enable all kinds of procedural workflows without the need to write a single line of code. This will enable game developers to quickly create all kinds of projects, from tree generators to entire cities, in just a few clicks and in an easily reusable manner. So this simple Blender 3 Geometry Node tutorial should be perfect for a beginner.
One challenge of Geometry Nodes is, they are somewhat confusing, at least at first glance. So what I am to do in this tutorial is show you about the easiest useful Geometry node example you can create, then we can start expanding upon it, adding new features and functionality. We will be using the beta version of Blender 3, and do keep in mind, these features are under heavy active development, so if you are reading this from the future, it’s quite possible that some node names have changed.
Alright… let’s get started. We are going to create a simple Geometry Node that “voxelizes” whatever you pass in. That is to say, it takes the geometry and replaces it with a series of cubes, like this:
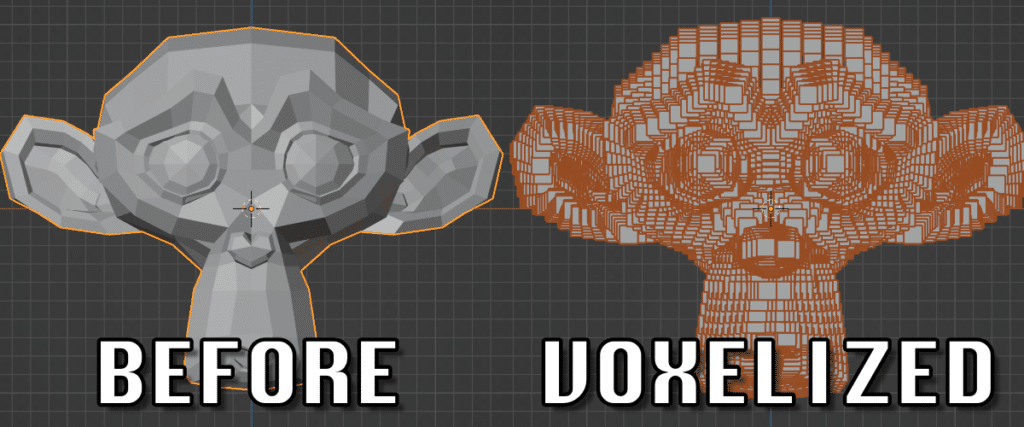
While note the most impressive demo, it is simple and a great starting point. So let’s jump in.
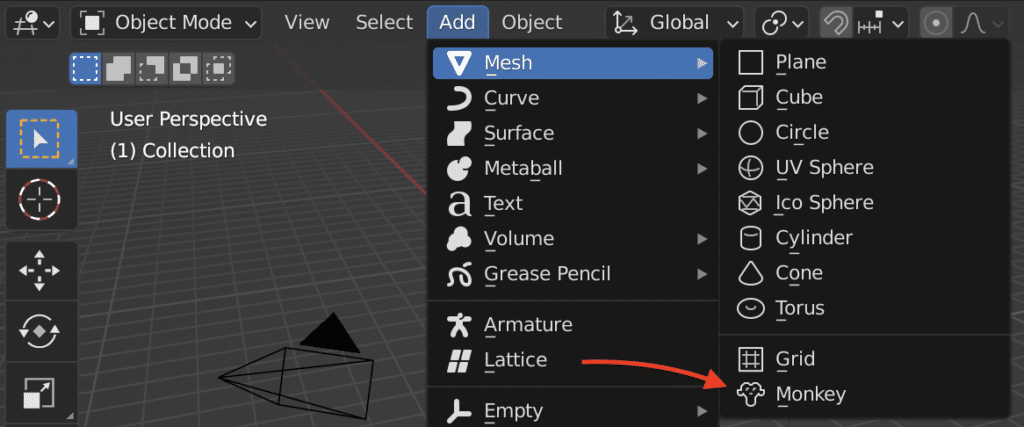
Start by creating a new Scene and sacrificing the default cube (click the cube and hit X) to the Blender gods. With the Blender deities appeased lets start things off by creating a new Monkey Mesh.
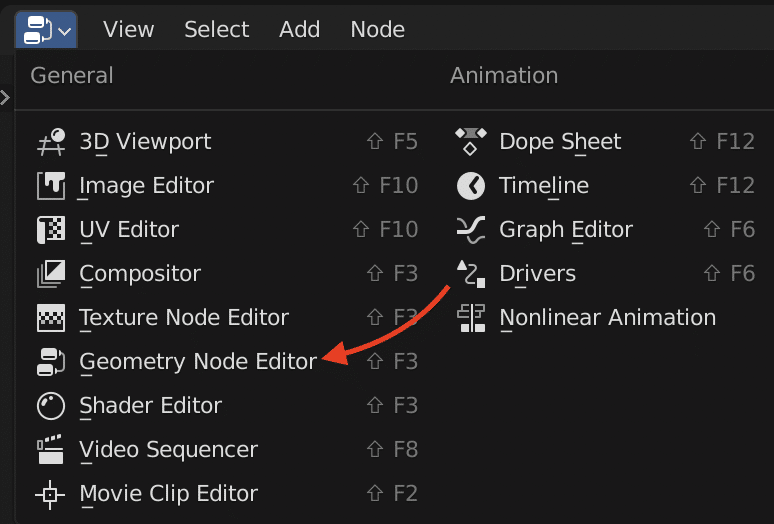
Now we want to get started creating our Geometry node and that means opening up a Geometry Node Window. Pick any Blender Window or create a new one, and change it’s type to Geometry Node by selecting the item shown before (or hitting SHIFT + F3).
Next create a new Geometry Node by clicking the + icon:


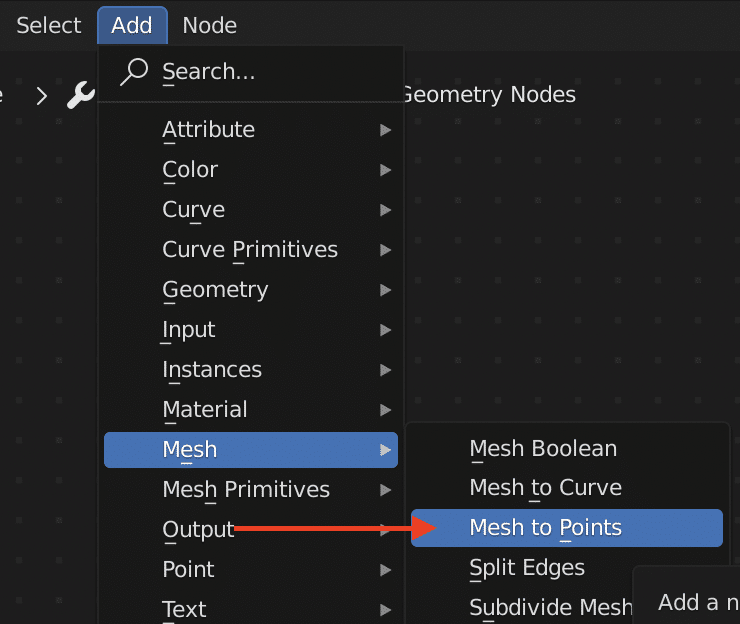
This is literally the simplest geometry node you can create and it literally does absolutely nothing. The input object is passed in, and the finished geometry is passed out. To actually do something, we are going to have to add some logic in the middle. We are going to use a node that creates a series of points on our mesh, Mesh to Points. We are going to perform this on the geometry that is passed in to the Node, which is simply whatever Blender object the node was attached to (Suzanne in our case). Let’s Add our new node by going to Add->Mesh->Mesh to Points. You can also simply Search for “Points” in the Search field at the top of the add menu to quickly locate nodes when you do not know the category the are under.
This will add a node on the editing area. Now simply drag the Geometry output to the Mesh input of the Mesh to Points node. You will notice that they are color coded to indicate what kinds of nodes are compatible with each other.
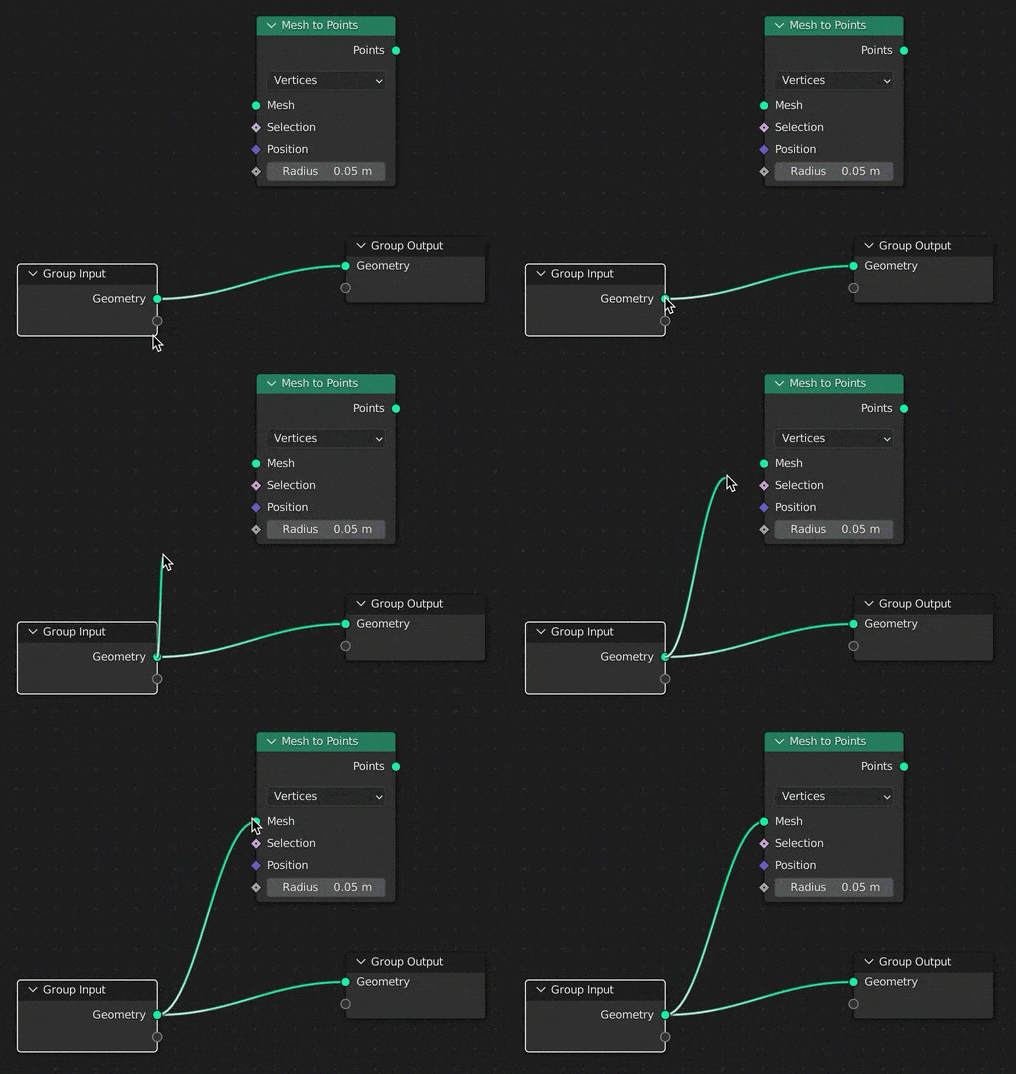
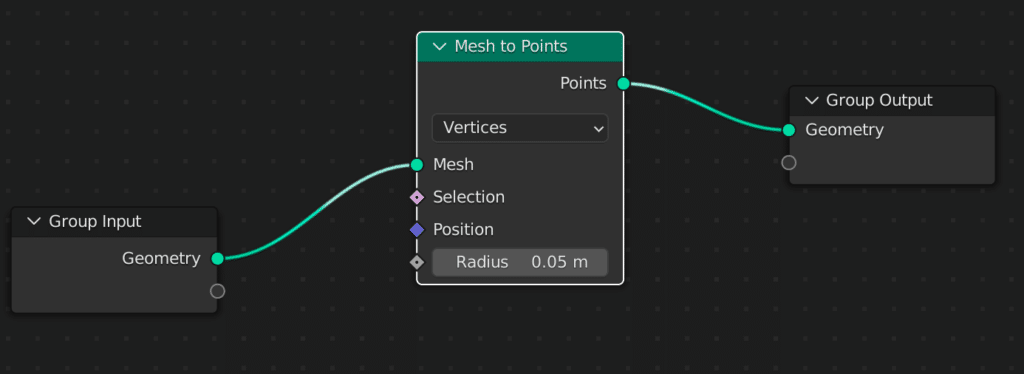
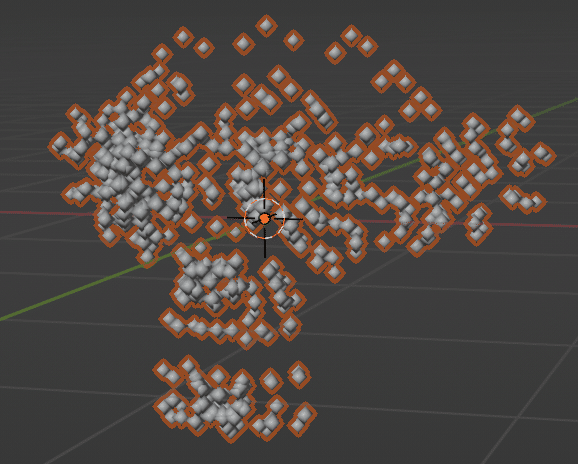
As you can see, even a single node Geometry Node graph can have some pretty profound results! At this point though, this looks nothing like a voxel now does it? Let’s change that. Instead of connecting the results to the Group Output, we are instead going for create a Cube at each point. To accomplish this, we are going to use two new nodes, Cube (Add->Mesh Instance->Cube) and Instance on Points (Add->Instance->Instance on Points), and connect it up like so:
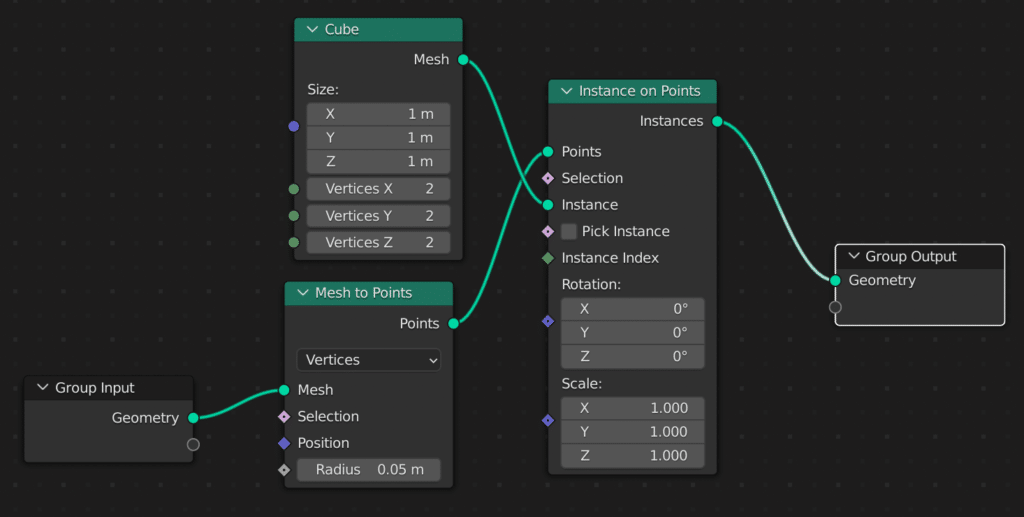
And if you take a look at the viewport, you will see a pretty profound transformation.
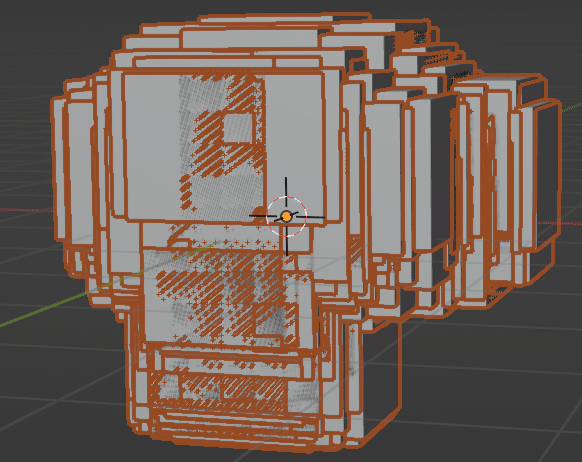
Granted, probably not the result you want…. why so? Well there are two reasons and the first one is extremely easy to fix… our cubes are way too big. You can simply edit the Size values of the Cube parameter until you get a look you like.
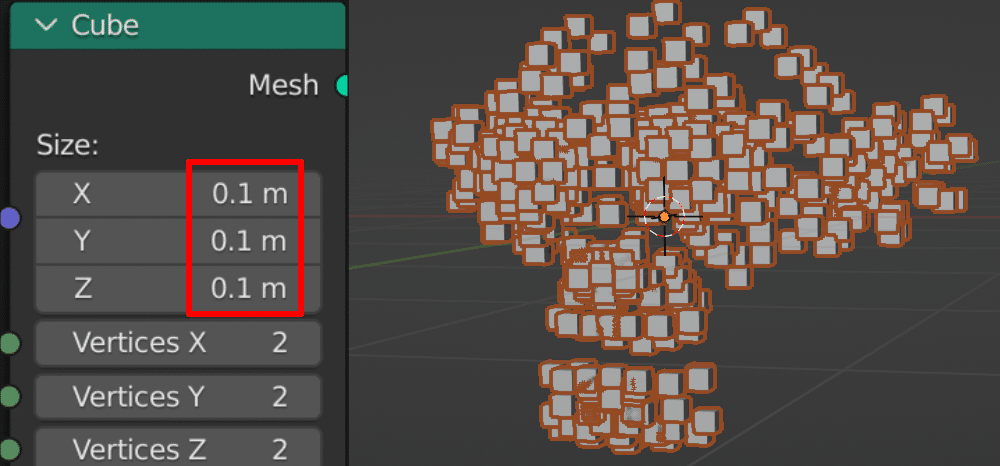
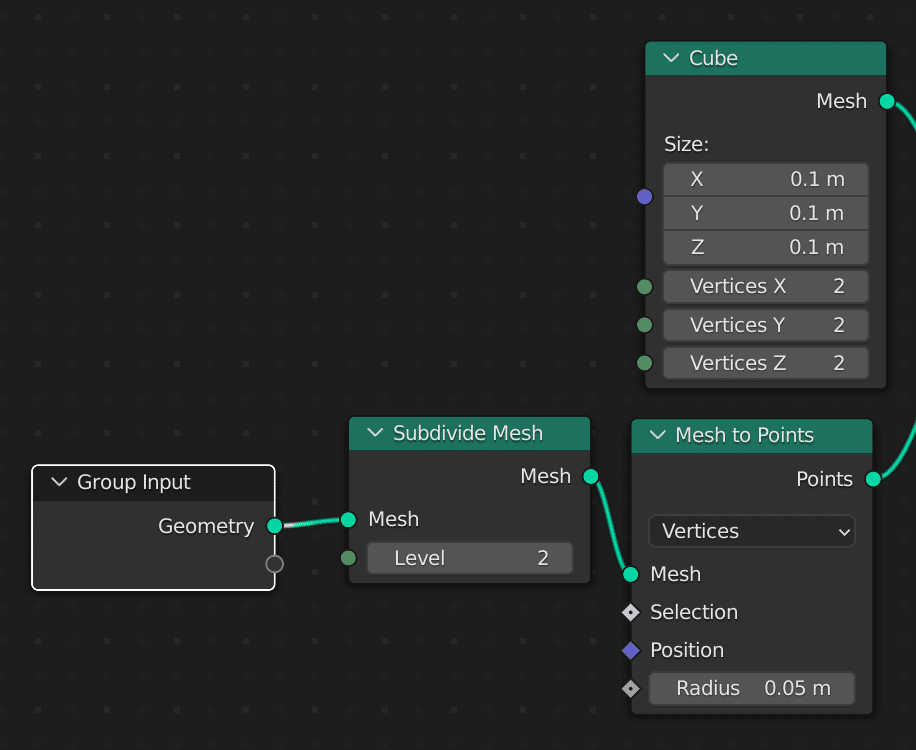
Another problem you may have noticed is there simply aren’t enough Cubes to fill in the mesh as a solid whole. We can easily fix this by adding a SubDivide Mesh (Add->Mesh->Subdivide Mesh) node to our input mesh and set the level to 2 like so:
And our tool is pretty much complete! Here is the result of our labours.
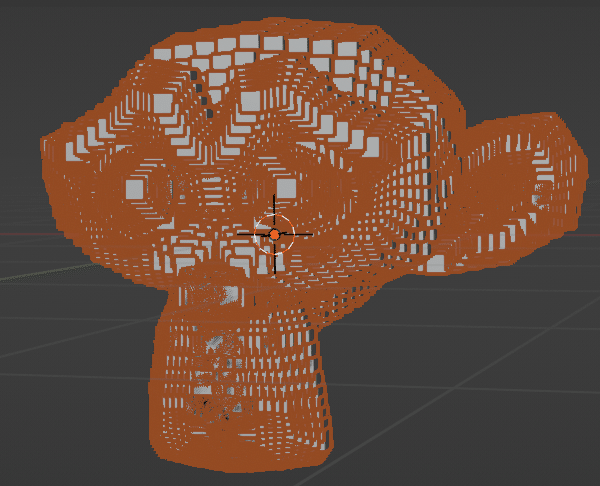
TADA!
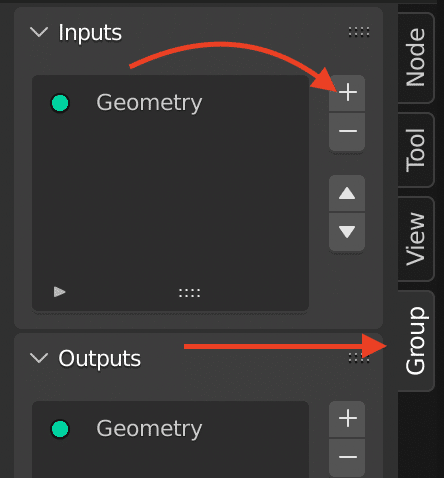
Now let’s make our Geometry Node a bit more useful. What if we wanted to make the Subdivision level a parameter, so we could reuse this graph on other objects and let a designer pass in the values they want to use? Thankfully this is pretty easy too. You can add input and output parameters to a Geometry Node, in the Properties panel (hit N if not visible) select the Group tab and you will notice entries for both Input and Output. Click the + under Inputs to add a new parameter.
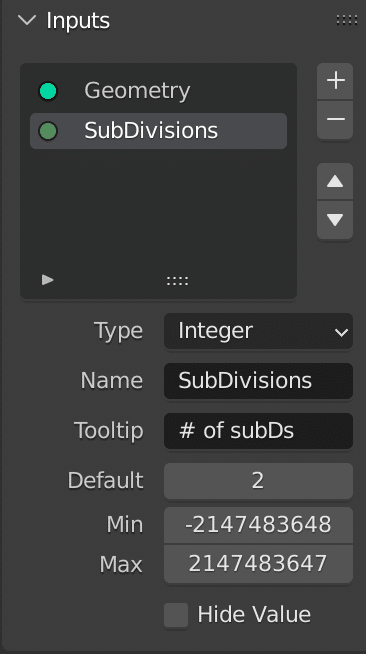
This will create a new entry which we will rename to SubDivisions, change to type Integer (since we do not want decimal points) then optionally set some information that will display when the user mouses over the parameter.
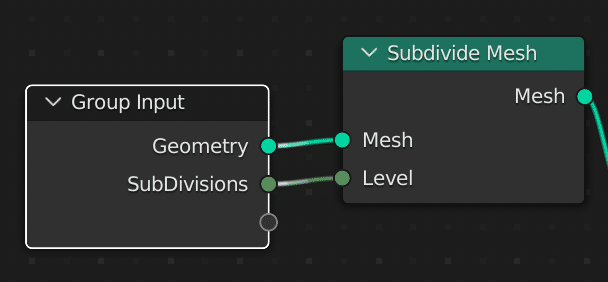
You will notice that the Group Input node now has a new option for Subdivisions. Simply drag this value into the input parameter of the Subdivision node like so:
Finally, let’s rename our Geometry Node to something that makes a bit more sense. Simply select the name in the following window, I renamed mine to Voxelize.

Now lets put our new Voxelize tool to effect. Let’s create a brand new scene, in the 3D viewport, select the New Scene icon then select New.

Now add any kind of geometry you want to the new scene, for example a UV sphere. With the newly created mesh selected, select the Modifier tab then Add Modifier.
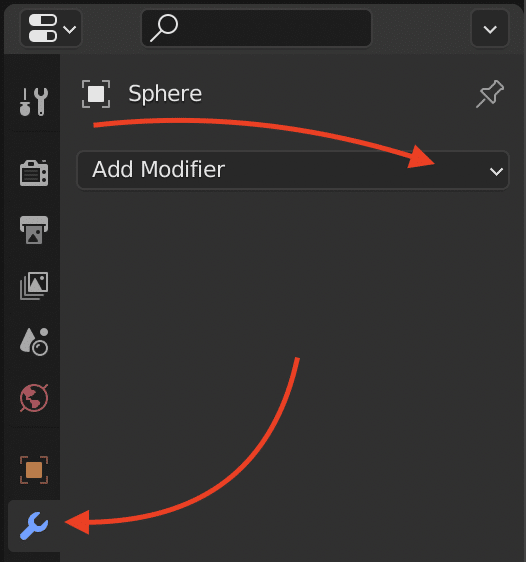
Select Geometry Nodes under the Generate tab.
Drop down the Node Tree drop down and select Voxelize.
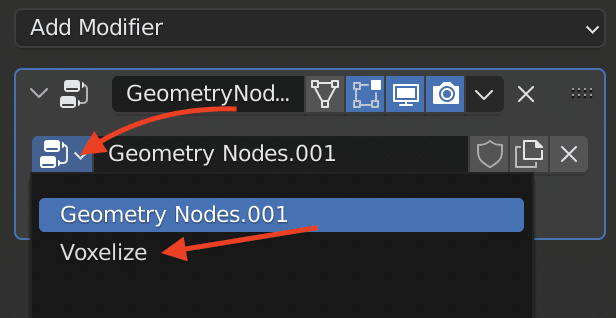
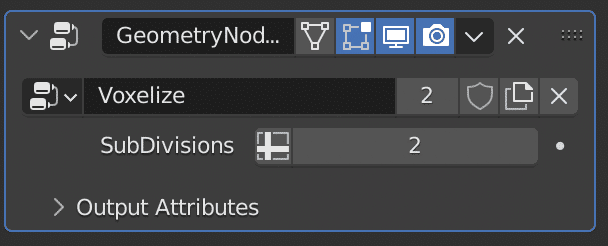
And Voila! A voxelized sphere (with 1 subdivision):
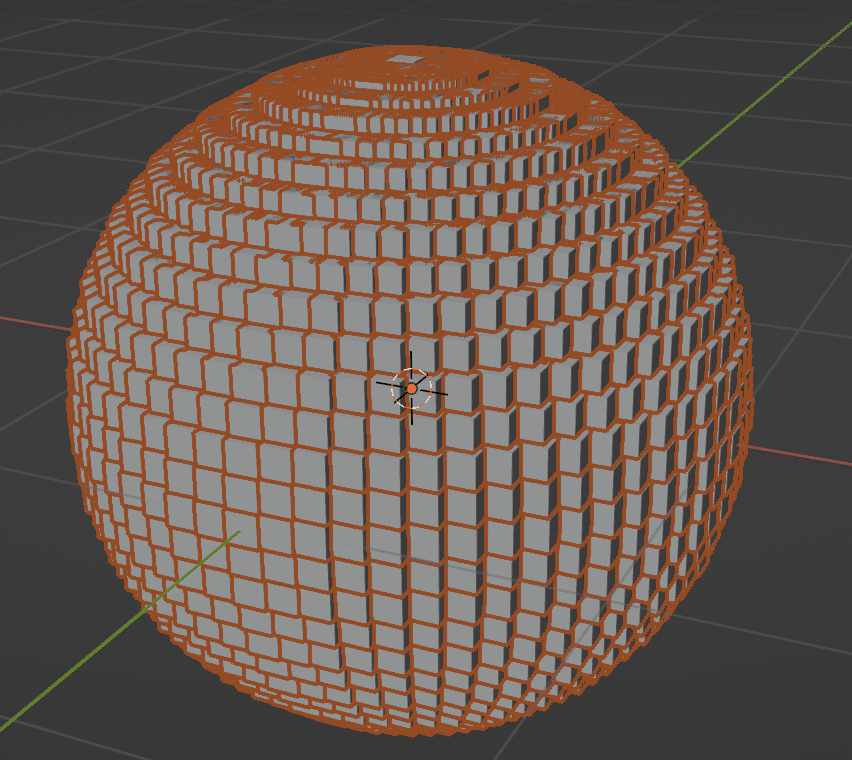
As you can see, your new Voxelize geometry node can now be used on any kind of input mesh or as a node in a more complex Geometry node network! As you can see, Blender geometry nodes add a powerful new tool to your toolbox and hopefully this tutorial got you started.
Special Note
Geometry nodes are a feature under development and you will find many of the tutorials out there refer to Nodes that no longer exist, such as Point Distribute. That is because these nodes have been marked as deprecated and will be removed in a future (Blender 4) version. You can however enable them if you wish. To do so, go to Edit->User Preferences and in the Interface tab, select Developer Extras.

You can now select the Experimental tab, then enable Geometry Nodes Legacy.
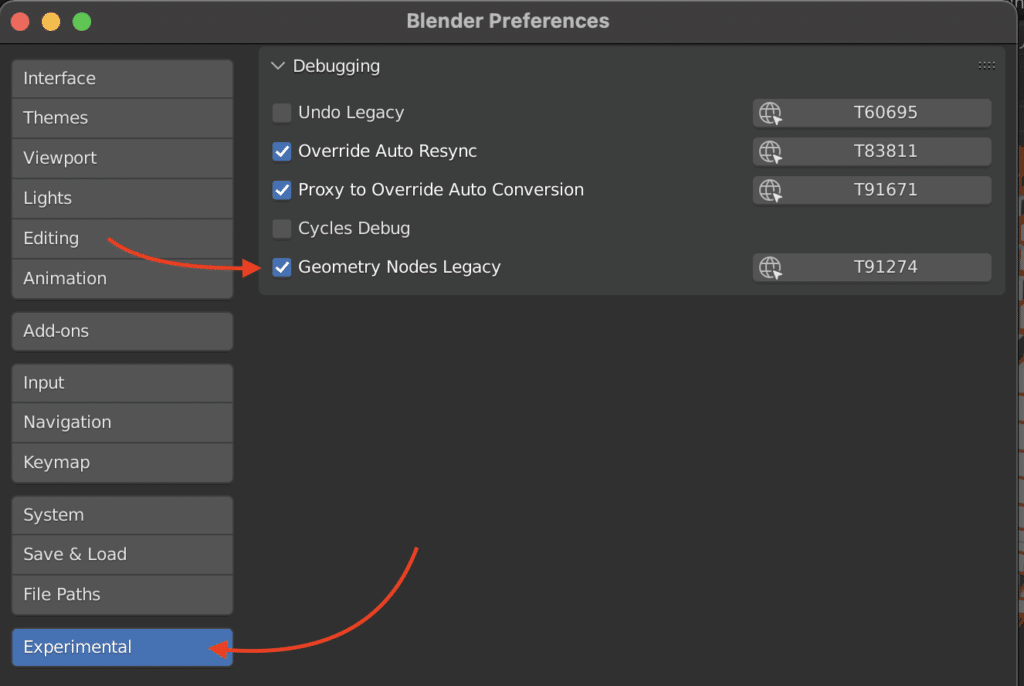
Now when you select Add to create new Nodes, all of the legacy nodes will be available. Do keep in mind once again, these nodes WILL be removed in the future, but in the interim, this should enable you to follow along with existing tutorials.
Check out our step by step Blender Geometry node tutorial in the video below.
