In this chapter we are going to look at using audio in XNA. Originally XNA supported one way of playing audio, using XACT (Cross Platform Audio Creation Tool ). Since the initial release they added a much simplified API. We will be taking a look at both processes.
There is an HD video of this chapter available here.
When playing audio there is always the challenge of what formats are supported, especially when you are dealing with multiple different platforms, all of which have different requirements. Fortunately the content pipeline takes care of a great deal of the complications for us. Simply add your audio files ( mp3, mp4, wma, wav, ogg ) to the content pipeline and it will do the rest of the work for you. As you will see shortly though, it is also possible to load audio files outside of the content pipeline. In this situation, be aware that certain platforms do not support certain formats ( for example, no wma support on Android or iOS, while iOS doesn’t support ogg but does support mp3 ). Unless you have a good reason, I would recommend you stick to the content pipeline for audio whenever possible.
The Perils of MP3
Although MP3 is supported by MonoGame, you probably want to stay away from using it. Why?
Patents. If your game has over 5,000 users you could be legally required to purchase a license. From a legal perspective, Ogg Vorbis is superior in every single way. Unfortunately Ogg support is not as ubiquitous as we’d like it to be.
Adding Audio Content using the Content Pipeline
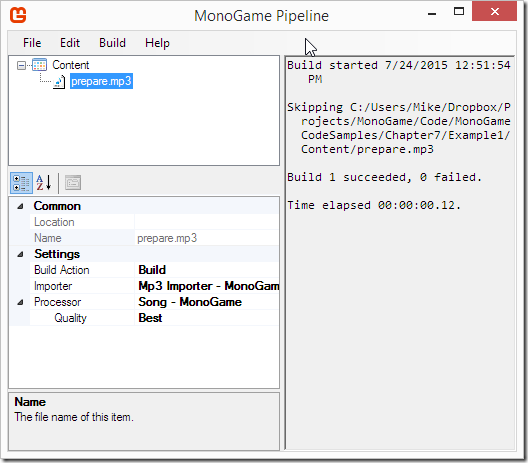
This process is virtually identical to adding a graphic file in your content file.
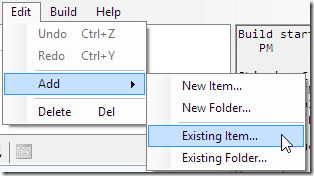
Simply add the content like you did using right click->Add Existing Items or the Edit menu:
If it is a supported format you will see the Processor field is filled ( otherwise it will display Unknown ). The only option here is to configure the mp3 audio quality, a trade off between size and fidelity.
Playing a Song
Now let’s look at the code involved in playing the song we just added to our game.
// This example shows playing a song using the simplified audio api

using Microsoft.Xna.Framework;
using Microsoft.Xna.Framework.Graphics;
using Microsoft.Xna.Framework.Input;
using Microsoft.Xna.Framework.Media;

namespace Example1
{
    public class Game1 : Game
    {
        GraphicsDeviceManager graphics;
        SpriteBatch spriteBatch;
        Song song;

        public Game1()
        {
            graphics = new GraphicsDeviceManager(this);
            Content.RootDirectory = "Content";
        }

        protected override void Initialize()
        {
            base.Initialize();
        }

        protected override void LoadContent()
        {
            spriteBatch = new SpriteBatch(GraphicsDevice);

            this.song = Content.Load<Song>("prepare");
            MediaPlayer.Play(song);
            //  Uncomment the following line will also loop the song
            //  MediaPlayer.IsRepeating = true;
            MediaPlayer.MediaStateChanged += MediaPlayer_MediaStateChan
                                             ged;
        }

        void MediaPlayer_MediaStateChanged(object sender, System.
                                           EventArgs e)
        {
            // 0.0f is silent, 1.0f is full volume
            MediaPlayer.Volume -= 0.1f;
            MediaPlayer.Play(song);
        }

        protected override void Update(GameTime gameTime)
        {
            if (GamePad.GetState(PlayerIndex.One).Buttons.Back ==
                ButtonState.Pressed || Keyboard.GetState().IsKeyDown(
                Keys.Escape))
                Exit();

            base.Update(gameTime);
        }

        protected override void Draw(GameTime gameTime)
        {
            GraphicsDevice.Clear(Color.CornflowerBlue);
            base.Draw(gameTime);
        }
    }
}
Notice that we added the using statement Microsoft.Xna.Framework.Media. We depend on this for the MediaPlayer and Song classes. Our Song is loaded using the ContentManager just like we did earlier with Texture, this time with the type Song. Once again the content loader does not use the file’s extension. Our Song can then be played with a call to MediaPlayer.Play(). In this example we wire up a MediaStateChanged event handler that will be called when the song completes, decreasing the volume and playing the song again.
Playing Sound Effects
This example shows playing sound effects. Unlike a Song, SoundEffects are designed to support multiple instances being played at once. Let’s take a look at playing SoundEffect in MonoGame:
// Example showing playing sound effects using the simplified audio
api
using Microsoft.Xna.Framework;
using Microsoft.Xna.Framework.Graphics;
using Microsoft.Xna.Framework.Input;
using Microsoft.Xna.Framework.Audio;
using System.Collections.Generic;

namespace Example2
{
    public class Game1 : Game
    {
        GraphicsDeviceManager graphics;
        SpriteBatch spriteBatch;
        List<SoundEffect> soundEffects;

        public Game1()
        {
            graphics = new GraphicsDeviceManager(this);
            Content.RootDirectory = "Content";
            soundEffects = new List<SoundEffect>();
        }

        protected override void Initialize()
        {
            base.Initialize();
        }

        protected override void LoadContent()
        {
            // Create a new SpriteBatch, which can be used to draw
            textures.
            spriteBatch = new SpriteBatch(GraphicsDevice);

            soundEffects.Add(Content.Load<SoundEffect>("airlockclose"))
                             ;
            soundEffects.Add(Content.Load<SoundEffect>("ak47"));
            soundEffects.Add(Content.Load<SoundEffect>("icecream"));
            soundEffects.Add(Content.Load<SoundEffect>("sneeze"));

            // Fire and forget play
            soundEffects[0].Play();

            // Play that can be manipulated after the fact
            var instance = soundEffects[0].CreateInstance();
            instance.IsLooped = true;
            instance.Play();
        }


        protected override void Update(GameTime gameTime)
        {
            if (GamePad.GetState(PlayerIndex.One).Buttons.Back ==
                ButtonState.Pressed || Keyboard.GetState().IsKeyDown(
                Keys.Escape))
                Exit();

            if (Keyboard.GetState().IsKeyDown(Keys.D1))
                soundEffects[0].CreateInstance().Play();
            if (Keyboard.GetState().IsKeyDown(Keys.D2))
                soundEffects[1].CreateInstance().Play();
            if (Keyboard.GetState().IsKeyDown(Keys.D3))
                soundEffects[2].CreateInstance().Play();
            if (Keyboard.GetState().IsKeyDown(Keys.D4))
                soundEffects[3].CreateInstance().Play();


            if (Keyboard.GetState().IsKeyDown(Keys.Space))
            {
                if (SoundEffect.MasterVolume == 0.0f)
                    SoundEffect.MasterVolume = 1.0f;
                else
                    SoundEffect.MasterVolume = 0.0f;
            }
            base.Update(gameTime);
        }

        protected override void Draw(GameTime gameTime)
        {
            GraphicsDevice.Clear(Color.CornflowerBlue);

            base.Draw(gameTime);
        }
    }
}
Note the using Microsoft.Xna.Framework.Audio statement at the beginning. Once again we added our audio files using the Content Pipeline, in this case I added several WAV files. They are loaded using Content.Load() this time with the type SoundEffect. Next it is important to note the two different ways the SoundEffects are played. You can either call Play() directly on the SoundEffect class. This creates a fire and forget instance of the class with minimal options for controlling it. If you have need for greater control ( such as changing the volume, looping or applying effects ) you should instead create a SoundEffectInstance using the SoundEffect.CreateInstance() call. You should also create a separate instance if you want to have multiple concurrent instances of the same sound effect playing. It is important to realize that all instances of the same SoundEffect share resources, so memory will not increase massively for each instance created. The number of simultaneous supported sounds varies from platform to platform, with 64 being the limit on Windows Phone 8, while the Xbox 360 limits it to 300 instances. There is no hard limit on the PC, although you will obviously hit device limitations quickly enough.
In the above example, we create a single looping sound effect right away. Then each frame we check to see if the user presses 1,2,3 or 4 and play an instance of the corresponding sound effect. If the user hits the spacebar we either mute or set to full volume the global MasterVolume of the SoundEffect class. This will affect all playing sound effects.
Positional Audio Playback
Sound effects can also be positioned in 3D space easily in XNA.
// Display positional audio

using Microsoft.Xna.Framework;
using Microsoft.Xna.Framework.Graphics;
using Microsoft.Xna.Framework.Input;
using Microsoft.Xna.Framework.Audio;

namespace Example3
{
    public class Game1 : Game
    {
        GraphicsDeviceManager graphics;
        SpriteBatch spriteBatch;
        SoundEffect soundEffect;
        SoundEffectInstance instance;
        AudioListener listener;
        AudioEmitter emitter;


        public Game1()
        {
            graphics = new GraphicsDeviceManager(this);
            Content.RootDirectory = "Content";
        }

        protected override void Initialize()
        {
            base.Initialize();
        }

        protected override void LoadContent()
        {
            spriteBatch = new SpriteBatch(GraphicsDevice);

            soundEffect = this.Content.Load<SoundEffect>("circus");
            instance = soundEffect.CreateInstance();
            instance.IsLooped = true;

            listener = new AudioListener();
            emitter = new AudioEmitter();

            // WARNING!!!!  Apply3D requires sound effect be Mono!
            Stereo will throw exception
            instance.Apply3D(listener, emitter);
            instance.Play();
        }

        protected override void Update(GameTime gameTime)
        {
            if (GamePad.GetState(PlayerIndex.One).Buttons.Back ==
                ButtonState.Pressed || Keyboard.GetState().IsKeyDown(
                Keys.Escape))
                Exit();

            if (Keyboard.GetState().IsKeyDown(Keys.Left))
            {
                listener.Position = new Vector3(listener.Position.X-0.
                                    1f, listener.Position.Y, listener.
                                    Position.Z);
                instance.Apply3D(listener, emitter);
            }
            if (Keyboard.GetState().IsKeyDown(Keys.Right))
            {
                listener.Position = new Vector3(listener.Position.X +
                                    0.1f, listener.Position.Y,
                                    listener.Position.Z);
                instance.Apply3D(listener, emitter);
            }

            if (Keyboard.GetState().IsKeyDown(Keys.Up))
            {
                listener.Position = new Vector3(listener.Position.X,
                                    listener.Position.Y +0.1f,
                                    listener.Position.Z);
                instance.Apply3D(listener, emitter);
            }
            if (Keyboard.GetState().IsKeyDown(Keys.Down))
            {
                listener.Position = new Vector3(listener.Position.X,
                                    listener.Position.Y -0.1f,
                                    listener.Position.Z);
                instance.Apply3D(listener, emitter);
            }
            base.Update(gameTime);
        }

        protected override void Draw(GameTime gameTime)
        {
            GraphicsDevice.Clear(Color.CornflowerBlue);
            base.Draw(gameTime);
        }
    }
}
In this example, we load a single SoundEffect and start it looping infinitely. We then create an AudioListener and AudioEmitter instance. The AudioListener represents the location of your ear within the virtual world, while the AudioEmitter represents the position of the sound effect. The default location of both is a Vector3 at (0,0,0). You set the position of a SoundEffect by calling Apply3D(). In our Update() call, if the user hits an arrow key we updated the Position of the AudioListener accordingly. After changing the position of a sound you have to call Apply3D again. As you hit the arrow keys you will notice the audio pans and changes volume to correspond with the updated position. It is very important that your source audio file is in Mono ( as opposed to Stereo ) format if you use Apply3D, or an exception will be thrown.
Using XACT
As mentioned earlier, XACT used to be the only option when it came to audio programming in XNA. XACT is still available and it enables your audio designer to have advanced control over the music and sound effects that appear in your game, while the programmer uses a simple programmatic interface. One big caveat is XACT is part of the XNA installer or part of the Direct X SDK as is not available on Mac OS or Linux. If you wish to install it but do not have an old version of Visual Studio installed, instructions can be found here ( https://www.gamefromscratch.com/post/2015/07/23/Installing-XNA-Tools-Like-XACT-without-Visual-Studio-2010.aspx ). If you are on MacOS or Linux, you want to stick to the simplified audio API that we demonstrated earlier.
Xact is installed as part of the XNA Studio install, on 64bit Windows by default the Xact executable will be located in C:Program Files (x86)Microsoft XNAXNA Game Studiov4.0Tools. Start by running AudConsole3.exe:
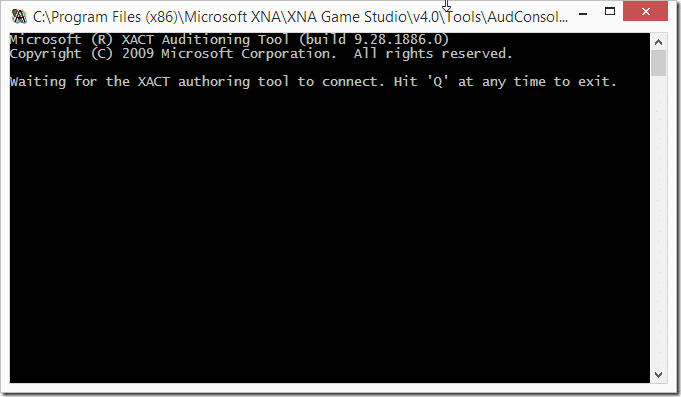
The XACT Auditioning Tool needs to be running when you run the Xact tool.
Then launch Xact3.exe
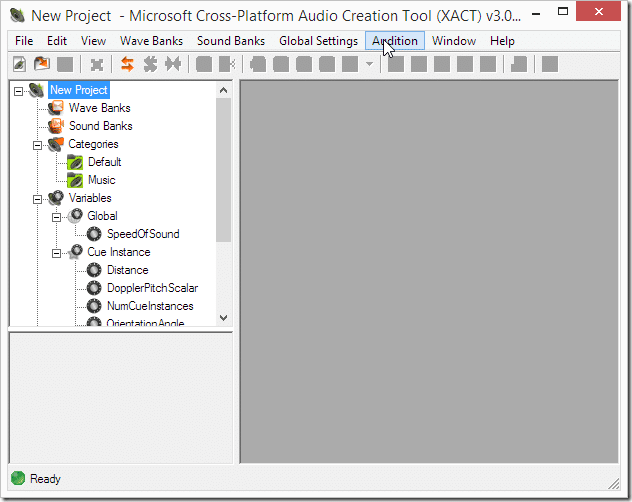
First create a new project:

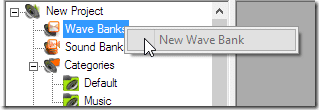
Next right click Wave Banks and select New Wave Bank
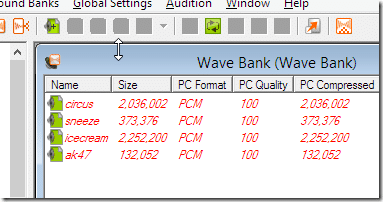
Drag and drop your source audio files into the Wave Bank window:
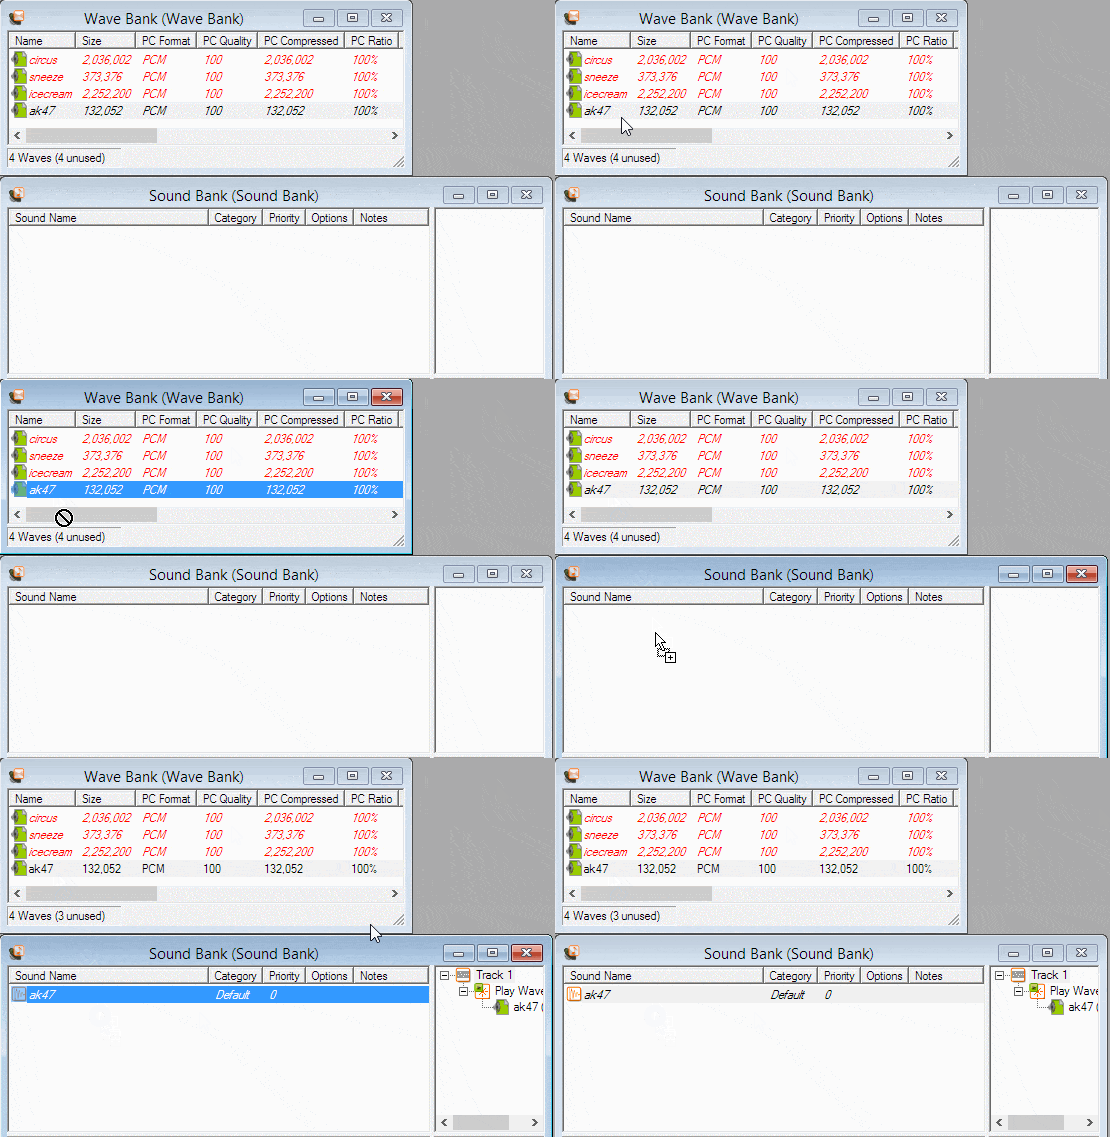
Now create a new Sound Bank by right clicking Sound Bank and selecting New Wave Bank

Now drag the Wave you wish to use from the Wave Bank to the Sound Bank
Now create a Cue by dragging and dropping the Sound Bank to the Cue window. Multiple files can be added to a cue if desired.
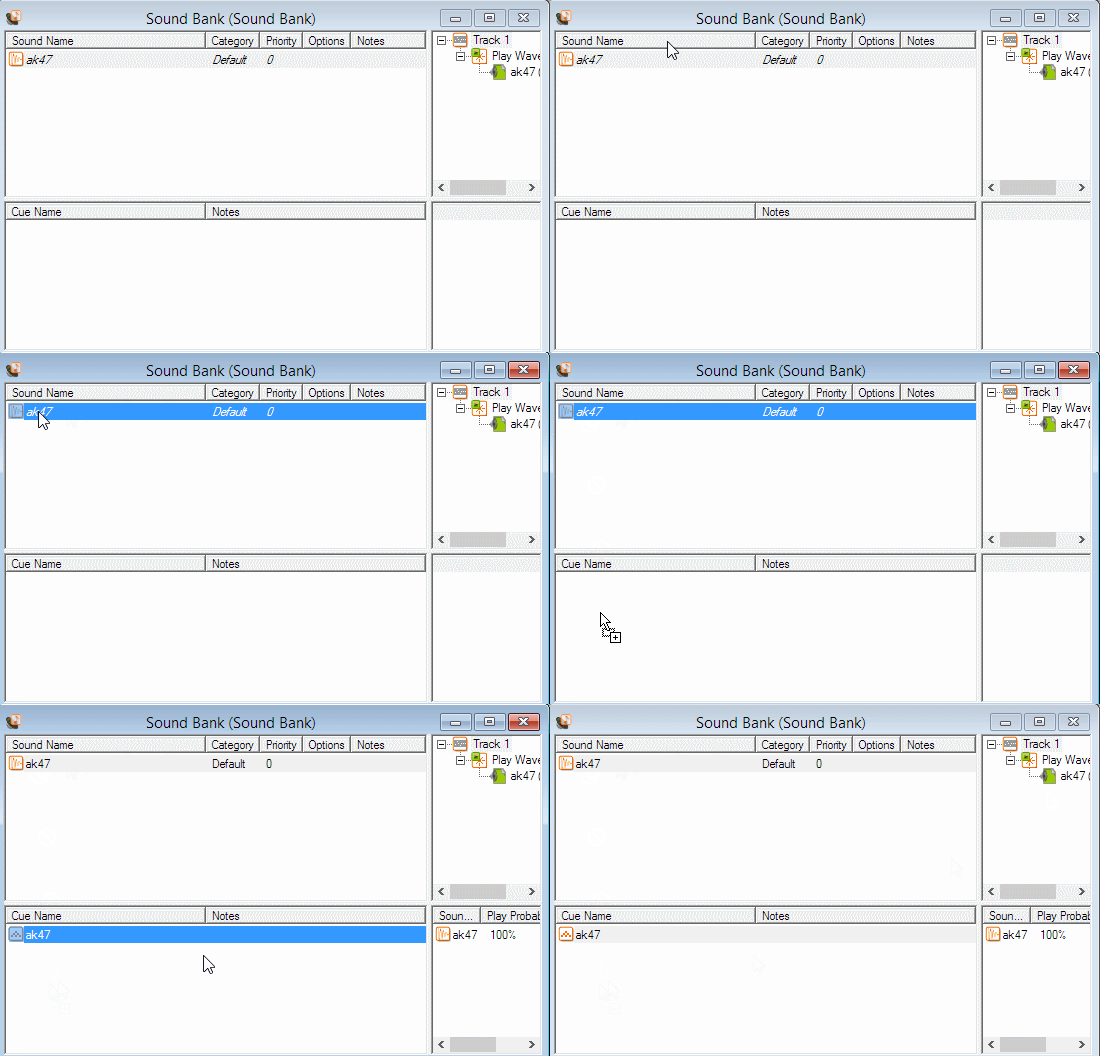
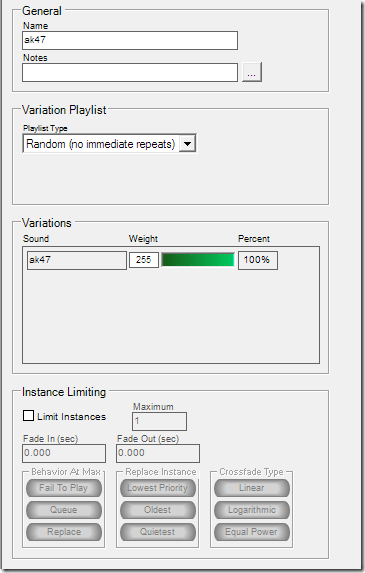
You can rename the Cue, set the probability to play if you set several Sounds in the Cue and change the instance properties of the Cue in the properties window to your left:
Now Build the results:
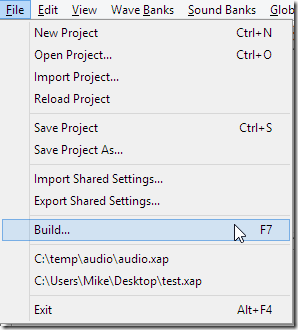
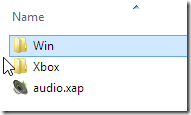
This will then create two directories in the folder you created your project in:
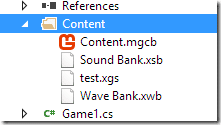
These files need to be added directly to your project, you do not use the content pipeline tool! Simply copy all three files to the content folder and set it’s build action to Copy.
Now let’s look at the code required to use these generated files:
using Microsoft.Xna.Framework;
using Microsoft.Xna.Framework.Graphics;
using Microsoft.Xna.Framework.Input;
using Microsoft.Xna.Framework.Audio;

namespace Example4
{
    public class Game1 : Game
    {
        GraphicsDeviceManager graphics;
        SpriteBatch spriteBatch;
        AudioEngine audioEngine;
        SoundBank soundBank;
        WaveBank waveBank;

        public Game1()
        {
            graphics = new GraphicsDeviceManager(this);
            Content.RootDirectory = "Content";
        }

        protected override void Initialize()
        {
            base.Initialize();
        }
        protected override void LoadContent()
        {
            // Create a new SpriteBatch, which can be used to draw
            textures.
            spriteBatch = new SpriteBatch(GraphicsDevice);

            audioEngine = new AudioEngine("Content/test.xgs");
            soundBank = new SoundBank(audioEngine,"Content/Sound Bank.
                        xsb");
            waveBank = new WaveBank(audioEngine,"Content/Wave Bank.
                       xwb");

            soundBank.GetCue("ak47").Play();
        }

        protected override void Update(GameTime gameTime)
        {
            if (GamePad.GetState(PlayerIndex.One).Buttons.Back ==
                ButtonState.Pressed || Keyboard.GetState().IsKeyDown(
                Keys.Escape))
                Exit();

            // TODO: Add your update logic here

            base.Update(gameTime);
        }

        protected override void Draw(GameTime gameTime)
        {
            GraphicsDevice.Clear(Color.CornflowerBlue);

            // TODO: Add your drawing code here

            base.Draw(gameTime);
        }
    }
}
First you create an AudioEngine using the xgs file, then a SoundBank using the xsb and a WaveBank unsing the xwb file. We then play the Cue we created earlier with a call to SoundBank.GetQue().Play(). This process allows the audio details to be configured outside of the game while the programmer simply uses the created Que.
Finally it is possible to play audio files that weren’t added using the content pipeline or using Xact using a Uri.
        protected override void LoadContent()
        {
            // Create a new SpriteBatch, which can be used to draw
            textures.
            spriteBatch = new SpriteBatch(GraphicsDevice);

            // URL MUST be relative in MonoGame
            System.Uri uri = new System.Uri("content/background.mp3",
                             System.UriKind.Relative);
            Song song = Song.FromUri("mySong", uri);
            MediaPlayer.Play(song);
            MediaPlayer.ActiveSongChanged += (s, e) => {
                song.Dispose();
                System.Diagnostics.Debug.WriteLine("Song ended and
                                                   disposed");
            };
        }
First you create a Uri that locates the audio file you want to load. We then load it using the method FromUri, passing in a name as well as the uri. One very important thing to be aware of here, on XNA you could use any URI. In MonoGame it needs to be a relative path.
