This post popped up on Reddit a few days back and didn’t really get a ton of interest. I almost missed it myself, but I am glad I didn’t. Off and on the last couple days, I’ve been playing around with BDX and I have to say, there is the kernel of something really cool here!
First off, let me say BDX is really young and it shows some times. You do some things wrong and you are left with either a crashing game or a cryptic Python error message. Armature support is currently missing as are a few other features I looked for. The community is currently small and we are talking a 0.10 release here… I had to work around a couple bugs, the Android SDK path was getting an extra “ added and I simply can’t get gradle import to work with IntelliJ without hacking out the Android project. So expect some warts and experimentation. It’s worth it though, this is pretty cool stuff, as you will now see.
Oh yeah, there is also a video version of this post. It’s also embedded below if you scroll down. It covers basically the same topics as this tutorial.
What is BDX?
So, what exactly is BDX? Well basically it’s a Java library built over top of LibGDX adding 3D support. Essentially I suppose you can think of it as a 3D scene graph. Then the cool part… it’s also a plugin to Blender that turns Blender into your 3D world editor. Basically you create your assets and world in Blender, apply properties using the BGE and Physics portions of Blender, then export and run. To a much lesser degree, it is also a code generator… sort of. Let’s take a look at how it works now…
Prerequisites
First off, you need to have a Java JDK installed, personally I am using JDK 1.7. If you are going to be building BDX from sources ( we wont here ) you also need Ant installed. If you have trouble, watch this video on configuring a Java/LibGDX development environment. It’s more than what you need, but will certainly get you running.
Next head on over to the BDX download page and download the BDX zip file. If you happen to be running on Mac, turn off that infernal “automatically run trusted downloads” setting, as you want the file to remain zipped.
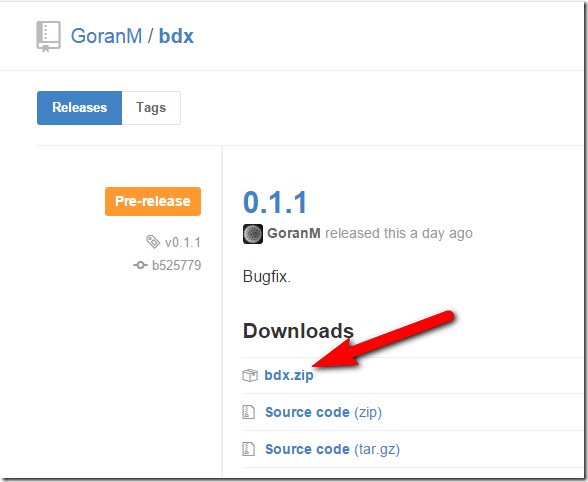
Of course, you will also need Blender installed. You can download it here. For the record I, at the time of writing this, am using 2.73a and as you can see from the screenshot above, 0.1.1 of BDX.
Please note, I WILL NOT be covering how to use Blender in this post, except for the configuration bit below. Fortunately I’ve got that down already, so if you are brand new to Blender run through this tutorial series. It will cover everything you need to get started (and more).
Installing BDX
At this point I assume you have Blender installed and BDX downloaded. Now we need to set it up in Blender. Don’t worry, it’s pretty simple.
Load Blender up.
In the menu, select File->User Preferences…
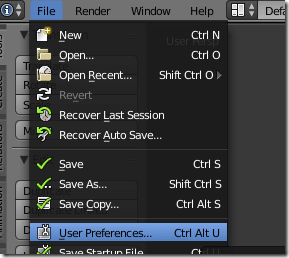
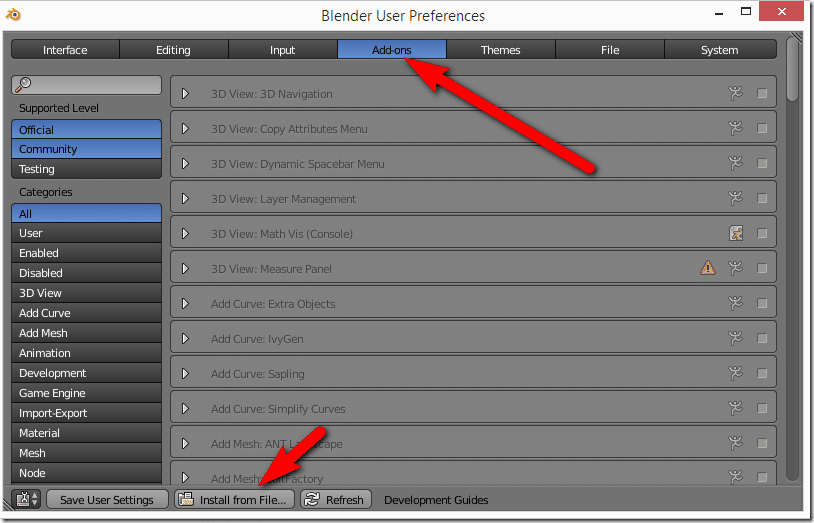
Select the Add-ons tab, then Install From Disk:
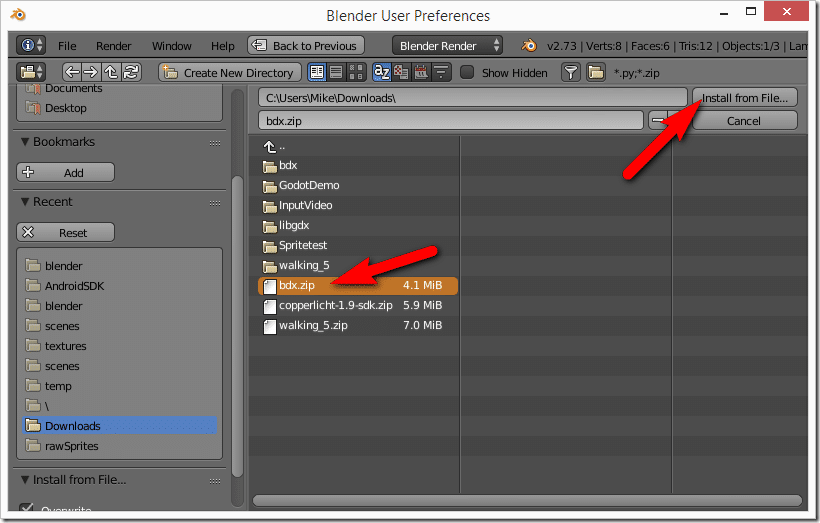
Now navigate to and select Bdx.zip then click “Install from File…”
Now we need to enable the plugin. Back in the Add-ons tab, on the left hand side toggle the option Testing. Import-Export: BDX should now appear as an option. Click the Checkbox beside the dynamite icon.

BDX should now be ready to use!
Creating Your First Project
BDX does an impressive job of wrapping the project generator for you. Coincidentally if you see the LibGDX project wizard you’ve made a mistake!
In Blender, make sure you are in Default view to start:
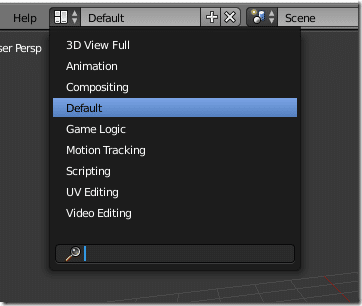
Now, assuming you are running factory settings, look for the Properties window on the right hand side, and scroll down to locate the BDX settings:

Fill in the settings like so:
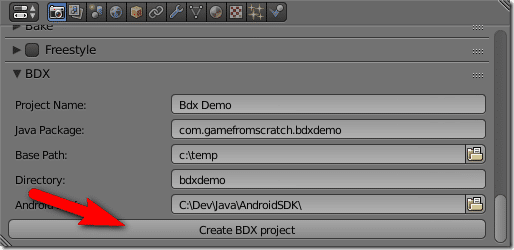
Click Create BDX project. For Java Package, make sure to give the entire name, not just the url qualifier. Base Path is the directory the project will be created in, while Directory is the folder within that directory that will be created. So using the above settings, you will get the directory c\:temp\bdxdemo.
Once you click the Create BDX project, the magic begins!
It will churn away for a few seconds, and assuming no errors occurred, it should create a new scene for you like so:
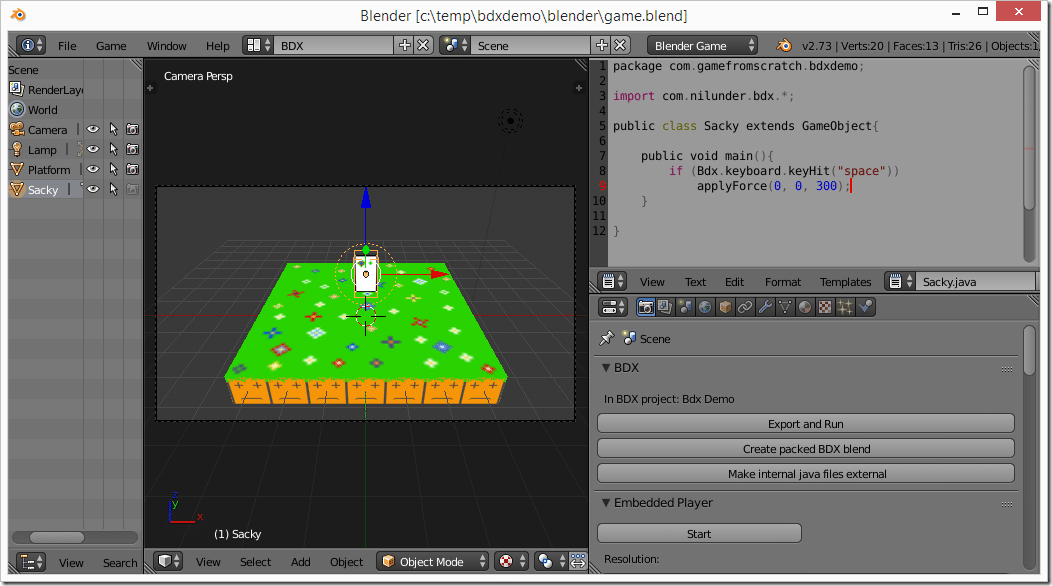
A complete but very simple “game” created for you. A couple things to notice. First your Blender now has a new display mode “BDX” available:
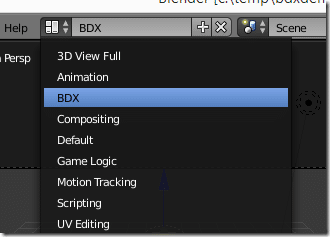
This enables you to switch in and out of the BDX view you see in the screenshot above. Also, the controls in the BDX scene are now completely different:
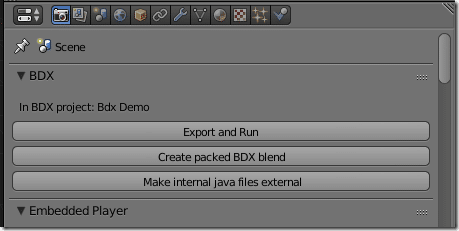
Go ahead and click Export and Run. This will package your Blender scene, generate some Java code for you, call the Java compiler and assuming no errors, run your game.
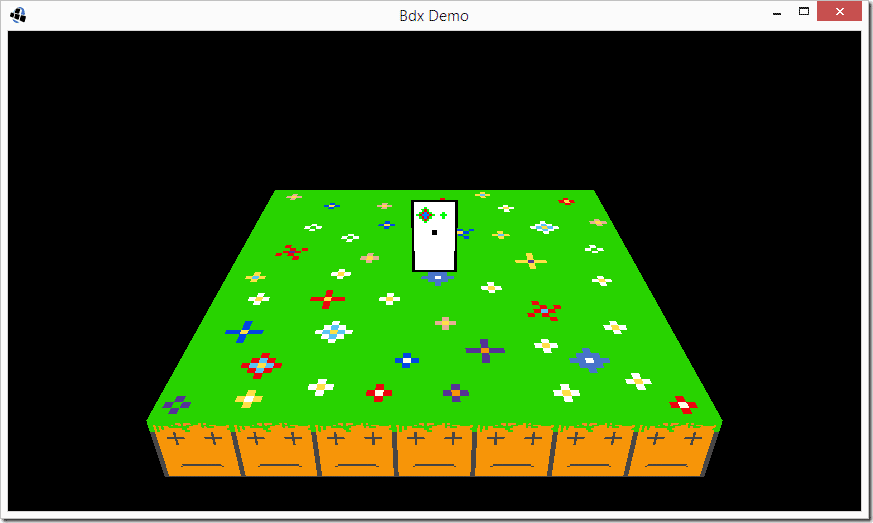
Cool stuff!
So basically you can now create and edit a world in Blender and code it using LibGDX. Let’s take a look at the code portion now… actually, lets look at the project this created. Go to the directory you specified earlier.
The Project Hierarchy… how it works
So, here’s the directory structure that is created, with the critical directories expanded:
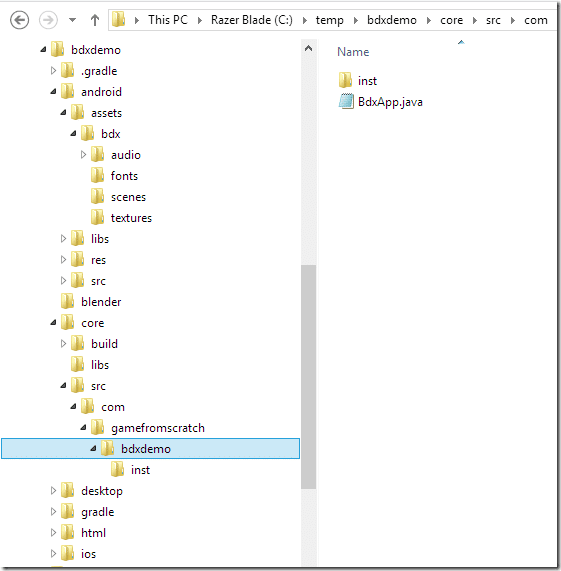
If you’ve done any LibGDX development, most of the structure should be immediately obvious. You get one directory for each project ( android, desktop, html, ios ), then all of the common code goes in to core. All of the assets ( graphics, scenes, data files, etc… ) that make up your game are put in the assets folder of the android folder.
The other folder of note is the Blender folder. This is where your Blender .blend files are generated/stored. In many ways, when using BDX, this becomes the heart of your project. You re-open the .blend file in Blender to reload your project.
What about the code?
So far we’ve just used Blender… how exactly do we work in Java?
Well the code is located in core/src/com/yourdomain/yourproject.
There are a pair of files generated by default here. First is BdxApp.java
This is your main application class implementing ApplicationListener. Here is the code below:
package com.gamefromscratch.bdxdemo;

import java.util.HashMap;

import com.badlogic.gdx.ApplicationListener;
import com.badlogic.gdx.Gdx;
import com.badlogic.gdx.graphics.GL20;
import com.badlogic.gdx.graphics.PerspectiveCamera;
import com.badlogic.gdx.graphics.g3d.ModelBatch;

import com.nilunder.bdx.Bdx;
import com.nilunder.bdx.GameObject;
import com.nilunder.bdx.Scene;
import com.nilunder.bdx.Instantiator;
import com.nilunder.bdx.utils.*;
import com.nilunder.bdx.inputs.*;

public class BdxApp implements ApplicationListener {

   public PerspectiveCamera cam;
   public ModelBatch modelBatch;

   @Override
   public void create() {
      modelBatch = new ModelBatch();

      Bdx.init();
      Gdx.input.setInputProcessor(new GdxProcessor(Bdx.keyboard, Bdx.mouse, Bdx.allocatedFingers));

      Scene.instantiators = new HashMap<String, Instantiator>();
      Scene.instantiators.put("Scene", new com.gamefromscratch.bdxdemo.inst.iScene());

      Bdx.scenes.add(new Scene("Scene"));
   }

   @Override
   public void dispose() {
      modelBatch.dispose();
   }

   @Override
   public void render() {
      Bdx.profiler.start("__graphics");
      Gdx.gl.glViewport(0, 0, Gdx.graphics.getWidth(), Gdx.graphics.getHeight());
      Gdx.gl.glClear(GL20.GL_COLOR_BUFFER_BIT);
      Bdx.profiler.stop("__graphics");

      Bdx.updateInput();
      Bdx.profiler.stop("__input");

      for (Scene s : (ArrayListNamed<Scene>)Bdx.scenes.clone()){
         s.update();
         Bdx.profiler.start("__render");
         renderScene(s);
         Bdx.profiler.stop("__render");
      }
      Bdx.profiler.update();
   }


   public void renderScene(Scene scene){
      Gdx.gl.glClear(GL20.GL_DEPTH_BUFFER_BIT);
      modelBatch.begin(scene.cam);
      for (GameObject g : scene.objects){
         if (g.visible()){
            modelBatch.render(g.modelInstance);
         }
      }
      modelBatch.end();
   }

   @Override
   public void resize(int width, int height) {
   }

   @Override
   public void pause() {
   }

   @Override
   public void resume() {
   }
}
If you’ve worked in LibGDX before, this should all look pretty straight forward. Basically it’s setting up the BDX classes and a regular LibGDX render loop.
However, the part that is critical to understand is this little line… it goes a long way towards figuring out how BDX actually works:
Scene.instantiators = new HashMap<String, Instantiator>();
      Scene.instantiators.put("Scene", new com.gamefromscratch.bdxdemo.inst.iScene());
This is the special sauce that links Blender and LibGDX together. If you look in sub directory inst, you will see a class named iScene.java:
package com.gamefromscratch.bdxdemo.inst;

import com.badlogic.gdx.utils.JsonValue;
import com.nilunder.bdx.Instantiator;
import com.nilunder.bdx.GameObject;
import com.gamefromscratch.bdxdemo.*;
public class iScene extends Instantiator {

   public GameObject newObject(JsonValue gobj){
      String name = gobj.name;

      if (name.equals("Sacky"))
         return new com.gamefromscratch.bdxdemo.Sacky();

      return super.newObject(gobj);
   }

}
This is actually an area I struggled with at first because I kept editing it by hand, then when I would run the game my changes were being overwritten! GRRRRRR… Then it dawned on me, BDX is also a code generator. This file is being created automatically when you click the “Export and Run” button.
So what exactly is it doing? Well basically it loops through each object in the Blender scene by name and creates the cooresponding Java class in our scene. For example, when it finds an object named “Sacky” in the Blender scene, it then creates a new com.gamefromscratch.bdxdemo.Sacky instance in our java code. Essentially this is the link between Blender and Java.
Wait, you might ask… what the heck is a Sacky?
Great question!
First, lets take a look at our Blender scene graph:
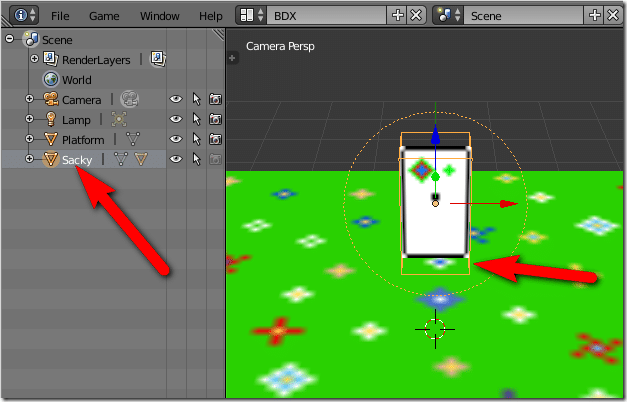
Ahhh… so that’s a “Sacky”. It’s basically a texture mesh in Blender that’s been named Sacky. So… where exactly is the class Sacky.java? If you look in the code directory:

No Sacky.java.
This is because by default the code is actually “embedded” in the blend file. In the BDX control buttons, there is a button “Make internal java files external”. Click it:
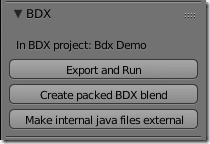
Now in your src folder you should see:

Ahhh, much better. At this point you can actually import the gradle project into your favorite IDE and work normally. You only need to return to Blender and click Export and Run when you make changes to the Blender scene.
NOTE: I am using IntelliJ and had a problem with the gradle import. It really doesn’t like the android gradle version created by default, but updating the version number caused other dependencies to break… oh the joy of Java build systems. I personally just hacked out everything but desktop and core from the gradle build. Leave a comment if you want more details how to do this… if you run into the same problem that is.
Meet the GameObject
The heart of the BDX scenegraph is GameObject. It’s basically a thing in the world, often called an entity or node in other engines. Here for example is Sacky.java:
package com.gamefromscratch.bdxdemo;

import com.nilunder.bdx.*;

public class Sacky extends GameObject{

    public void main(){
        if (Bdx.keyboard.keyHit("space"))
            applyForce(0, 0, 300);
    }

}
GameObjects have a couple key methods. main() you see above is what you traditionally think of as update or tick. It is called each frame, so this is where you update your objects logic. There is also init() called on creation and onEnd() called when removed. In the above example you simply poll to see if the user hits space, and if they do apply 300 “force” along the Z axis. BDX makes use of the physics properties of Blender, as we will see shortly.
In a nutshell, the things that make up your game are GameObjects. Under the curtain, GameObjects are still LibGDX classes we know and love, let’s take a quick look behind the curtain with a debugger and inspect what makes up Sacky here…
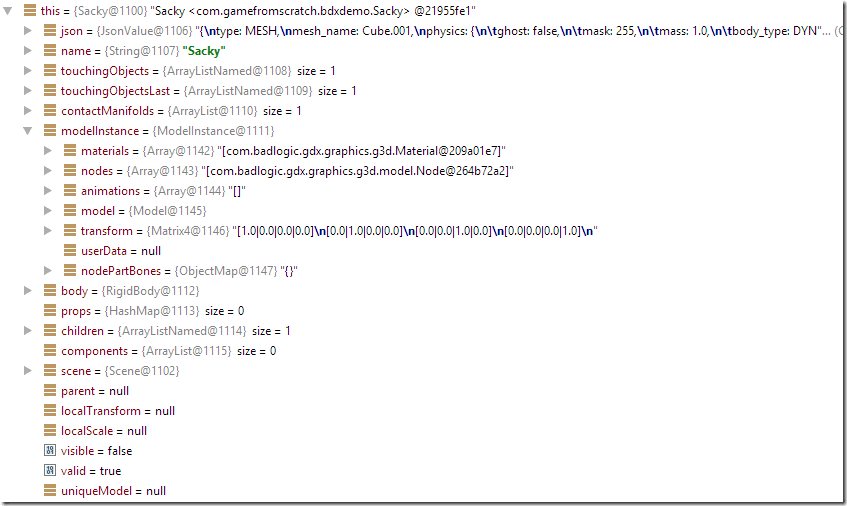
Essentially GameObject is a fairly light wrapper over the LibGDX ModelInstance class, which is what you ultimately get when you import a 3D model into LibGDX. It holds all the nodes, animations, geometry and bones that make up an object. Unfortunately bone animation isn’t currently supported by BDX. You may also notice that each GameObject holds a reference to the Scene that contains it.
Scene itself is essentially the scene graph. That is, the container that holds the contents of your game ( the GameObjects, Cameras, etc ):
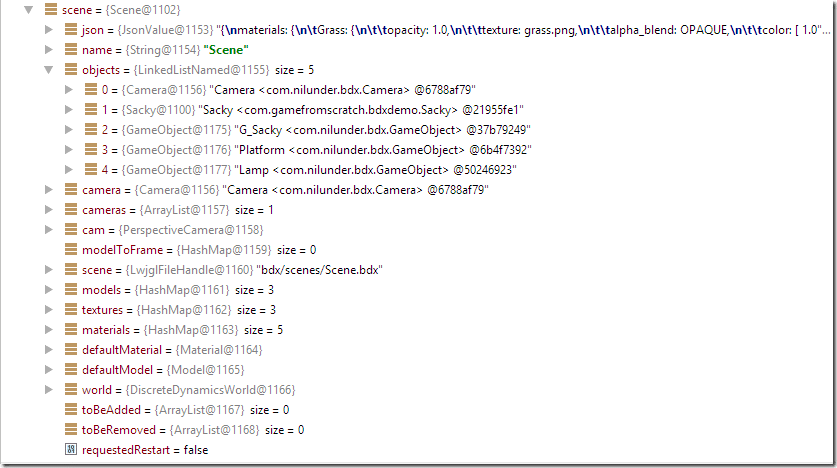
All told, pretty straight forward stuff and a good reminder that below it all, LibGDX is still right there, just slightly wrapped.
Creating a new GameObject
Now let’s actually look at creating your own GameObject. This is basically what the majority of your game development workflow will look like in BDX. It’s a multistep process, but isn’t difficult.
First, in Blender, simply add a new object. I am going to add a new Mesh->Cube:
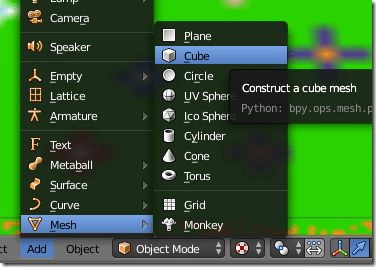
Now in the scene graph select your newly created Cube, rename it to MyCube:
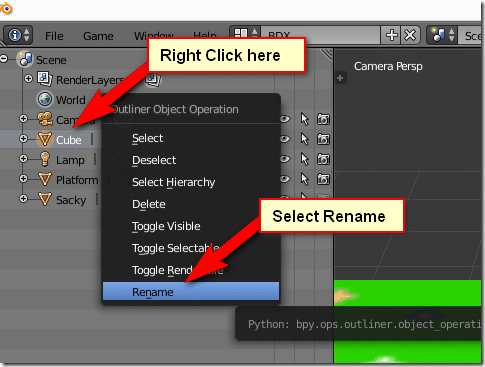
Now if you select Export and Run, you will now see your Cube:
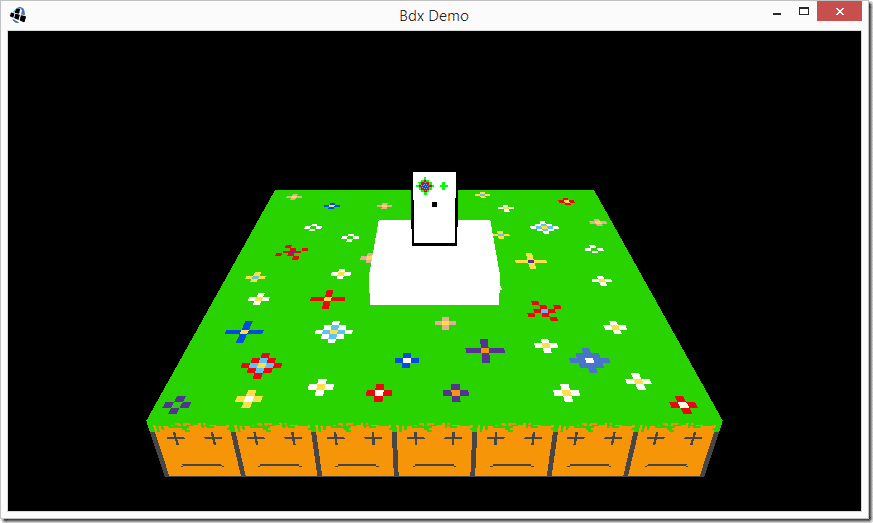
Now let’s wire some code to it.
In the same directory as your App and the existing Sacky.java file, create a new Java class named MyCube.java, with the following contents:
package com.gamefromscratch.bdxdemo;

import com.nilunder.bdx.*;

public class MyCube extends GameObject{

    public void main(){
        if (Bdx.keyboard.keyHit("space"))
            visible(!visible());
    }

}
Next in Blender click the Export and Run button. Now when you press the spacebar, the visibility of the newly created cube will now toggle.
You will notice something… now that we have an object named MyCube in Blender and a class named MyCube.java, when we click the Export button, the iScene.java class is being auto generated each time:
package com.gamefromscratch.bdxdemo.inst;

import com.badlogic.gdx.utils.JsonValue;
import com.nilunder.bdx.Instantiator;import com.nilunder.bdx.GameObject;
import com.gamefromscratch.bdxdemo.*;
public class iScene extends Instantiator {

   public GameObject newObject(JsonValue gobj){
      String name = gobj.name;

      if (name.equals("MyCube"))
         return new com.gamefromscratch.bdxdemo.MyCube();
      if (name.equals("Sacky"))
         return new com.gamefromscratch.bdxdemo.Sacky();

      return super.newObject(gobj);
   }

}
Again, this is basically the glue that ties Java and Blender together
Texturing our Cube
An un-textured cube isn’t exactly exciting, so let’s quickly texture our cube. To do so, switch to edit mode in Blender, select all vertices and unwrap. Then create a new material, then a new texture. Watch the attached video for more details of this process.
There is one critical part you need to be aware of, thus why I am bothering to mention it at all. When generating your texture map, you need to put it in your assets folder! So when saving it, save it to the correct folder, like so:
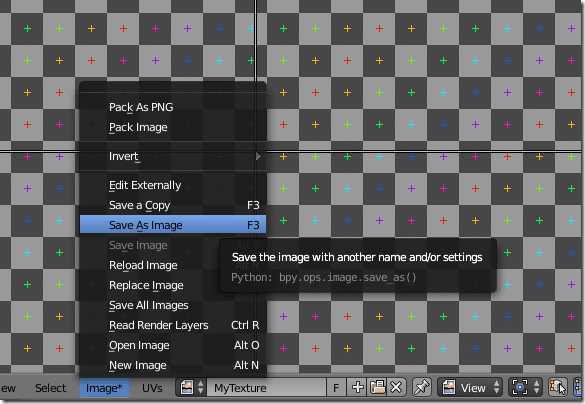
To the following location:
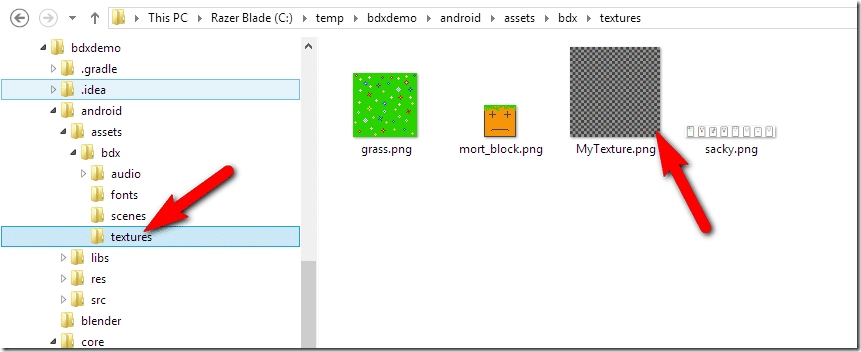
If you don’t implicitly save it to this folder, or a sub-directory, your code will die on execution. Oh, another top tip… DO NOT RUN YOUR GAME WHILE IN EDIT MODE! Yeah, it doesn’t work. I’m guessing it’s a bug, but always switch back to object mode before running.
Now that we’ve got our cube textured, let’s run it:
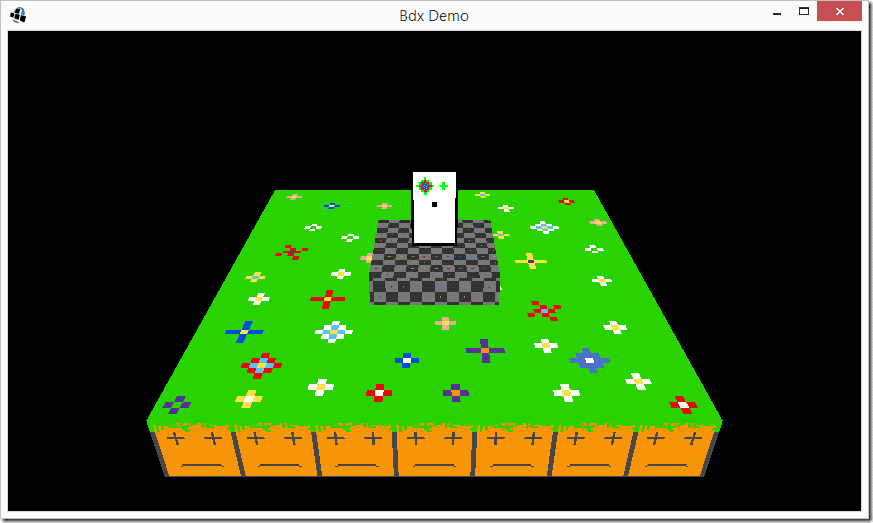
Very cool.
Adding Physics
You can also make objects physics objects using Blender. With your object selected selected the Physics tab in Blender:

You can now set the object to static ( unmoving ), dynamic ( affected by physics but not moving on its own ) or rigid body ( fully simulated physics ):
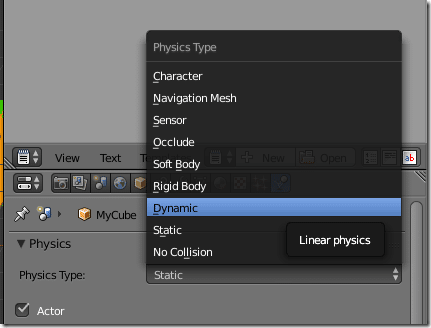
All other options are ignored, so stick to those three or No Collision.
For a Rigid Body there are a number of properties you can select. You can also determine the bounding type. Your choices are limited to Box (uses a bounding box to determine boundaries), Sphere (uses a sphere instead) and Mesh (uses the mesh itself. More accurate but much more CPU intensive):
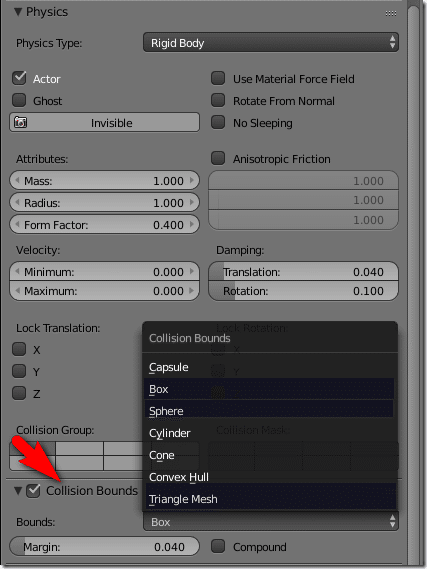
As you can see, you can also configure Mass, velocity, etc.
Setting Properties
Another cool feature is you can actually set properties using Blender and access them in your code. Therefore you can use Blender as a proper game editor, setting properties such as HP.
To do this, open the Logic Editor in Blender, and click Add Property.
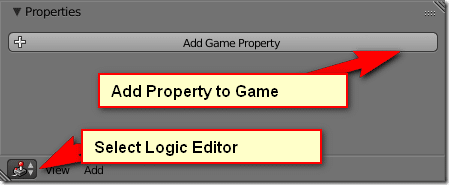
Now name and type your property and set a default value, like so:

Then in code you can easily access these values:
public class MyCube extends GameObject{
    public void main(){
        if (Bdx.keyboard.keyHit("space")) {
            int hp = this.props.get("hitPoints").asInt();
            Gdx.app.log("Current HP",String.valueOf(hp));
            visible(!visible());
        }
    }
}
Very cool stuff
The Video
Conclusion
BDX is certainly a project to watch if you are working in 3D with LibGDX, especially if you use Blender as part of your workflow. It does over all make for a pretty seamless pipeline and makes world authoring a breeze.
Programming LibGDX Java Blender
