This tutorial is a quick guide on getting MonoGame up and running on Windows OS. The process is incredibly straight forward, with two options on how to proceed.
First you are going to need a development environment, of which two options are available. Xamarin’s Xamarin Studio or Microsoft’s Visual Studio. If you wish to go the Xamarin Studio route, be sure to check the MacOS guide, as the process will be virtually identical. The rest of this tutorial assumes that you chose to install Visual Studio, the industry standard IDE for Windows development which is now thankfully available for free.
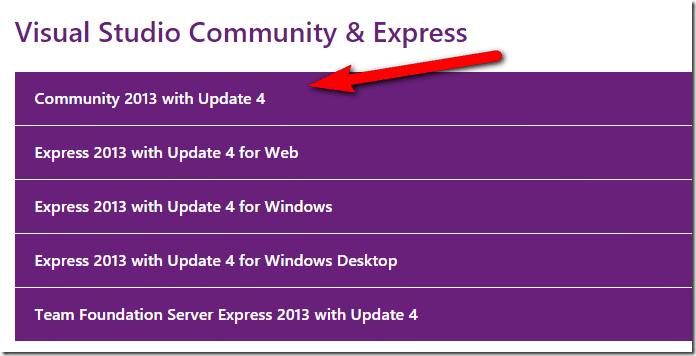
So first things first, download and install Visual Studio 2013 Community. Be sure that you select Community and not one of the 90 trial editions. The community install is a complete and full functioning version of Visual Studio, but with some limitations on the size of your company.
As of time of writing, this is the version you want.
If you want to talk a walk on the wild side, the release candidate of Visual Studio 2015 will also work. Of course, it’s a release candidate… so buyer beware.
Installing either with the minimal recommendations or better will get you all that you need installed.
Install using the Installer
By far the easiest option, simply download and run the installer available here. Be sure to shut down Visual Studio before installing.
Click Next, then agree to the EULA… after you read it and submit it to your lawyer for approval of course…
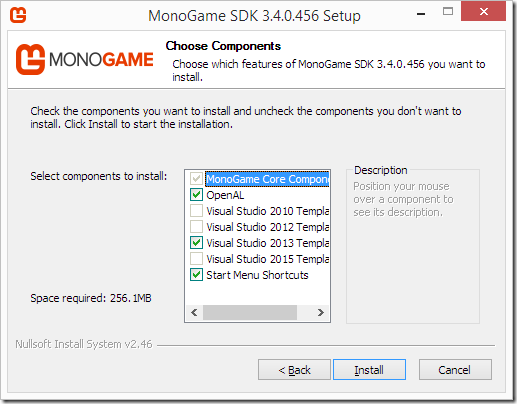
Next you will be prompted for the features you want installed. The defaults are pretty solid, click Install:
Install using NuGet
Visual Studio integrates a package manager called NuGet. This offers a few (potential) benefits over using the library’s standalone installer.
- dependency resolution. If it depends on other libraries, NuGet can handle those dependencies
- package updating abilities. Keep yourself up to date easier
Actually, that’s about it. Basically if you want to be kept up to date on updates, this is the route to go. The install process is certainly more complicated though, at least initially.
First of course you need the NuGet package manager installed. It’s getting more and more common in use, so you will probably have it installed or need it installed shortly. It is available as a Visual Studio extension or command line utility.
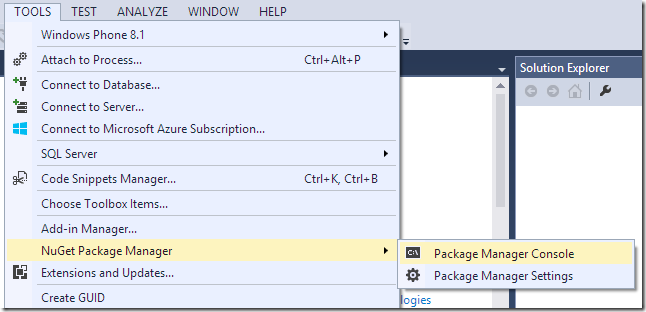
To install with NuGet, Launch Visual Studio, on first run you may have to make some configuration choices, don’t worry, most of these can be revisited later on. Once configured, select the menu Tools->NuGet Package Manager->Package Manager Console:
Now you simply install the packages you want. Unlike the installer you download the various packages independently. The list of packages are available here. Assuming you are going to develop initially on Windows, you probably want to start with the DirectX Windows version. To install that in the Package Manager Console type:
Install-Package MonoGame.Framework.WindowsDX
This will download and install all the required files and dependencies. For more details on the MonoGame NuGet packages please read this post on StackOverflow by the maintainer.
Your First Project
Now that you’ve got MonoGame installed let’s create our first project. If not already done, load up Visual Studio.
Select File->New Project

In the resulting dialog, on the left hand side under installed templates, select Visual C#->MonoGame, then on the right hand side select MonoGame Windows Project, pick a location, a project name, if you want source control, then click OK.
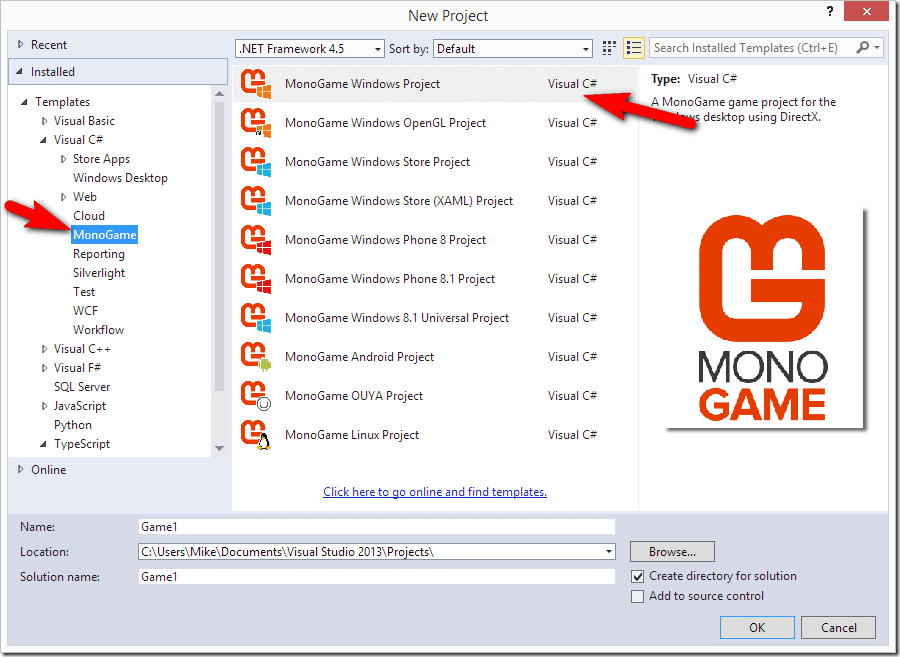
As you can see, MonoGame ships out of the box with templates for a number of different targets and a few above may require a bit of an explanation. The MonoGame Windows Project targets Windows desktop using Direct X for the backend. The OpenGL project is another Windows target, but instead using OpenGL as the backend. As DirectX is Windows, XBox and WinPhone only, you may find using the GL backend the most consistent if targeting Mac, Linux, Android and/or iOS, as those all use OpenGL on the back end. A Windows 8.1 Universal project is an application that supports both Win 8 desktop and mobile targets with one code base, and if I am honest, with the announcement of Windows 10, is probably a complete dead end.
Ideally you will write most of your code as libraries, with only the platform specific portions in their own corresponding project file. We will look at this process closer down the road. For now we will KISS (Keep It Simple Stupid) and just target the platform we are developing on.
Once you click OK, the following simple project will be created:
using Microsoft.Xna.Framework;
using Microsoft.Xna.Framework.Graphics;
using Microsoft.Xna.Framework.Input;

namespace Game1
{
    /// <summary>
    /// This is the main type for your game.
    /// </summary>
    public class Game1 : Game
    {
        GraphicsDeviceManager graphics;
        SpriteBatch spriteBatch;

        public Game1()
        {
            graphics = new GraphicsDeviceManager(this);
            Content.RootDirectory = "Content";
        }

        /// <summary>
        /// Allows the game to perform any initialization it needs to
        before starting to run.
        /// This is where it can query for any required services and
        load any non-graphic
        /// related content.  Calling base.Initialize will enumerate
        through any components
        /// and initialize them as well.
        /// </summary>
        protected override void Initialize()
        {
            // TODO: Add your initialization logic here

            base.Initialize();
        }

        /// <summary>
        /// LoadContent will be called once per game and is the place
        to load
        /// all of your content.
        /// </summary>
        protected override void LoadContent()
        {
            // Create a new SpriteBatch, which can be used to draw
            textures.
            spriteBatch = new SpriteBatch(GraphicsDevice);

            // TODO: use this.Content to load your game content here
        }

        /// <summary>
        /// UnloadContent will be called once per game and is the
        place to unload
        /// game-specific content.
        /// </summary>
        protected override void UnloadContent()
        {
            // TODO: Unload any non ContentManager content here
        }

        /// <summary>
        /// Allows the game to run logic such as updating the world,
        /// checking for collisions, gathering input, and playing
        audio.
        /// </summary>
        /// <param name="gameTime">Provides a snapshot of timing
                        values.</param>
        protected override void Update(GameTime gameTime)
        {
            if (GamePad.GetState(PlayerIndex.One).Buttons.Back ==
                ButtonState.Pressed || Keyboard.GetState().IsKeyDown(
                Keys.Escape))
                Exit();

            // TODO: Add your update logic here

            base.Update(gameTime);
        }

        /// <summary>
        /// This is called when the game should draw itself.
        /// </summary>
        /// <param name="gameTime">Provides a snapshot of timing
                        values.</param>
        protected override void Draw(GameTime gameTime)
        {
            GraphicsDevice.Clear(Color.CornflowerBlue);

            // TODO: Add your drawing code here

            base.Draw(gameTime);
        }
    }
}
Don’t concern yourself overly with the code, we will explain it all shortly. We just want to make sure that your MonoGame install is up and running. To run your game hit F5 or press:

Assuming all went well, you should see a window drawn in CornFlower blue:
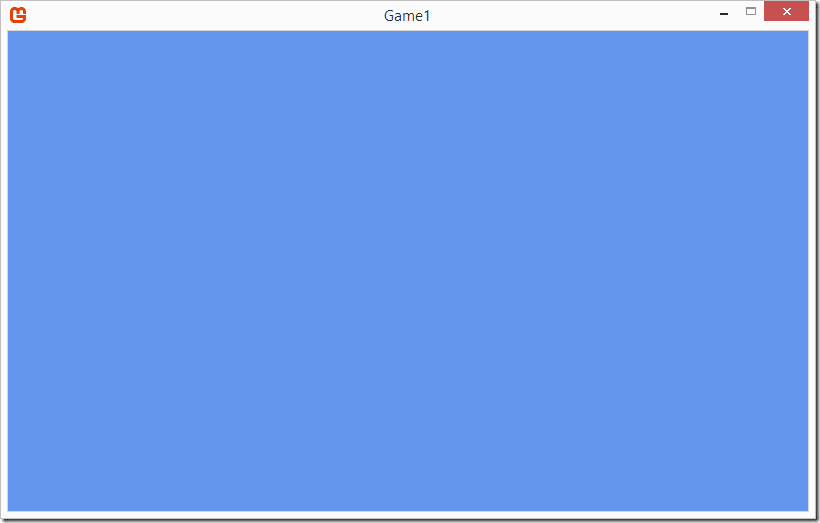
Congratulations, you’ve just created your first ever MonoGame application!
Let’s talk briefly about the Content Pipeline. This is the way you get content into your MonoGame application. If you look in the Solution Explorer, you will see a file named Content.mgcb.
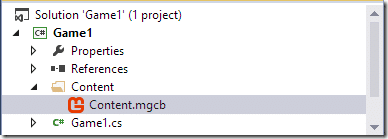
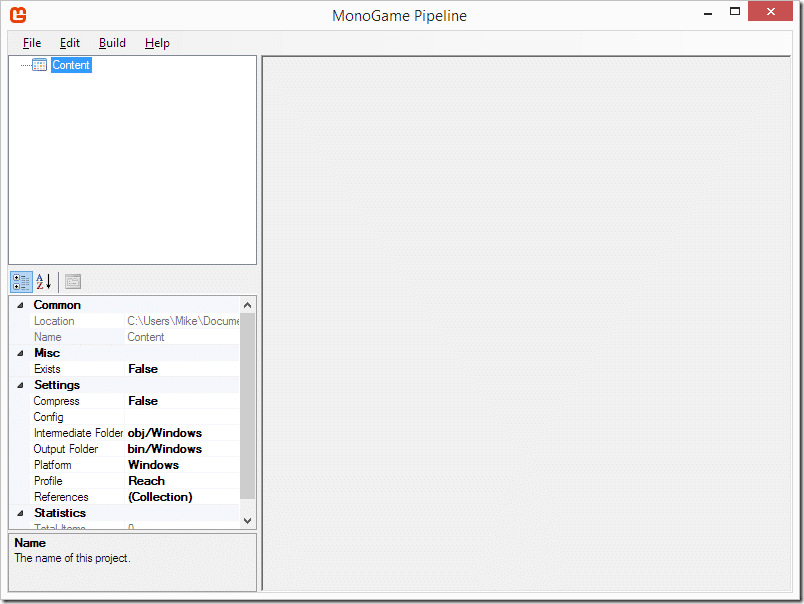
Double click it, and the MonoGame Content Pipeline tool will open:
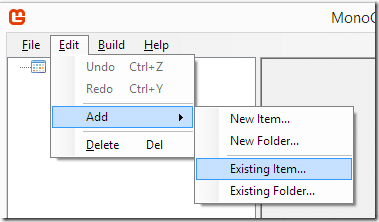
Let’s quickly add a texture to our project. Select Edit->Add->Existing Item, navigate to an existing image file somewhere on your computer.
Next you will be prompted for how you want the file to be added, copied or linked, I chose copy to break the connection with the source image. This means updates to the original image will not be propagated, nor will deleting it have any effect.
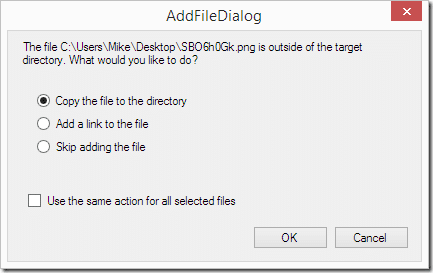
The image will be added to your content bundle, as as you can see with it selected, there are a number of properties exposed for how the image should be processed when building content:
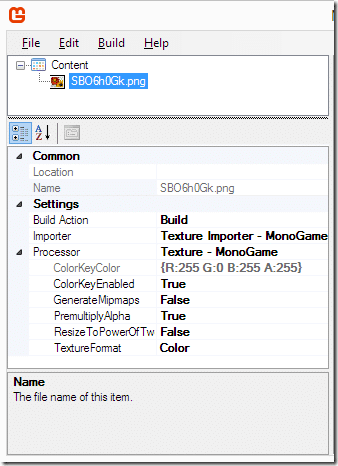
There are several Import processors available for various different file types:
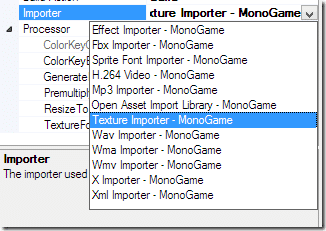
Each one exposes different parameters you can modify. For images some of the key properties exposed are the option to automatically resize the image to a power of 2 dimension, to change the texture compression settings (TextureFormat) or setting the color key value used for transparencies.
Now select the Content root node and you will see the property details have changed:
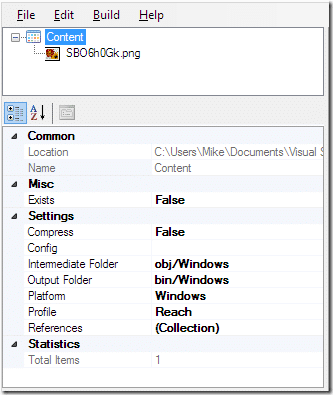
The key setting here is Platform. Each different platform can have slightly different requirements and the Content Pipeline takes care of that for you. In this case we already have Windows set for the pipeline, so there is nothing that needs to be changed.
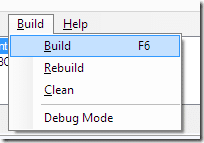
Now Build your content using the Buld->Build menu option, or by hitting F6.
Now back in Visual Studio, confirm that the build action on your Content.mgcb file is set correctly. Right click the file and select Properties:
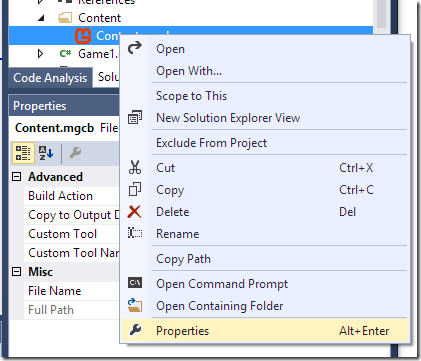
Make sure that Build Action is set to MonoGameContentReference.

This will enable you to use the content as if it was installed locally, making switching between platform versions trivial.
Now actually using content in code is as simple as:
protected override void LoadContent()
        {
            spriteBatch = new SpriteBatch(GraphicsDevice);
            var myImage = this.Content.Load<Texture2D>("SBO6h0Gk");
        }
Don’t worry, we will cover this process in more detail later. Just note that the file extension is not used.
Behind the scenes, you may notice that the Content Pipeline tool created the following xnb file in the /bin/Windows subdirectory of Content:

