Now we move on to a topic that people always seem to love, graphics! In the past few chapters/videos I’ve said over and over “don’t worry, we will cover this later”, well… welcome to later. We are primarily going to focus on loading and displaying textures using a SpriteBatch. As you will quickly discover, this is a more complex subject than it sounds.
As always, there is an HD video of the content available here.
Before we can proceed too far we need a texture to draw. A texture can generally be thought of as a 2D image stored in memory. The source image of a texture can be in bmp, dds, dib, hdr, jpg, pfm, png, ppm or tga formats. In the “real world” that generally means bmp, jpg or png formats and there is something to be aware of right away. Of those three formats, only png and some jpgs have an alpha channel, meaning it supports transparency out of the box. There are however ways to represent transparency in these other formats, as we will see shortly. If you’ve got no idea which format to pick, or why, pick png.
Using the Content Pipeline
If you’ve been reading since the beginning you’ve already seen a bit of the content pipeline, but now we are going to actually see it in action with a real world example.
Do we have to use the content pipeline for images?
I should make it clear, you can load images that haven’t been converted into xnb format. As of XNA 4, a simpler image loading api was added that allowed you to load gif, jpg and png files directly with the ability to crop, scale and save. The content pipeline does a lot for you though, including massaging your texture into a platform friendly format, potentially compressing your image, generation of mip maps or power of two textures, pre-multiplied alpha (explained shortly ), optimized loading and more. MonoGame included a number of methods for directly loading content to make up for it’s lack of a working cross platform pipeline. With the release of the content pipeline tool, these methods are deprecated. Simply put, for game assets ( aka, not screen shots, dynamic images, etc ), you should use the content pipeline.
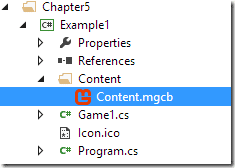
Create a new project, then in the Contents folder, double click the file Content.mgcb.
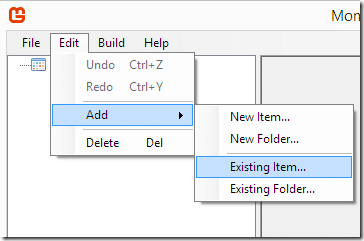
This will open the MonoGame Content Pipeline tool. Let’s add our texture file, simple select Edit->Add->Existing Item…
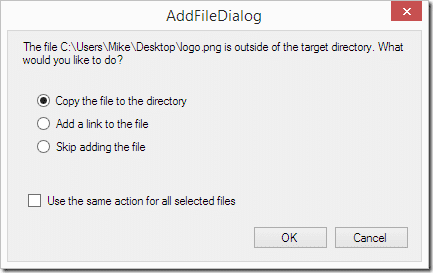
Navigate to a select a compatible image file. When prompted chose the mode that makes the most sense. I want the original to be untouched, so I am choosing Copy the file to the directory.
Your content project should now look like:
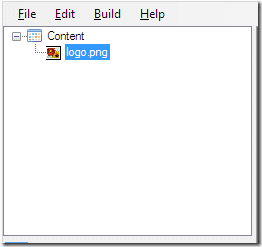
The default import settings for our image are fine, but we need to set the Content build platform. Select Content in the dialog pictured above, then under Platform select the platform you need to build for.
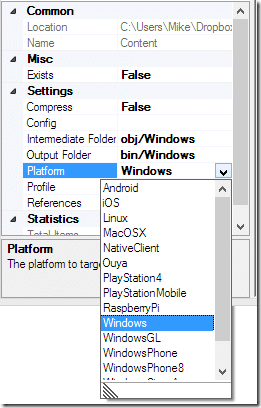
Note the two options for Windows, Windows and WindowsGL. The Windows platform uses a DirectX backend for rendering, while WindowsGL uses OpenGL. This does have an effect on how content is processed so the difference is important.
Now select Build->Build, saving when prompted:
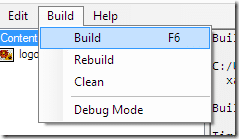
You should get a message that your content was built.
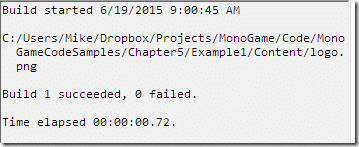
We are now finished importing, return to your IDE.
Important Platform Specific Information
One Windows the .mgcb file is all that you need. When the IDE encounters it, it will basically treat it as a symlink and instead refer to the contents it contains. Currently when building on MacOS using Xamarin, you have to manually copy the generated XNB contents into your project and set their build type as Content. The generated files are located in the Output Folder as configured in the Content Pipeline. I have been notified that a fix for this is currently underway, so hopefully the Mac and Windows development experience will be identical soon. Alright, we now have an image to work with, let’s jump into some code.
Loading and displaying a Texture2D
So now we are going to load the texture we just added to the content project, and display it on screen. Let’s just jump straight into the code.
using Microsoft.Xna.Framework;
using Microsoft.Xna.Framework.Graphics;
using Microsoft.Xna.Framework.Input;

namespace Example1
{
    public class Game1 : Game
    {
        GraphicsDeviceManager graphics;
        SpriteBatch spriteBatch;
        Texture2D texture;

        public Game1()
        {
            graphics = new GraphicsDeviceManager(this);
            Content.RootDirectory = "Content";
        }

        protected override void Initialize()
        {
            base.Initialize();
        }

        protected override void LoadContent()
        {
            spriteBatch = new SpriteBatch(GraphicsDevice);
            texture = this.Content.Load<Texture2D>("logo");
        }

        protected override void UnloadContent()
        {
            //texture.Dispose(); <-- Only directly loaded
            Content.Unload();
        }

        protected override void Update(GameTime gameTime)
        {
            if (GamePad.GetState(PlayerIndex.One).Buttons.Back == ButtonState.
                Pressed || Keyboard.GetState().IsKeyDown(Keys.Escape))
                Exit();
            base.Update(gameTime);
        }

        protected override void Draw(GameTime gameTime)
        {
            GraphicsDevice.Clear(Color.CornflowerBlue);

            spriteBatch.Begin();
            spriteBatch.Draw(texture,Vector2.Zero);
            spriteBatch.End();

            base.Draw(gameTime);
        }
    }
}
When we run this code we see:
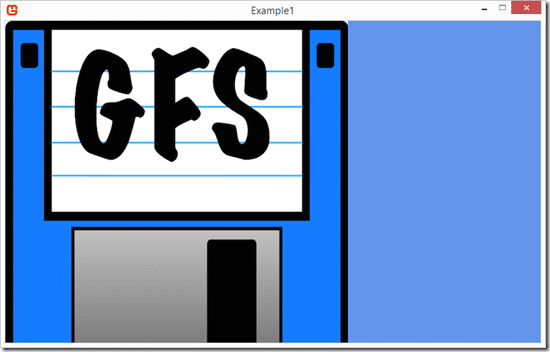
Obviously your image will vary from mine, but our texture is drawn on screen at the position (0,0). There are a few key things to notice here. First we added a Texture2D to our class, which is essentially the in memory container for our texture image. In LoadContent() we then load our image into our texture using the call: texture = this.Content.Load<Texture2D>(“logo”); You notice we use our Game’s Content member here. This is an instance of Microsoft.Xna.Framework.ContentManager and it is ultimately responsible for loading binary assets from the content pipeline. The primary method is the Load() generic method which takes a single parameter, the name of the asset to load minus the extension. Notice the bold there? That’s because this is a very common tripping point. In addition to Texture2D, Load() supports the following types:
- Effect
- Model
- SpriteFont
- Texture
- Texture2D
- TextureCube
It is possible to extend the processor to support additional types, but it is beyond the scope of what we are covering here today.
Next we get to the UnloadContent method, where we simply call Content.Unload(); The ContentManager “owns” all of the content it loads, so this cleans up all of the memory for all of the objects loaded through the ContentManager. Notice I left a commented out example calling Dispose(). It’s important to know if you load a texture outside of the ContentManager or create one dynamically, it’s is your responsibility to dispose of it or you may leak memory. You may say, hey, this will all get cleaned up on program exit anyways. Honestly this isn’t technically wrong, although cleaning up after yourself is certainly a good habit to get into.
Memory Leaks in C#?
Many new to C# developers think because it’s managed you can’t leak memory. This simply isn’t true. While compared to languages like C++, memory management is much simpler in C#, it is still quite possible to have memory leaks. In C# the easiest way is to not Dispose() of classes that implement IDisposable. An object that implements IDisposable owns an unmanaged resource (such as a Texture) and that memory will be leaked if someone doesn’t call the Dispose() method. Wrapping the allocation in a using statement will result in Dispose() being called at the end of scope. As a point of trivia, other common C# memory leaks are caused by not removing event listeners and of course, calling leaky native code (pInvoke).
Now that we have our texture loaded, its time to display it on screen. This is done with the following code:
    spriteBatch.Begin();
    spriteBatch.Draw(texture,Vector2.Zero);
    spriteBatch.End();
I will explain the SpriteBatch in a few moments, so let’s instead focus on the Draw() call. This needs to be called within a Begin()/End() pair. Let’s just say SpriteBatch.Draw() has A LOT of overloads, that we will look at now. In this example we simply Draw the passed in texture at the passed in position (0,0). Next let’s look at a few of the options we have when calling Draw().
Where is 0,0?
Different libraries, frameworks and engines have different coordinate systems. In XNA, like most windowing or UI libraries, the position (0,0) refers to the top left corner of the screen. For sprites, (0,0) refers to the top left corner as well, although this can be changed in code. In many OpenGL based game engines, (0,0) is located at the bottom left corner of the screen. This distinction becomes especially important when you start working with 3rd party libraries like Box2D, which may have a different coordinate system. Using a top left origin system has advantages when dealing with UI, as your existing OS mouse and pixel coordinates are the same as your game’s. However the OpenGL approach is more consistent with mathematics, where positive X and Y coordinate values refer to the top right quadrant on a Cartesian plane. Both are valid options, work equally well, just require some brain power to convert between.
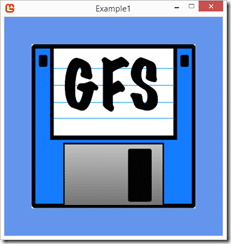
Translation and Scaling
spriteBatch.Draw(texture, destinationRectangle: new Rectangle(50, 50, 300, 300));
This will draw our sprite at the position (50,50) and scaled to a width of 300 and a height of 300.
Rotated
spriteBatch.Draw(texture,
    destinationRectangle: new Rectangle(50, 50, 300, 300),
    rotation:-45f
    );
This will rotate the image –45degrees about it’s origin.
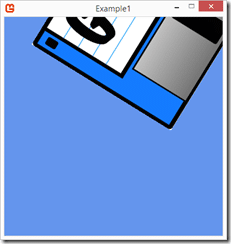
Notice that the rotation was performed relative to the top left corner of the texture. Quite commonly when rotating and scaling you would rather do it about the sprites mid point. This is where the origin value comes in.
Rotated about the Origin
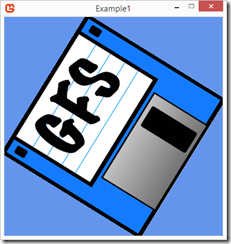
spriteBatch.Draw(texture,
    destinationRectangle: new Rectangle(150 + 50,150 + 50, 300, 300),
    origin:new Vector2(texture.Width/2,texture.Height/2),
    rotation:-45f
    );
Ok, this one may require a bit of explanation. The origin is now the midpoint of our texture, however we are going to be translating and scaling relative to our midpoint as well, not the top left. This means the coordinates passed into our Rectangle need to take this into account if we wish to remained centered. Also you need to keep in mind that you are resizing the texture as part of the draw call. This code results in:
For a bit of clarity, if we hadn’t translated(moved) the above, instead used this code:
spriteBatch.Draw(texture,
    destinationRectangle: new Rectangle(0, 0, 300, 300),
    origin:new Vector2(texture.Width/2,texture.Height/2),
    rotation:-45f
    );
We would rotate centered to our sprite, but at the origin of our screen
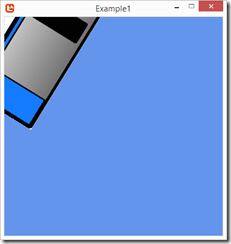
So it’s important to consider how the various parameters passed to draw interact with each other!
Tinted
spriteBatch.Begin();
spriteBatch.Draw(texture,
    destinationRectangle: new Rectangle(50, 50, 300, 300),
    color:Color.Red);
spriteBatch.End();
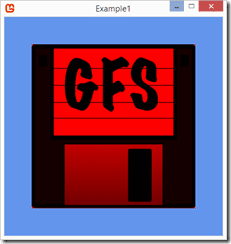
The Color passed in ( in this case Red ) was then added to every pixel in the texture. Notice how it only effects the texture, the Cornflower Blue background is unaffected. The additive nature of adding red to blue resulted in a black-ish colour, while white pixels simply became red.
Flippped
spriteBatch.Draw(texture,
    destinationRectangle: new Rectangle(50, 50, 300, 300),
    effects:SpriteEffects.FlipHorizontally|SpriteEffects.FlipVertically
    );
That’s about it for draw, now let’s look a bit closer at SpriteBatch.
SpriteBatch
In order to understand exactly what SpriteBatch does, it’s important to understand how XNA does 2D. At the end of the day, with modern GPUs, 2D game renderers no longer really exist. Instead the renderer is actually still working in 3D and faking 2D. This is done by using an orthographic camera ( explained later, don’t worry ) and drawing to a texture that is plastered on a 2D quad that is parallel to the camera. SpriteBatch however takes care of this process for you, making it feel like you are still working in 2 dimensions.
That isn’t it however, SpriteBatch is also a key optimization trick. Consider if your scene consisted of hundreds of small block shape sprites each consisting of a small 32×32 texture, plus all of the active characters in your scene, each with their own texture being drawn to the screen. This would result in hundreds or thousands of Direct3D or OpenGL draw calls, which would really hurt performance. This is where the “Batch” part of sprite batch comes in. In it’s default operating mode ( deferred ), a simply queues up all of the drawing calls, they aren’t executed until End() is called. It then tries to “batch” them all together into a single draw call, thus rendering as fast as possible.
There are settings attached to a SpriteBatch called, specified in the Begin() that we will see shortly. These are the same for every single Draw call within the batch. Additionally you should try to keep every single Draw call within the batch in the same texture, or within as few different textures as possible. Each different texture within a batch incurs a performance penalty. You can also call multiple Begin()/End() pairs in a single render pass, just be aware that the Begin() process is rather expensive and this can quickly hurt performance if you do it too many times. Don’t worry though, there are ways to easily organize multiple sprites within a single texture. If by chance you actually want to perform each Draw call as it occurs you can instead run the sprite batch in immediate mode, although since XNA 4 (which MonoGame is based on), there is little reason to use Immediate mode, and the performance penalty is harsh.
One other major function of the SpriteBatch is handling blending, which is how overlapping sprites interact.
Sprite Blending
Up until now we’ve used a single sprite with no transparency, so that’s been relatively simple. Let’s instead look at an example that isn’t entirely opaque.
Let’s go ahead an add a transparent sprite to our content project. Myself I am going to use this one:

… I’m sorry, I simply couldn’t resist the pun. The key part is that your sprite supports transparency, so if you draw it over itself you should see:

Now let’s change our code to draw two sprites in XNA.
using Microsoft.Xna.Framework;
using Microsoft.Xna.Framework.Graphics;
using Microsoft.Xna.Framework.Input;

namespace Example2
{
    public class Game1 : Game
    {
        GraphicsDeviceManager graphics;
        SpriteBatch spriteBatch;
        Texture2D texture;

        public Game1()
        {
            graphics = new GraphicsDeviceManager(this);
            graphics.PreferredBackBufferWidth = 400;
            graphics.PreferredBackBufferHeight = 400;
            Content.RootDirectory = "Content";
        }

        protected override void LoadContent()
        {
            spriteBatch = new SpriteBatch(GraphicsDevice);
            texture = this.Content.Load<Texture2D>("transparentSprite");
        }

        protected override void Update(GameTime gameTime)
        {
            if (GamePad.GetState(PlayerIndex.One).Buttons.Back == ButtonState.
                Pressed || Keyboard.GetState().IsKeyDown(Keys.Escape))
                Exit();
            base.Update(gameTime);
        }

        protected override void Draw(GameTime gameTime)
        {
            GraphicsDevice.Clear(Color.CornflowerBlue);

            spriteBatch.Begin();
            spriteBatch.Draw(texture, Vector2.Zero);
            spriteBatch.Draw(texture, new Vector2(100,0));
            spriteBatch.End();

            base.Draw(gameTime);
        }
    }
}
… and run:
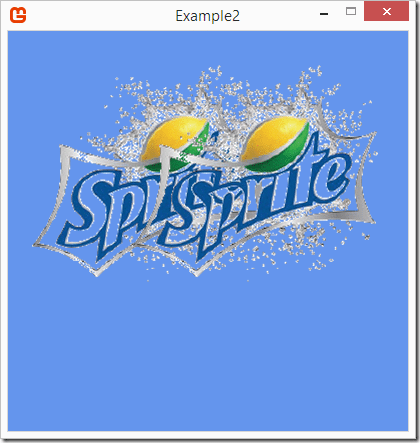
Pretty cool.
This example worked right out of the box for a couple reasons. First, our sprite was transparent and identical, so draw order didn’t matter. Also when we ran the content pipeline, the default importer ( and the default sprite batch blend mode ) is transparency friendly.
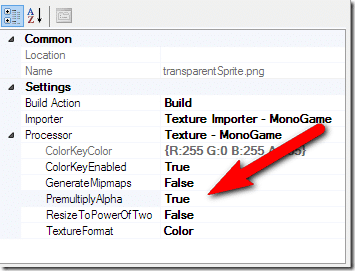
This setting creates a special transparency channel for your image upon import, which is used by the SpriteBatch when calculating transparency between images.
Let’s look at a less trivial example, with a transparent and opaque image instead.
using Microsoft.Xna.Framework;
using Microsoft.Xna.Framework.Graphics;
using Microsoft.Xna.Framework.Input;

namespace Example2
{
    public class Game1 : Game
    {
        GraphicsDeviceManager graphics;
        SpriteBatch spriteBatch;
        Texture2D texture;
        Texture2D texture2;

        public Game1()
        {
            graphics = new GraphicsDeviceManager(this);
            graphics.PreferredBackBufferWidth = 400;
            graphics.PreferredBackBufferHeight = 400;
            Content.RootDirectory = "Content";
        }

        protected override void LoadContent()
        {
            spriteBatch = new SpriteBatch(GraphicsDevice);
            texture = this.Content.Load<Texture2D>("logo");
            texture2 = this.Content.Load<Texture2D>("transparentSprite");
        }

        protected override void Update(GameTime gameTime)
        {
            if (GamePad.GetState(PlayerIndex.One).Buttons.Back == ButtonState.
                Pressed || Keyboard.GetState().IsKeyDown(Keys.Escape))
                Exit();
            base.Update(gameTime);
        }

        protected override void Draw(GameTime gameTime)
        {
            GraphicsDevice.Clear(Color.CornflowerBlue);

            spriteBatch.Begin();
            spriteBatch.Draw(texture, Vector2.Zero);
            spriteBatch.Draw(texture2, Vector2.Zero);
            spriteBatch.End();

            base.Draw(gameTime);
        }
    }
}
When run:
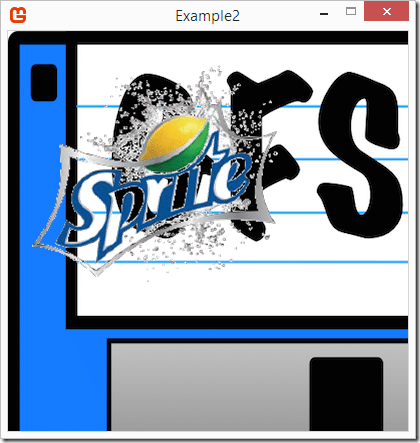
So far, so good. Now let’s mix up the draw order a bit…
spriteBatch.Begin();
spriteBatch.Draw(texture2, Vector2.Zero);
spriteBatch.Draw(texture, Vector2.Zero);
spriteBatch.End();
… and run:
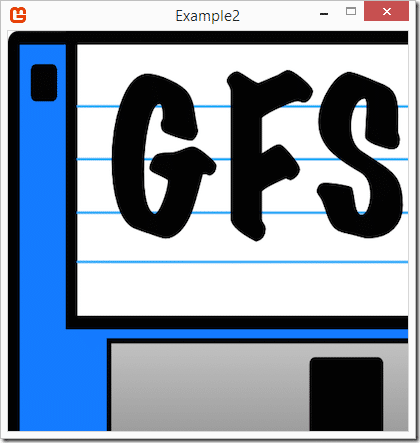
Oh…
As you can see, the order we make Draw calls is by default, the order the sprites are drawn. As in the second Draw() call will draw over the results of the first Draw() call and so on.
There is a way to explicitly set the drawing order:
spriteBatch.Begin(sortMode: SpriteSortMode.FrontToBack);
spriteBatch.Draw(texture2, Vector2.Zero, layerDepth:1.0f);
spriteBatch.Draw(texture, Vector2.Zero, layerDepth:0.0f);
spriteBatch.End();
Here you are setting the SpriteBatch sort order to be front front to back, then manually setting the draw layer in each draw call. If you are guessing, there is also a BackToFront setting. SpriteSortMode is also what determines if drawing is immediate ( SpriteSortMode.Immediate ) or deferred ( SpriteSortMode.Differed ).
Blend States
We mentioned earlier that textures imported using the Content Pipeline by default has a special pre-calculated transparency channel created. This corresponds with SpriteBatches default BlendState, AlphaBlend. This uses the magic value created by the pipeline to determine how overlapping transparent sprites are renderer. If you don’t have a really good reason otherwise, and are using the Content Pipeline to import your textures, you should stick to the default. I should point out, this behavior only became the default in XNA4, so older tutorials may have much different behavior.
The old default used to be interpolative blending, which used the RGBA values of the texture to determine transparency. This could lead to some strange rendering artifacts ( discussed here: https://en.wikipedia.org/wiki/Alpha_compositing ). The advantage is, all you need to blend images is an alpha channel, there was no requirement to create a special pre-multiplied channel. This means you didn’t have to run these images through the content pipeline. If you wish to do things the “old” way, when importing your assets ( if not simply loaded directly from file ) select false for PreMultiplied alpha in the Texture Importer Processor settings of the Content Pipeline. Then in your SpriteBatch, do the following:
spriteBatch.Begin(blendState:BlendState.NonPremultiplied);
There are additional BlendState options including Additive ( colors are simply added together ) and Opaque ( subsequent draw calls simply overwrite the earlier calls ). You can have a great deal of control over the BlendState, but most projects simply will not require it. One other thing I ignored is Chromekeying. This is another option for supporting transparency basically you dedicate a single color to be transparent, then specify that color in the Content Pipeline. Essentially you are forming a 1bit alpha channel and are essentially “green screening” like in movies. Obviously you cannot use the color in your image however. In exchange for ugly source sprites and extra labor, you save in file size as you don’t need to encode the alpha channel. There is some additional functionality built into SpriteBatch, including texture sampling, stencil buffers, matrix transforms and even special effects. These are well beyond the basics though, so we will have to cover them at a later stage.
