A video only version of this tutorial is available here.
In this part of the Unreal vs Unity Tutorial Series, we are going to take an introductory look at Unreal Engine. A bit of a guide tour of the interface as you will need to understand it to make 2D games. I assume at this point you’ve downloaded and installed Unreal Engine already. If not, go do so! It is now completely free, but you will have to register before downloading.
Once you’ve finished the install, you will have one icon to deal with, Epic Game Launcher.
Click this.
The Launcher
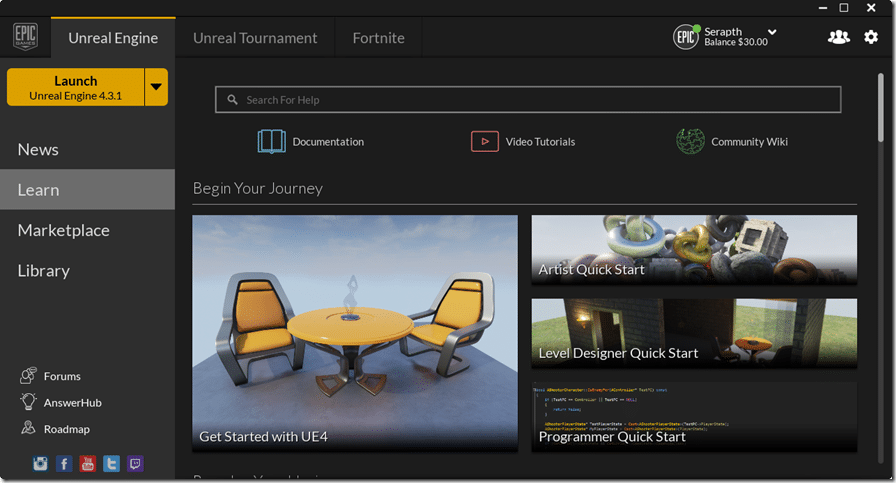
This will load up the Launcher, like so:
There are currently three tabs across the top, one for Unreal Engine, then one each for the in development games Unreal Tournament and Fortnite. Generally what you want is the Unreal Engine Tab and simply click the Launch button. However it is also a good idea to look through the Learn tab to see the wealth of learning materials available for Unreal. ( this tab is selected in the image above ). The Marketplace is another great place to browse, full of free and paid assets you can drop into your game, including models, animations, blueprints, sample levels and tutorials.
For now though, click Launch. Don’t be surprised if you have to download an update, there are frequent updates.
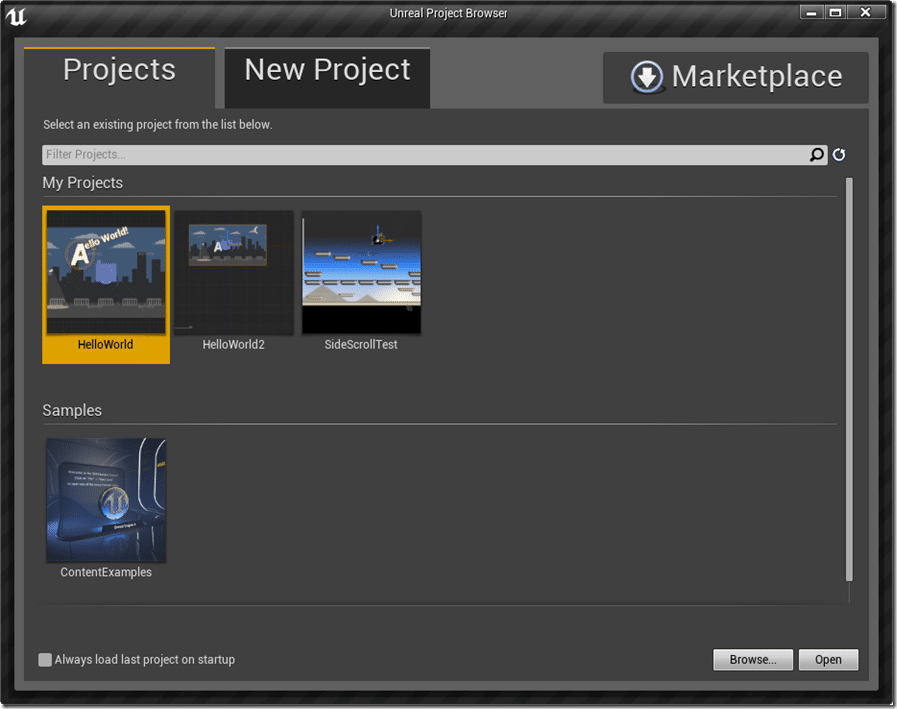
Once you click Launch, the following dialog should appear:
If you want Unreal to auto reload the project you are currently working on, instead of this dialog, be sure to tick the “Always load last project on startup” dialog.
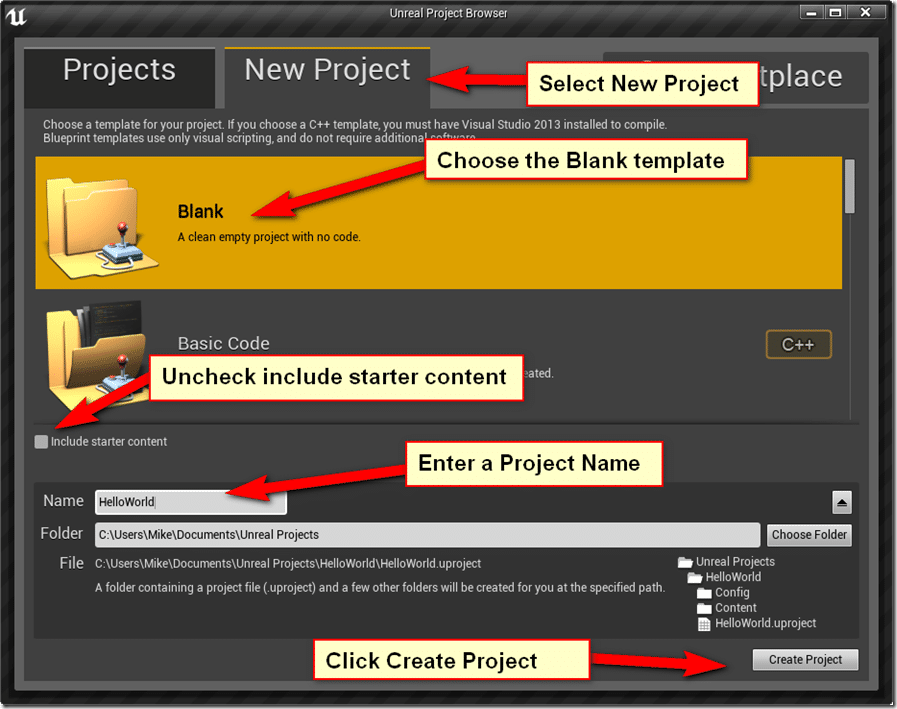
In our case though, we are going to create a simple project today, although the details are probably going to be in a second post to keep things from getting too long. Click the “New Project” tab. Then fill it in like follows:
If you want to change the location, you need to click the drop down arrow icon at the bottom right to get additional options.
In this dialog you can start from a number of different templates, using either Blueprints or C++. Templates include starter projects such as FPS, Flying game, Racing Game, etc. In our case though, we want to start from scratch, so we chose Blank. Additionally there is a bunch of content to get you started. We however do not want it right now. You can easily import it after the fact if you prefer.
Once you click “Create Project” the Unreal editor itself should finally load.
Unreal Editor
Welcome to Unreal Engine! This is where you are going to spend a great deal of your game development life going forward, so let’s take a quick tour.
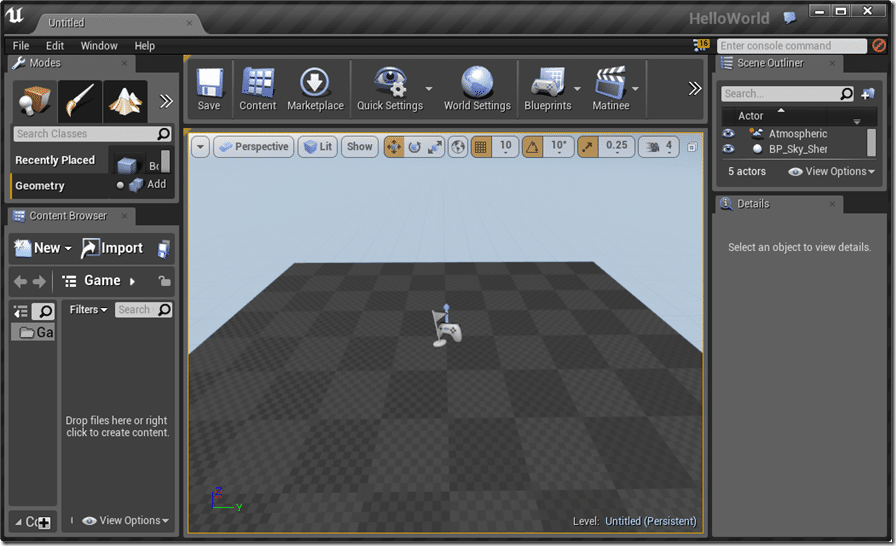
First, lets start with a shot of the entire editor, then we will break it down into sections.
Unreal is one of those applications that absolutely eats screen space. It also supports multiple Windows and you will often have several editors open at once. This is one of those applications that justifies your extremely expensive, ultra-wide monitor setup! If you haven’t discovered the joy of multiple monitor development, you really need to!
Let’s break the screen down into easy to digest pieces.
Modes Panel
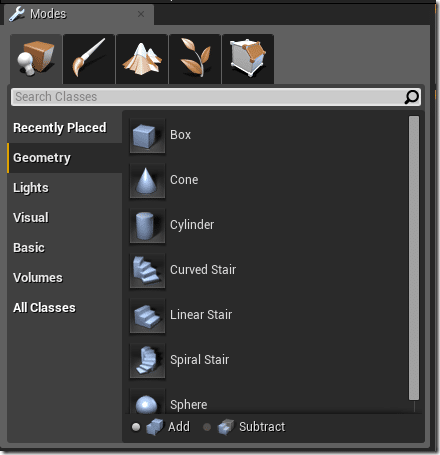
For a 2D game, this is a panel you are rarely going to use. The tabs across the top are Place, Paint, Landscape, Foliage and Geometry Editing.
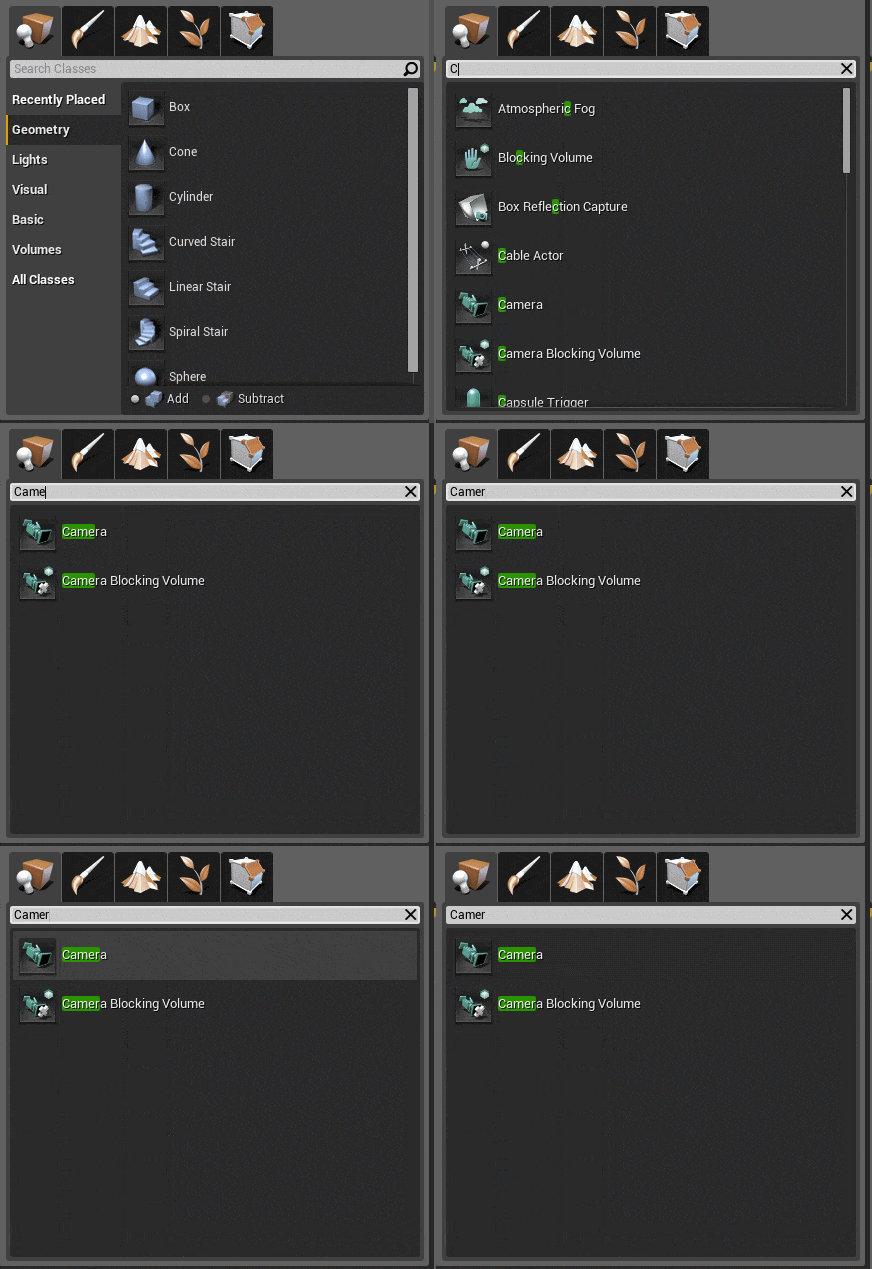
The last four are almost all entirely used for 3D games and we will be ignoring them. Place however is used for placing game assets in your game, and we will be using it. You can quickly add new objects using the Search Classes dialog, like so:
Once the item you want to place is selected, you can simply drag it into your scene.
The Content Browser panel
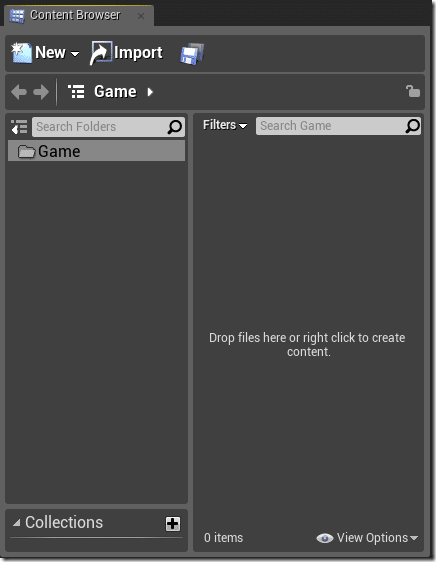
The Content Browser is critically important. This is how you get assets into your game. All the various files that go into making your game, such as models, textures, etc… can be drag/dropped into the right side of the Window.
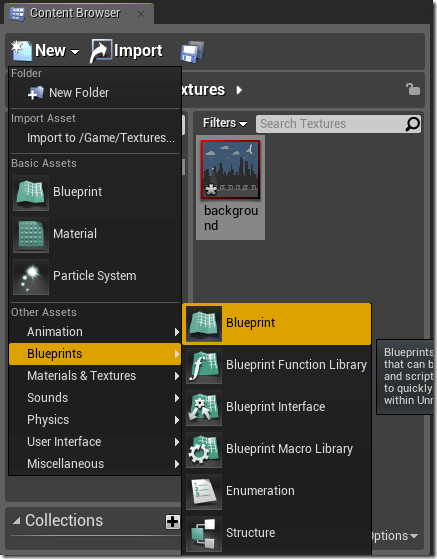
The left hand folder hierarchy can be organized however you like. Collections are a way of keeping similar things together. You can also easily create new content by clicking New or Right clicking:
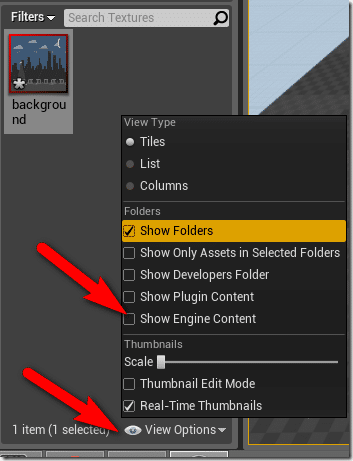
Now, remember earlier when we unchecked Include Starter Content? Well, let’s say you want something that included with the engine itself? Well fortunately that’s quite simple.
Selecct View Options, then check Show Engine Content.
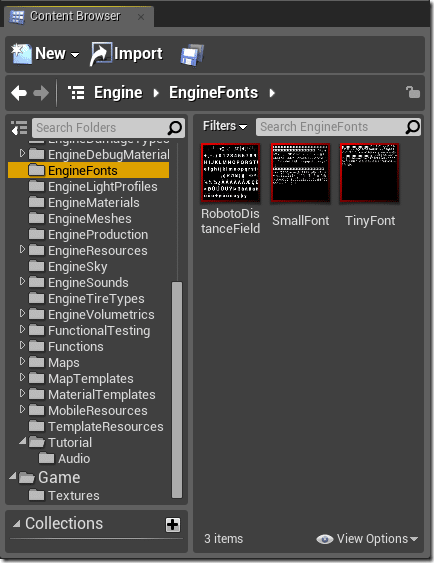
Now you will see an additional folder in the Content Browser:
You can then copy this content into your engine and turn it back off again if you wish.
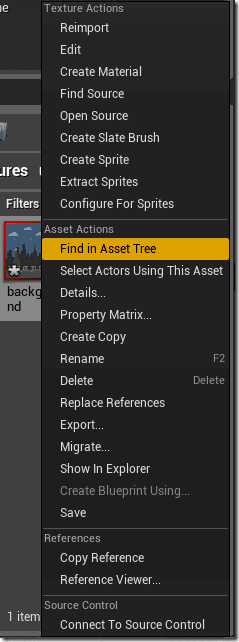
The final, and perhaps most important feature of the Content Browser, are the right click context menu when you click game assets, such as the image we dragged in earlier:
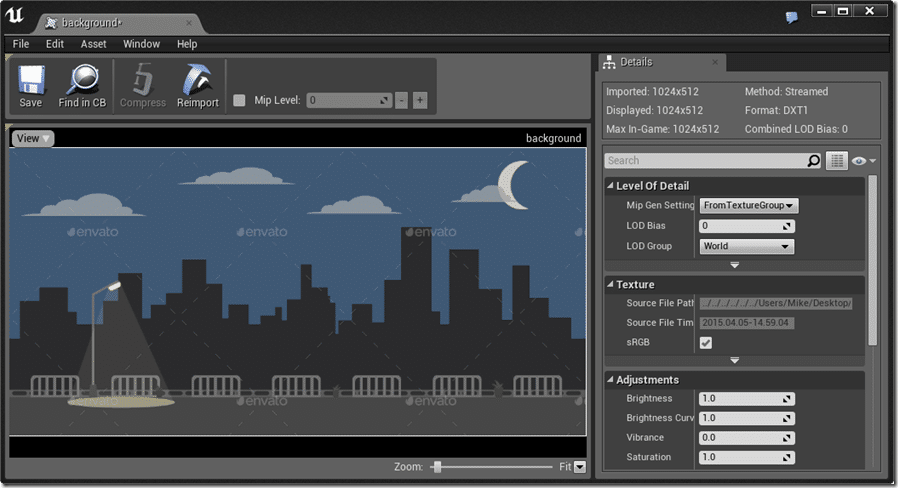
These menus are context sensitive to the type of file you’ve clicked. As you can see from this being an image file, the top half of the menu is populated with the Texture Actions menu. Choosing Edit for example, brings up the Texture Editor window:
Basically the Content Browser is where you add, manage and edit game related assets.
The Toolbar
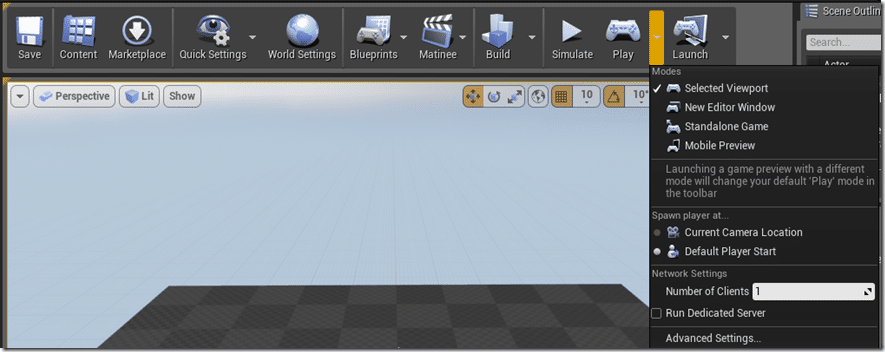
Across the top of your screen you have the convenient toolbar. Most of the buttons are self explanatory, but a couple deserve further mention. Buttons with drop down arrows have additional options, like you can see with the expanded Play button above. Play runs your game, either in the current viewport, in a new window, as a stand alone game or in the mobile simulator. Launch on the other hand is used for running your game on an actual device, such as an iPad. Blueprints and World Settings are very handy, but we will cover both in more depth shortly, so stay tuned.
Scene Outliner
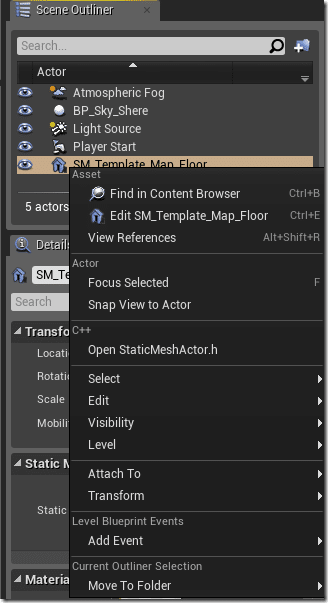
This is your scene graph. This is where you create actual instances of your game assets to put together a level. Think about it this way… imagine playing with a set of Lego to build a world. The individual different lego pieces… the big flat green thing, the 4 post bricks, the 2 post bricks, etc… this are you building blocks and would be the analog of stuff that appears in the Content Browser. The actual individual pieces, those that you use to build your house or whatever… those are what would appear in the Outliner. The minute you drag an item from the Content Browser into the scene, it will appear in this list (technically tree).
As you can see from the screenshot above, there are a number of options for selecting each instance, editing it’s code, modifying it’s visibility, etc. You can of course remove items from the level using this interface as well.
The Details Panel
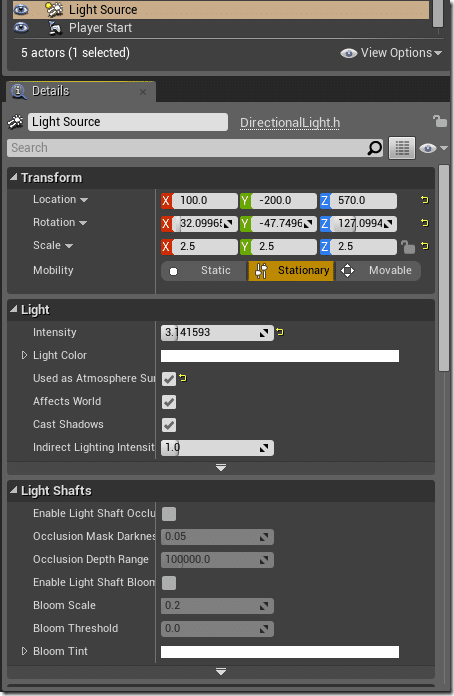
Going hand in hand with the Outliner, the Details panel enables you to edit the individual properties of each object instance in your game world. It is completely context sensitive, as you can see in the screenshot above, these are the details with the Lightsource selected in the outliner. All of the editable attributes of each component that makes up the selected object can be edited here.
The Viewport
And finally… the biggest one for last, the Viewport.
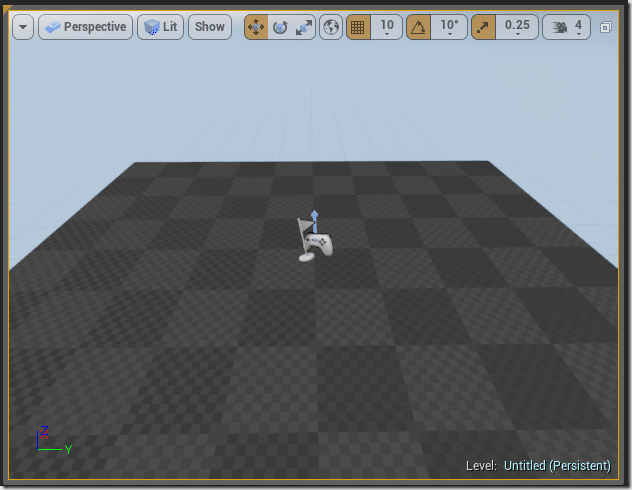
This is the 3D representation of your scene. You can drag objects from the Content Browser to the viewport to add them to the scene ( they will also appear in the Outliner ). You can select, move, rotate and scale objects. Speaking of moving, rotating and scaling, those can also be controlled using these buttons:
You can also use the W, E and R keys respectively. ESC to unselect. Use the left mouse button to select an object.
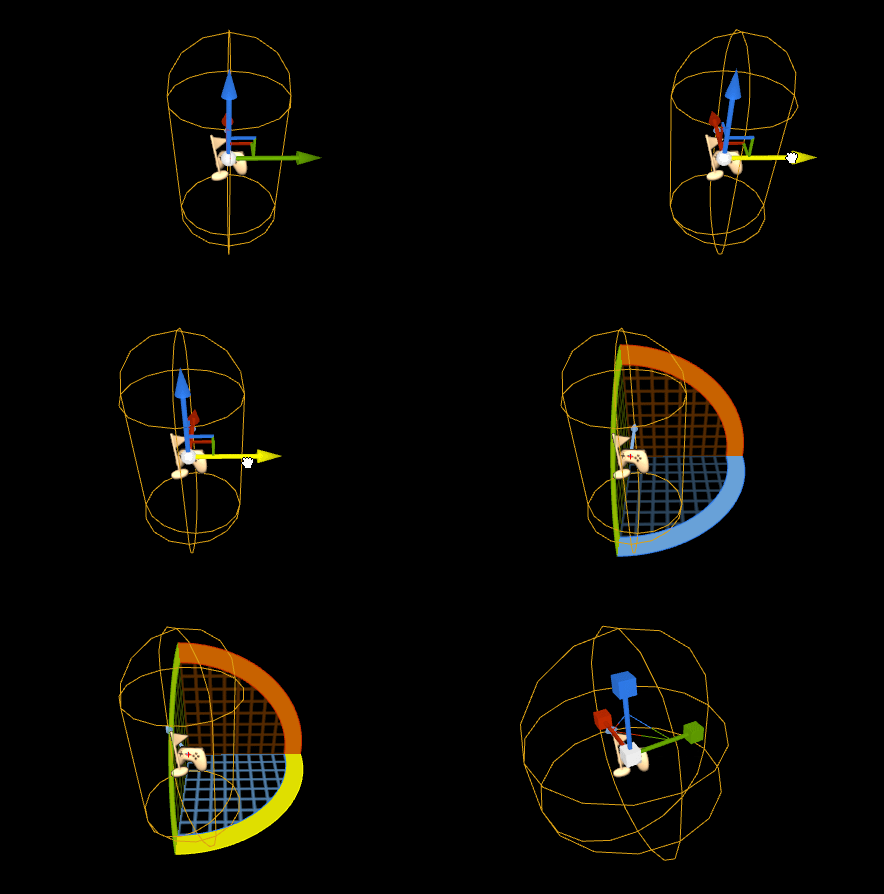
Here are translation, rotation and scaling in effect. As you can see, each axis is represented and colour coded in the widget:
A quick note on scene camera controls. In Perspective mode you can freely move the camera around. The controls are as follows:
Zoom in/out : Scroll wheel or ALT + RMB
Orbit Camera: Hold RMB + move
Pan Camera: MMB + Move
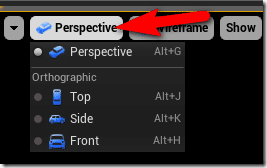
There are a number of very important menus for the viewport controls. The first is the one that lets you switch between the different predefined views, or the free form perspective mode:
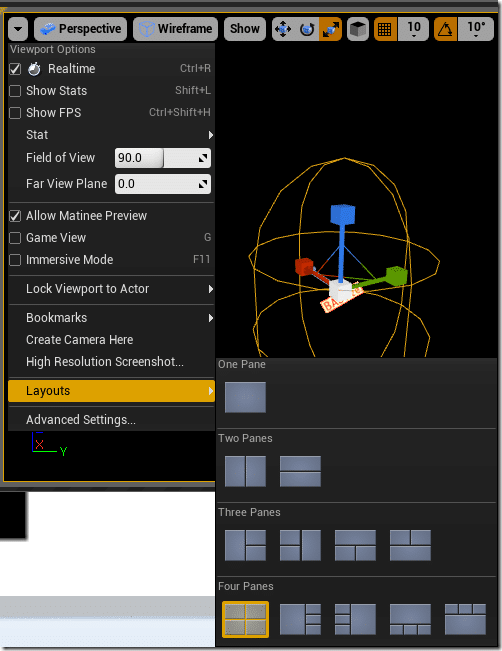
Clicking the drop down arrow at the top left corner contains a series of very important configuration menus, including the ability to change the layout:
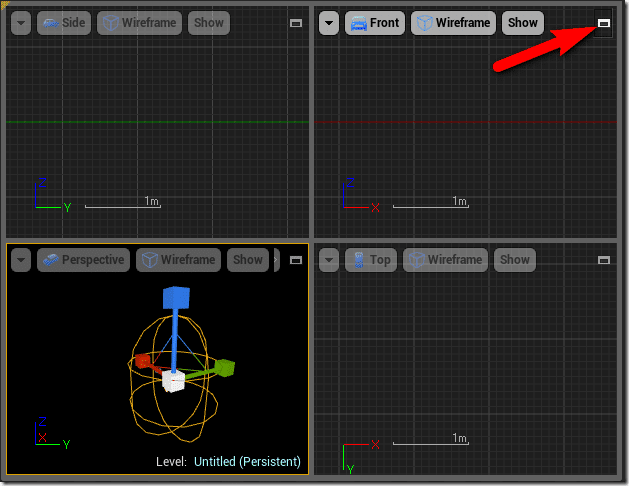
If you prefer the traditional quad view like 3D Studio MAX, you can click the icon in the top right corner to toggle between a quad and single view mode, like so:
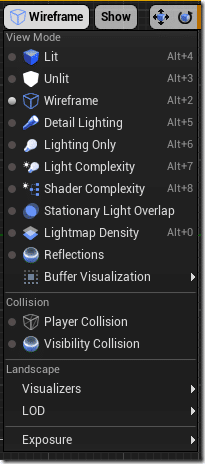
Finally, you will often want to switch visibility modes. Sometimes you want your scene textured and lit. Often in 2D you want it textured and unlit. In a large scene, or working behind something else, wireframe is often handy. They can all be toggled with this menu:
As you can see, the majority of those settings also have a quick Alt + # hotkey available as well.
Conclusion
So, that is a basic guided tour of the Unreal Engine tools. In the next text tutorial, we are going to create a simple Hello World scene with a sprite, camera and even a blueprint controlling it all.

