In the previous tutorial we created a new project but didn’t really go anywhere with it. Instead we were focusing more on learning our way around the Unreal Engine interface. By the way, with each tutorial I assume you are familiar with the subject matter of the tutorial that came before it. This tutorial and the previous one combined contain basically the same content as this video tutorial version. So if you are jumping right in and completely new to Unreal, I would suggest you start there. If you are confused about something, try the video instead and you might find some clarity…
…alright, back to the subject at hand. Our very first application. At this point you should have a new “Blank” project created. If you haven’t got one, head back to the Epic launcher and create one now. We are going to create a very simple application, basically a sprite backdrop, a camera, a blueprint and the text Hello World. We will not go into much detail on using Sprites, as that is one of the next topics I will cover in much greater detail.
Getting Started
First, let’s clear up our scene, we want to start completely from scratch, and the “Blank” project isn’t completely blank. If you look at the Outliner, you will see that a few default objects have been created in our scene.
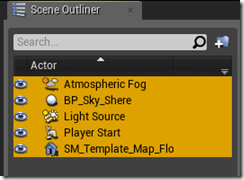
We want to SHIFT + Click select them all and then hit the Delete key. Now we’ve got a completely empty scene. Let’s put something in it!
Adding a Sprite backdrop
Now we need to add an image to our scene. I will cover this process in a bit more detail later on, so if you’ve got some questions, don’t worry, we will probably get to it later. Just follow along for now.
The first thing we need to do is add a texture to our game. A texture is simply an image file, although there are a few caveats. First off, Unreal Engine really prefers textures with an alpha channel. This means jpg and gif files are very poor format choices. Additionally, Unreal Engine wants your images to be “power of 2” dimensions. It’s not a strict requirement but its heavily encouraged. This means your width or height are 2,4,8,16,32,64,128,256… 2048,4096, etc… pixels in size.
The image I used I simply got from Google Image search. I searched for Game background, set size to 1024×512 like so:

This is the image I chose at random. Obviously I am not the owner and you have zero redistribution rights to this image. Pick or use whatever image you wish, it really doesn’t matter in the end.
Now that we have our texture, we need to add it to the game. Let’s be a bit organized about this and create a folder for our textures. In the Content Browser, right click Game and select New Folder and name it Textures:
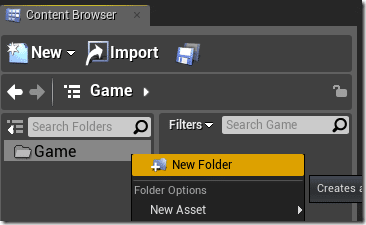
Your end result should look like:

Now from Explorer/Finder, simply drag your image on top of the Textures folder in the Content Browser.
It should immediately appear on the right hand side if everything went well:
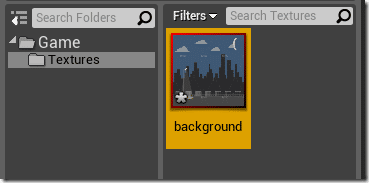
Now that we have a Texture, let’s create a Sprite from it. Again I will cover this later, but think of the difference between a Texture and Sprite as follows. A Texture is the image file itself, contains the pixel information, etc… The Sprite is an instance of your texture, or even part of your texture. It contains positional information, etc… but all the image information comes from the texture. You can have one texture with many sprites instanced from it. More importantly, a sprite can be dragged into our scene and a texture cannot!
Let’s create a Sprite, it’s super simple. Simply right click the texture on the right hand side of the Content Browser and select “Create Sprite”. As you can see, right click menus in the Content Browser are context sensitive, knowing what type of files they are dealing with and presenting different options accordingly.
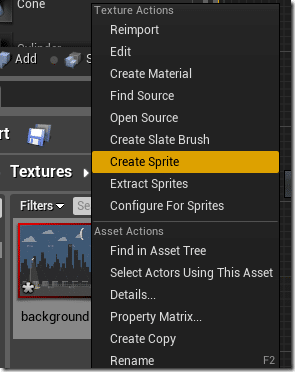
This will create a new sprite in the same directory:
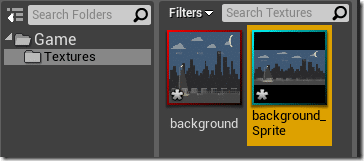
Let’s stay tidy here and create another folder off Game called Sprites. Then simply drag our newly created sprite to that folder and select Move Here. This of course is purely optional. If you want all your stuff in one big mess of a folder, that’s your prerogative!
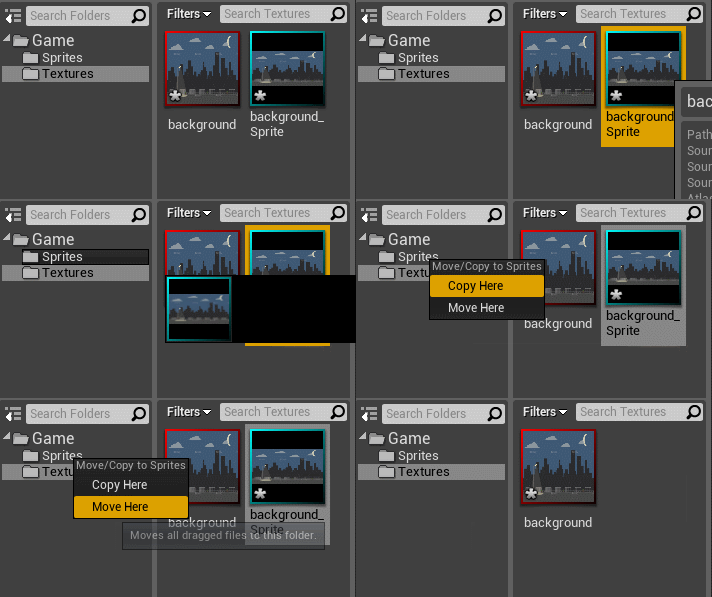
Now finally we can create our sprite. This is as simple as dragging one into the scene!
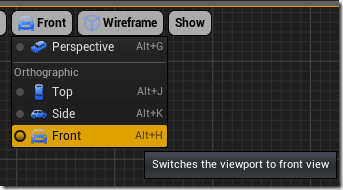
First lets make sure we are in Front camera perspective:
Now let’s drag the sprite to the origin. For the record, this is the origin… the point where the X and Y axis meet:
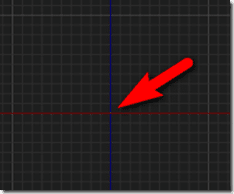
You may need to pan the camera around a bit to locate it. Keep in mind, you hold down the right mouse button to pan the camera. Now simply drag your sprite from the sprite folder so it’s centered about the origin:
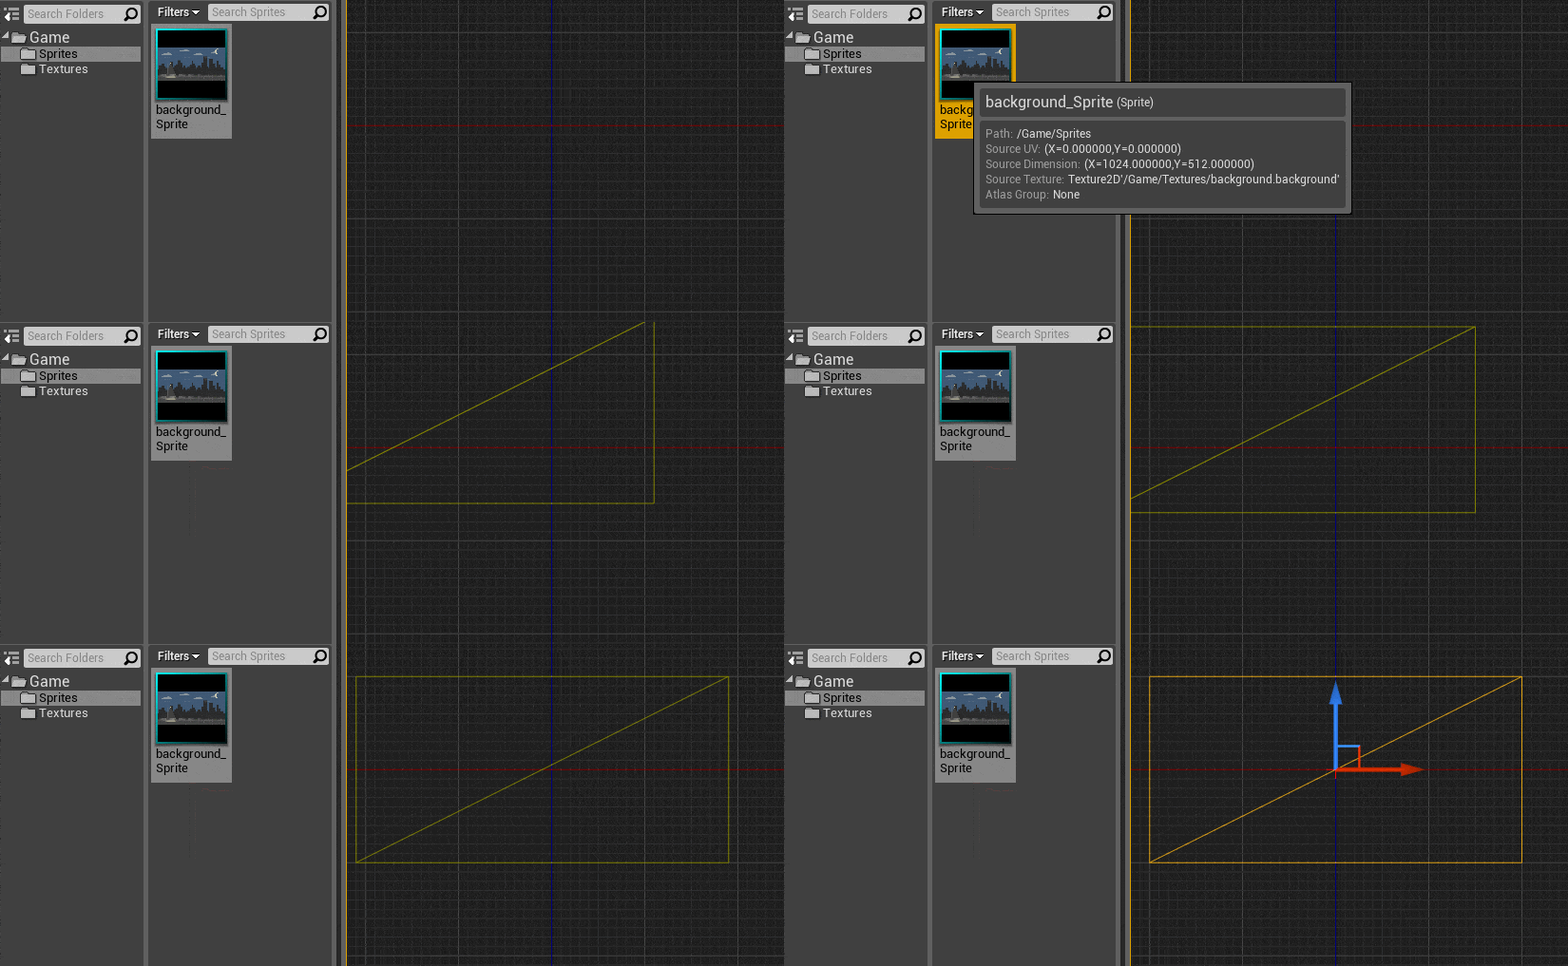
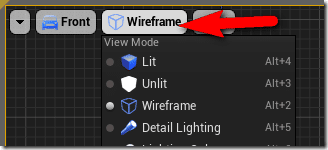
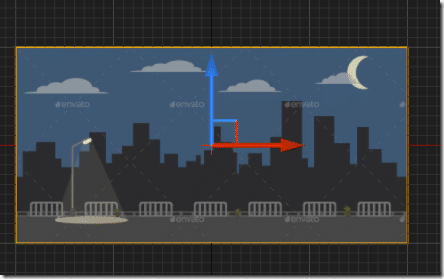
Well… that doesn’t look very sprite like, does it? That’s because we are in wireframe mode. In your view drop down the view menu and instead select Unlit ( or press Alt + 3 ):
Now your texture should appear in the scene:
We could actually run our “game” right now. To run your game, hit the play icon.

The result will probably look something like a black screen. You can hold down the right mouse button to rotate the view, eventually you will probably see:
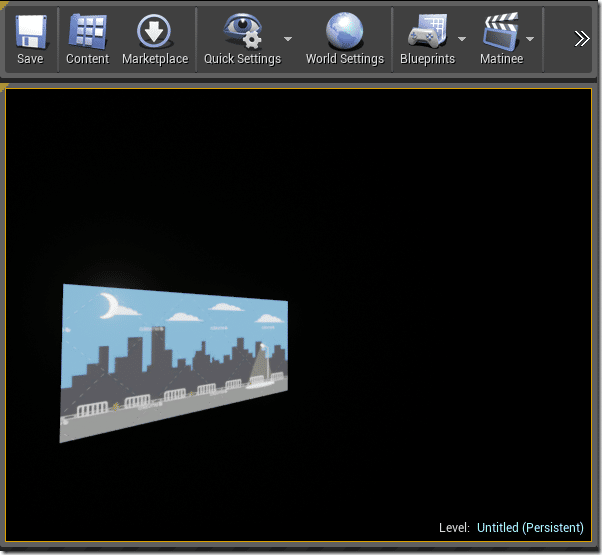
Yeah…. that’s not what we want. By the way, hit ESC when you are done playing to return to the editor mode.
The problem here is we don’t have a camera defined so when we start we aren’t looking at our background. There are a couple options here and I will show both. There is a third option ( the best one ), a Character Controller… we will cover that later on!
Now first the easy option.
You can set the perspective view. This is where the view points if there is no camera defined. Switch instead from Front view to Perspective View:
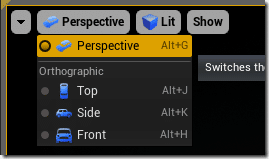
Using the camera controls (Right click to orbit, scroll mouse to zoom, middle mouse to pan ) center your image in the view. With the background sprite selected you can also press f or Right click and choose Focus Selected

With the image displayed in your 3D View:
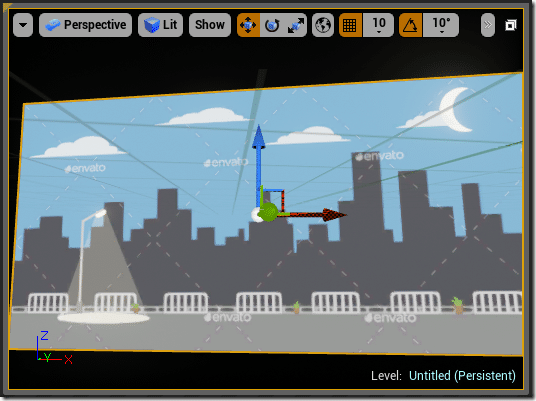
The next time you hit play, you should see the same angle:
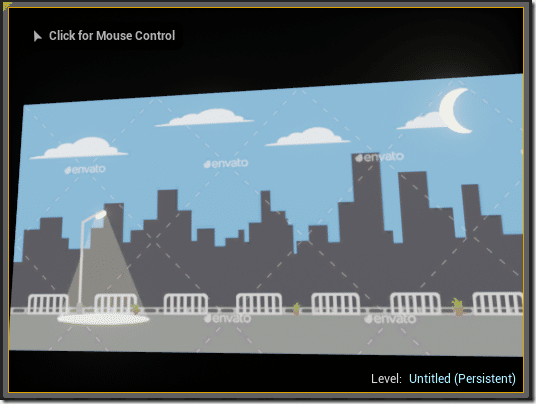
That said, this is useful only for development purposes… in reality what you want is a camera…
Creating a Camera
So, let’s create one, it’s stupidly easy!
First we need to find the Camera object. In the Modes panel in Place mode, simply type Camera, then drag the resulting object on to the 3D view, somewhere near the origin. ( I switched back to Front view before doing this, btw )
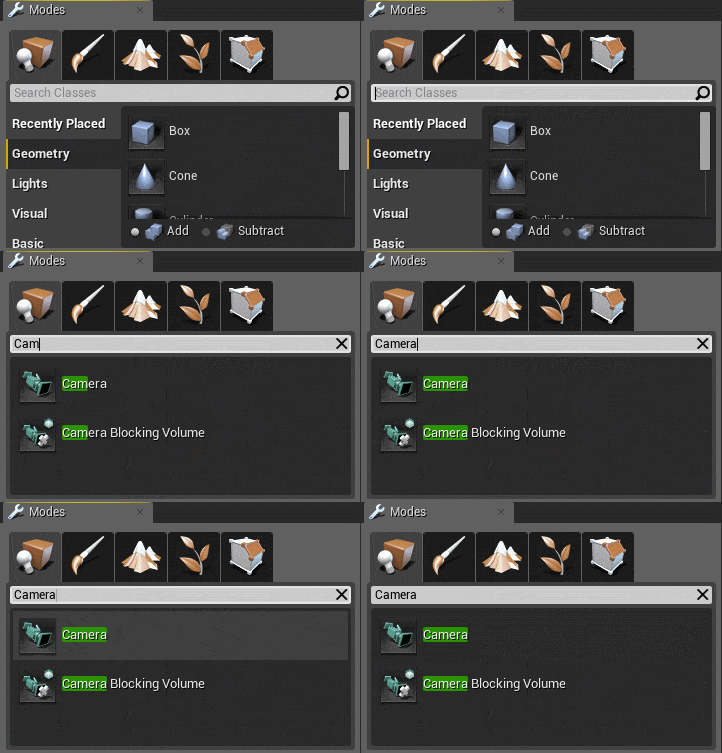
With the camera dragged onto the view, now position it somewhat around the origin like so:
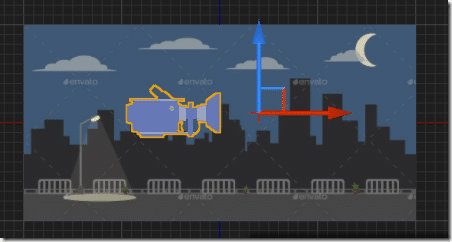
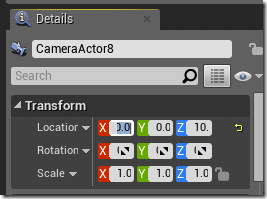
Remember, you can move an object by selecting it, then hitting the W key. You could also have modified it using the Transform settings in the Details panel:
Now switch to Top View ( Alt + J )
We now want to Rotate and Move our camera so its facing the X axis ( where our sprite is ) and out a little bit. Remember you can move using W key and rotate using E. We want it placed something like this:
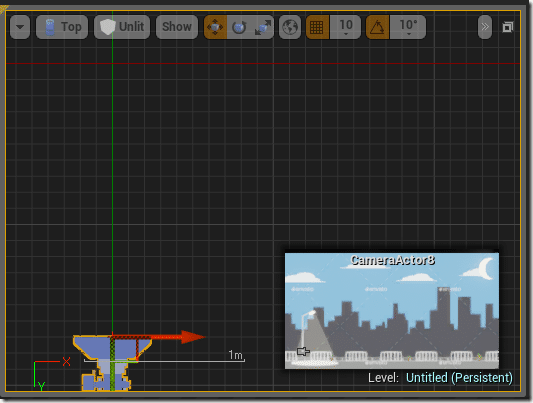
You’ll notice as you move the camera, there is a preview window of what the camera currently sees. Please note, as of right now, this preview only works when the camera is in perspective mode! I assume this is a bug and will hopefully be fixed in the future. For a 2D game you would generally switch it to Orthographic ( see below ), but until this bug is fixed, for development it’s often easier to work in perspective mode.Different Camera Types If you look at the Camera Settings in the Details panel you will notice there are two different settings for Projection, Perspective and Orthographic. Which one you choose has a major impact on the options available and the way the camera performs.
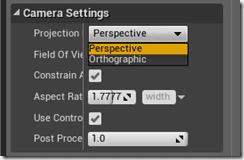
Perspective Camera – the role of a camera is to project a 3D scene into 2D and there is a catch involved. You see, as things get farther away from us they appear to get smaller. Obviously though, this is an illusion, that BMW Z3 racing straight at you at 100mph is obviously not changing in size as it gets closer! A perspective camera however models this behavior, as things get further way they are rendered smaller. When creating a perspective camera you provide a field of view and an aspect ratio. The field of view represents the number of degrees to the arc of what is visible to the camera. The aspect ratio is the ratio of pixels of width to height. Orthographic Camera – the orthographic camera renders things the same way regardless to their depth within the scene. Instead of providing a field of view, you instead provide the width of the rectangle the camera should capture. Generally an orthographic camera is used for 2D games, where you are mostly ignoring the depth component when rendering.
Now when we press play things must certainly work, right? Well… no, not quite. This is because our camera isn’t set as active. For this we are going to create our first blueprint.
Creating a Blueprint
Now let’s create our first Blueprint, a very simple one that is going to set our camera as the active camera.What is Blueprint?
It used to be that gameplay logic was scripted in UnrealScript while the engine was written and extended in C++. Then in Unreal Engine 3 a new visual scripting language, Kismet was added. In Unreal Engine 4, Kismet has been extended and renamed Blueprint while UnrealScript has been taken out to pasture and shot. At the same time through much magic, C++ has been enabled as a scripting language. So what exactly is Blueprint? Well it’s a graph based scripting language where you program by connecting a variety of nodes together in a visual manner. You drag events, functions, branches etc onto the canvas then connect them together to create programs. Impressively a Blueprint can inherit from a C++ class, and a C++ class can inherit from a Blueprint. It’s a different way of programming, and certainly a boon for visual thinkers, but it can also be a bit messy for the more code focused developer.
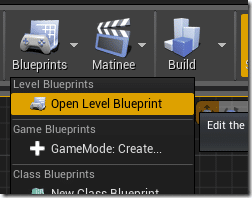
First we need to create a Blueprint for our level. This fortunately is very simple, simply drop down the Blueprint menu in the menu bar and select Open Level Blueprint. The level blueprint is a special blueprint that is available across the entire level. Every level has a level blueprint, even if its empty. Ok, let’s edit the level blueprint:
This will now open up the Blueprint code editor:
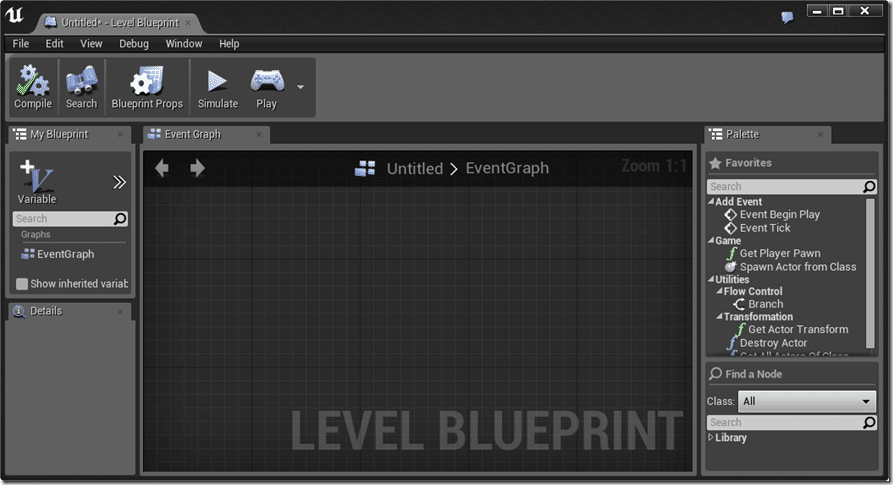
This is a free floating window used to create new blueprints. As you can see, the over all look and feel is very similar to main Unreal Engine. The Palette on the right contains a common list of node types that can be dragged onto the surface. The My Blueprint window on the left has context sensetive information about your blueprint. In many ways it is similar in functionality to the Details panel in the main interface. The Event Graph is where you create your actual blueprint.
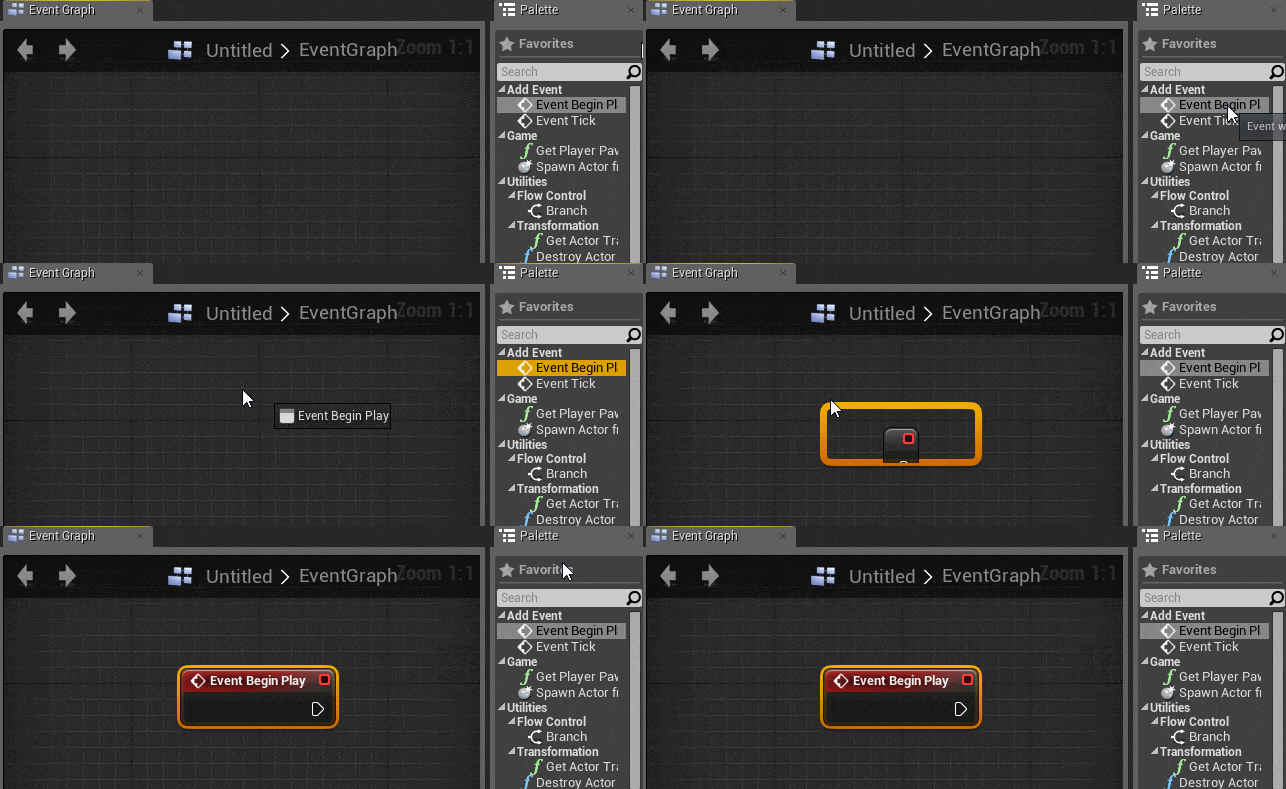
First thing we are going to need something to fire an event to get the ball rolling. There are a number of events available, these are things that happen that can be responded to in your blueprint, like Tick ( called each frame ). In our case however, we simply want to run our code when the game starts. In this case we want to run our code just once when the level is loaded and ready. The event we want is the Event Begin Play node. You may notice its in the Palette on the right. Simply locate the Event Begin Play node and drag it onto the the graph:
In addition to dragging the node from the Palette, you can also simply right quick and do a quick search for the node by typing it’s name like so:
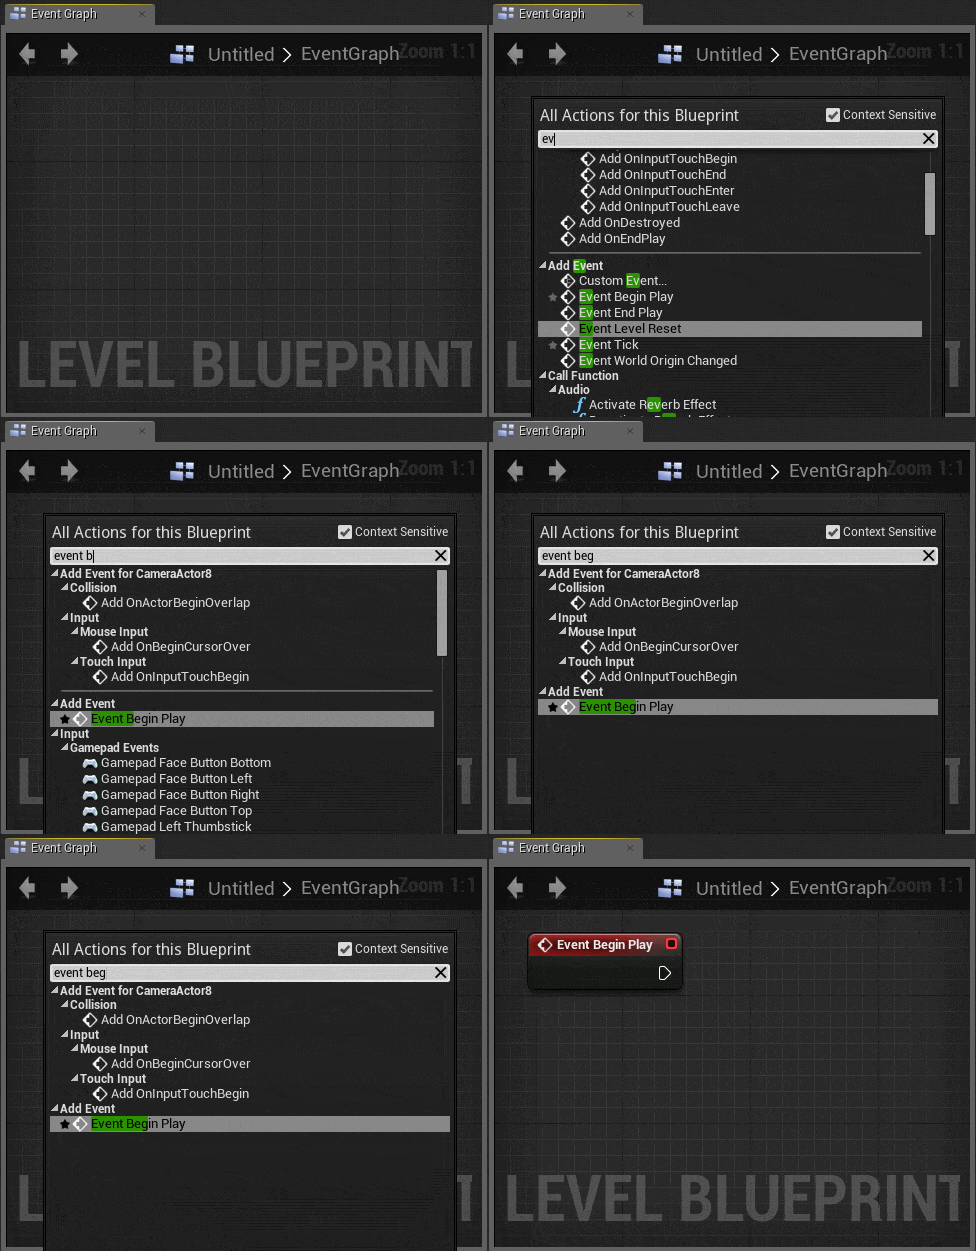
In the long run, especially if you are a coder, you will probably find yourself using the second approach far more often… both have the exact same result.
Ok, we now have an event to work with… let’s do something with it. What we want to do is set the view to our active camera. This is done with a function called “Set View Target with Blend”. This is created the same way as shown above, with a small catch. Simply right click the graph and type Set View and it should show in the list. However, by default Blueprints try to guess the context you are working in to streamline the search results. In this case however, we do not want it to do that! Make sure the Context Sensitive checkbox is not checked, or it will not appear in the results:
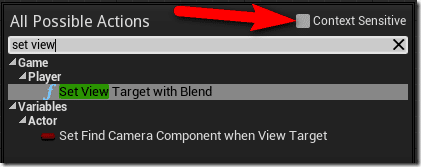
Left click the Set View Target with Blend function and it will be added to the graph.
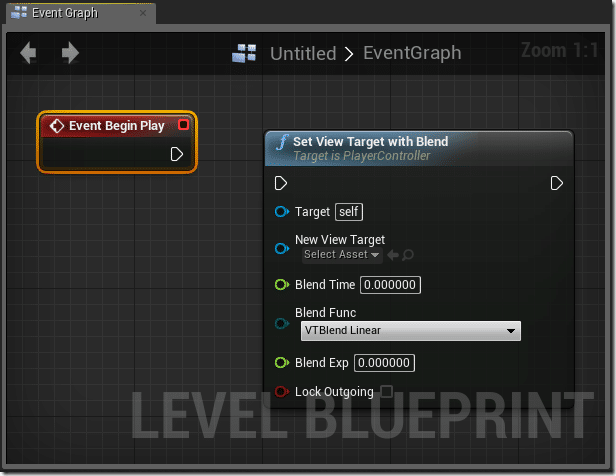
Looking at the left hand side of the function you can see that it takes a number of incoming connections, you can think of these like function parameters, although they are often completely optional. If you hover over the connector you can see the type it expects:
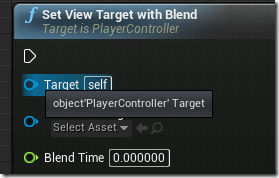
Here you can see that it takes a parameter called Target of type object. It also takes another parameter called New View Target, also of type object. Basically these are the new target to use ( our camera ) and the object to update ( our view controller ). So now we need both of them!
First off, lets bring in a reference to our camera. Go back to the main Unreal Editor and make sure that your camera is selected in the Scene Outliner:
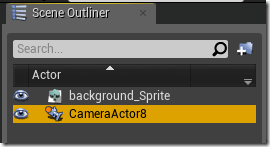
With the camera selected, right click the graph in the Blueprint editor and the option Add a Reference to CameraActor8 should be available. This is a quick shortcut to add a reference to the selected scene object.

Now we want to get the Player Controller. This is a special class within the game, there is always at least one. We will actually cover this class in a bit more detail shortly when we create our own. For now just realize it’s this class that controls the active camera.

Now our graph should look something like this:
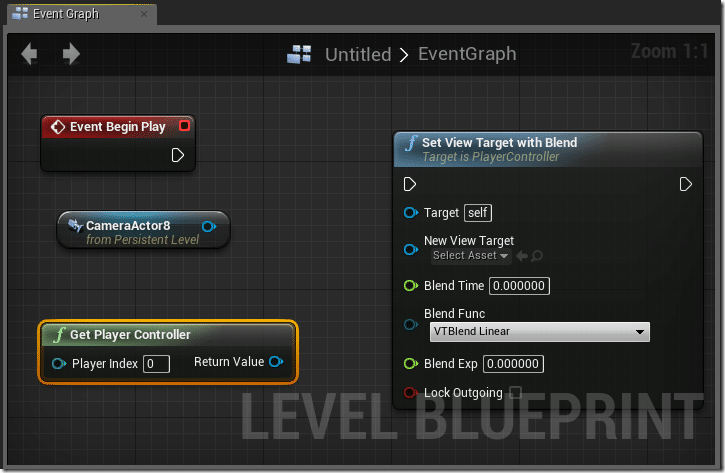
It’s probably important to note at this point, you can arrange things however you wish on the graph. Simply left click and drag a node to relocate it. You can also use the scroll wheel to zoom in and out in the blueprint editor.
It’s also worth noting that Nodes are colour coded and these colours have a meaning. A red node is a starting point for execution of an event. A Green node is generally a function that “gets” something. A blue node is a function or event ( if it’s a function there is an F in the top left corner ) that takes input and may or may not have output.
So at this stage we now have an event that is going to fire when the game starts playing, we have a function we want to call that sets the view of the selected object, and we have two object references, our camera and our player controller. Everything we need, now we just have to wire them up!
You may notice that the Event Begin Play node has a white play icon on it’s left. This means that this node executes something. You may then notice that the Set View Target with Blend has the same icon on it’s left and right. The left icon indicates that it can be executed, while the right one means it can execute something else. Connecting these nodes together is how you make your program do something.
At the same time you may notice the Get Player Controller and CameraActor8 nodes both have a blue return value connector on their right hand side. If you are a programmer, you can think of this as the return value from that node. As mentioned earlier, the Set View Target with Blend function has a number of connectors down the left, these are the inputs it accepts. As you can see, they are nicely colour coded, so you can see (by default) what works with what. Now its simply a matter of wiring everything up. Simple drag the click and drag between pins you wish to connect like so:
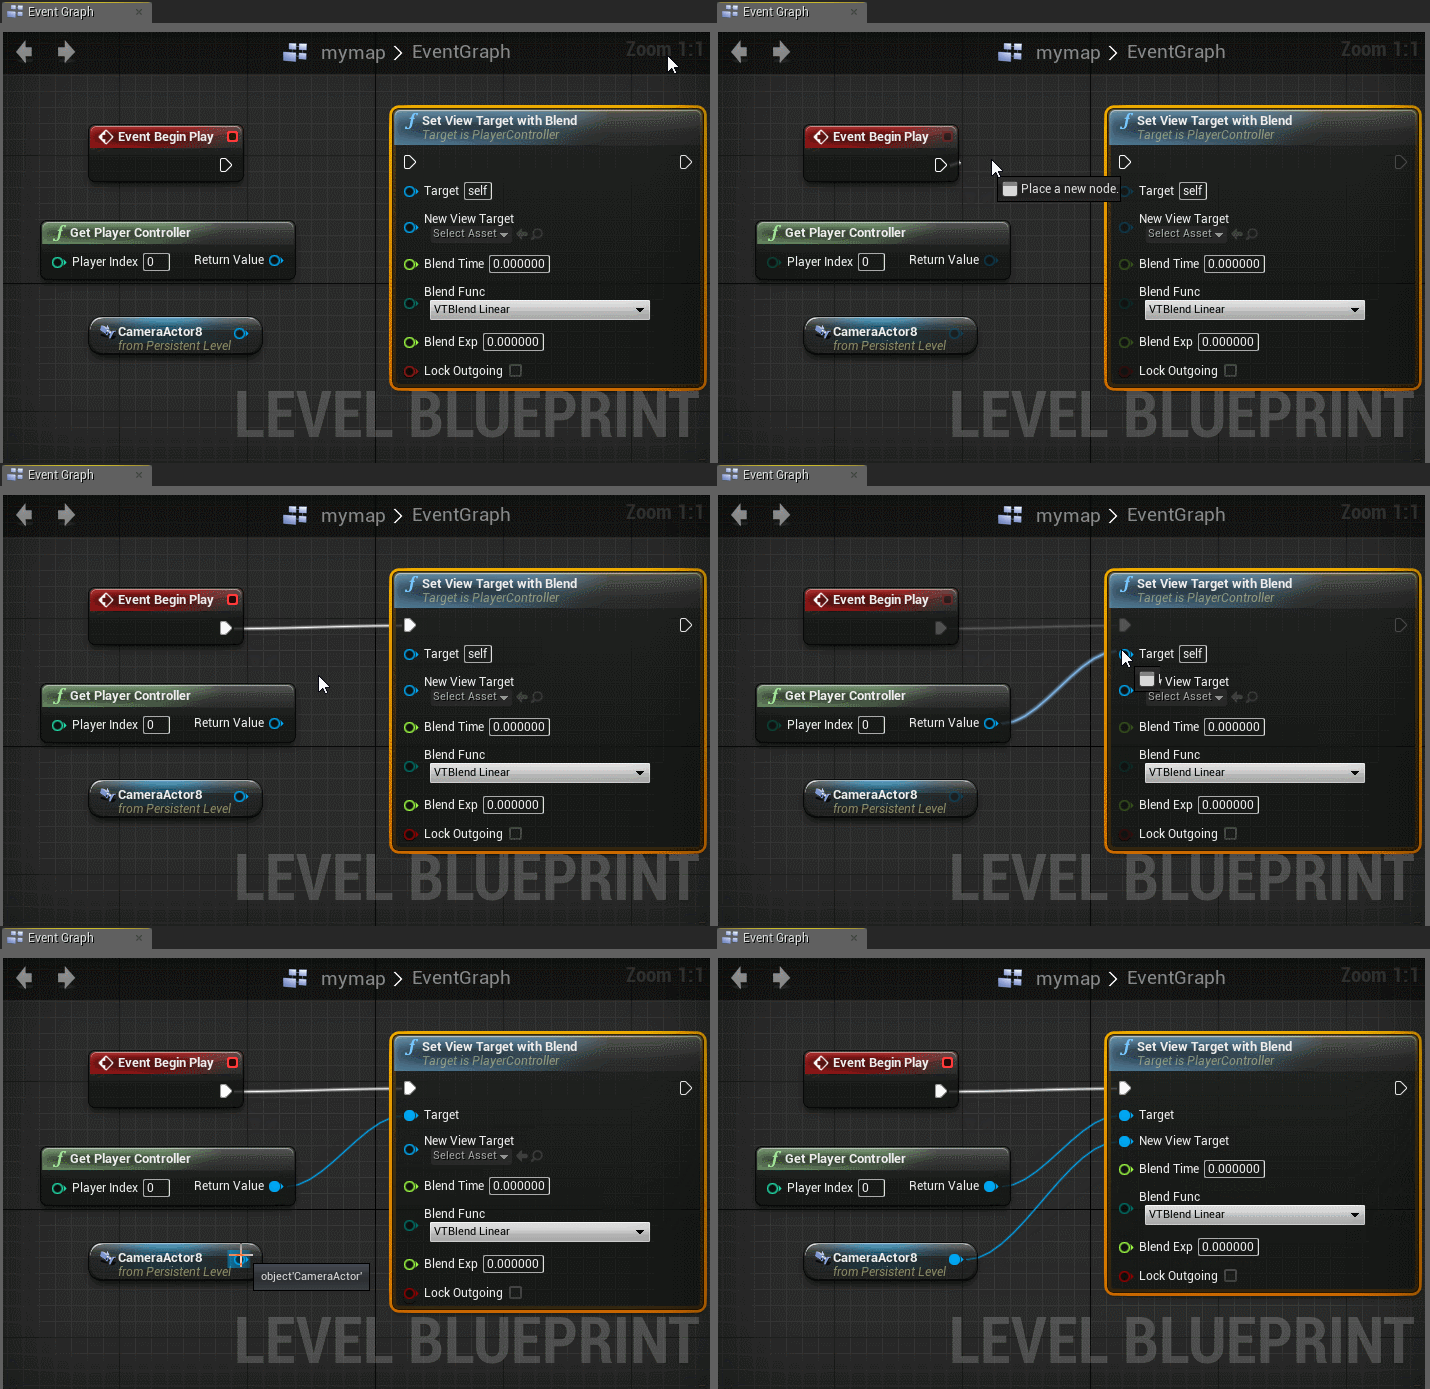
When you make a new Blueprint, or make changes to an existing one, you have to compile, you can tell by the ? mark over the compile button:

Assumiing everything went ok, you should now see:

If you want to test the program flow of your new Blueprint, you can hit the Simulate button and you can see how data will be changed as the program executes.
Hit the simulate button:

And you should see:
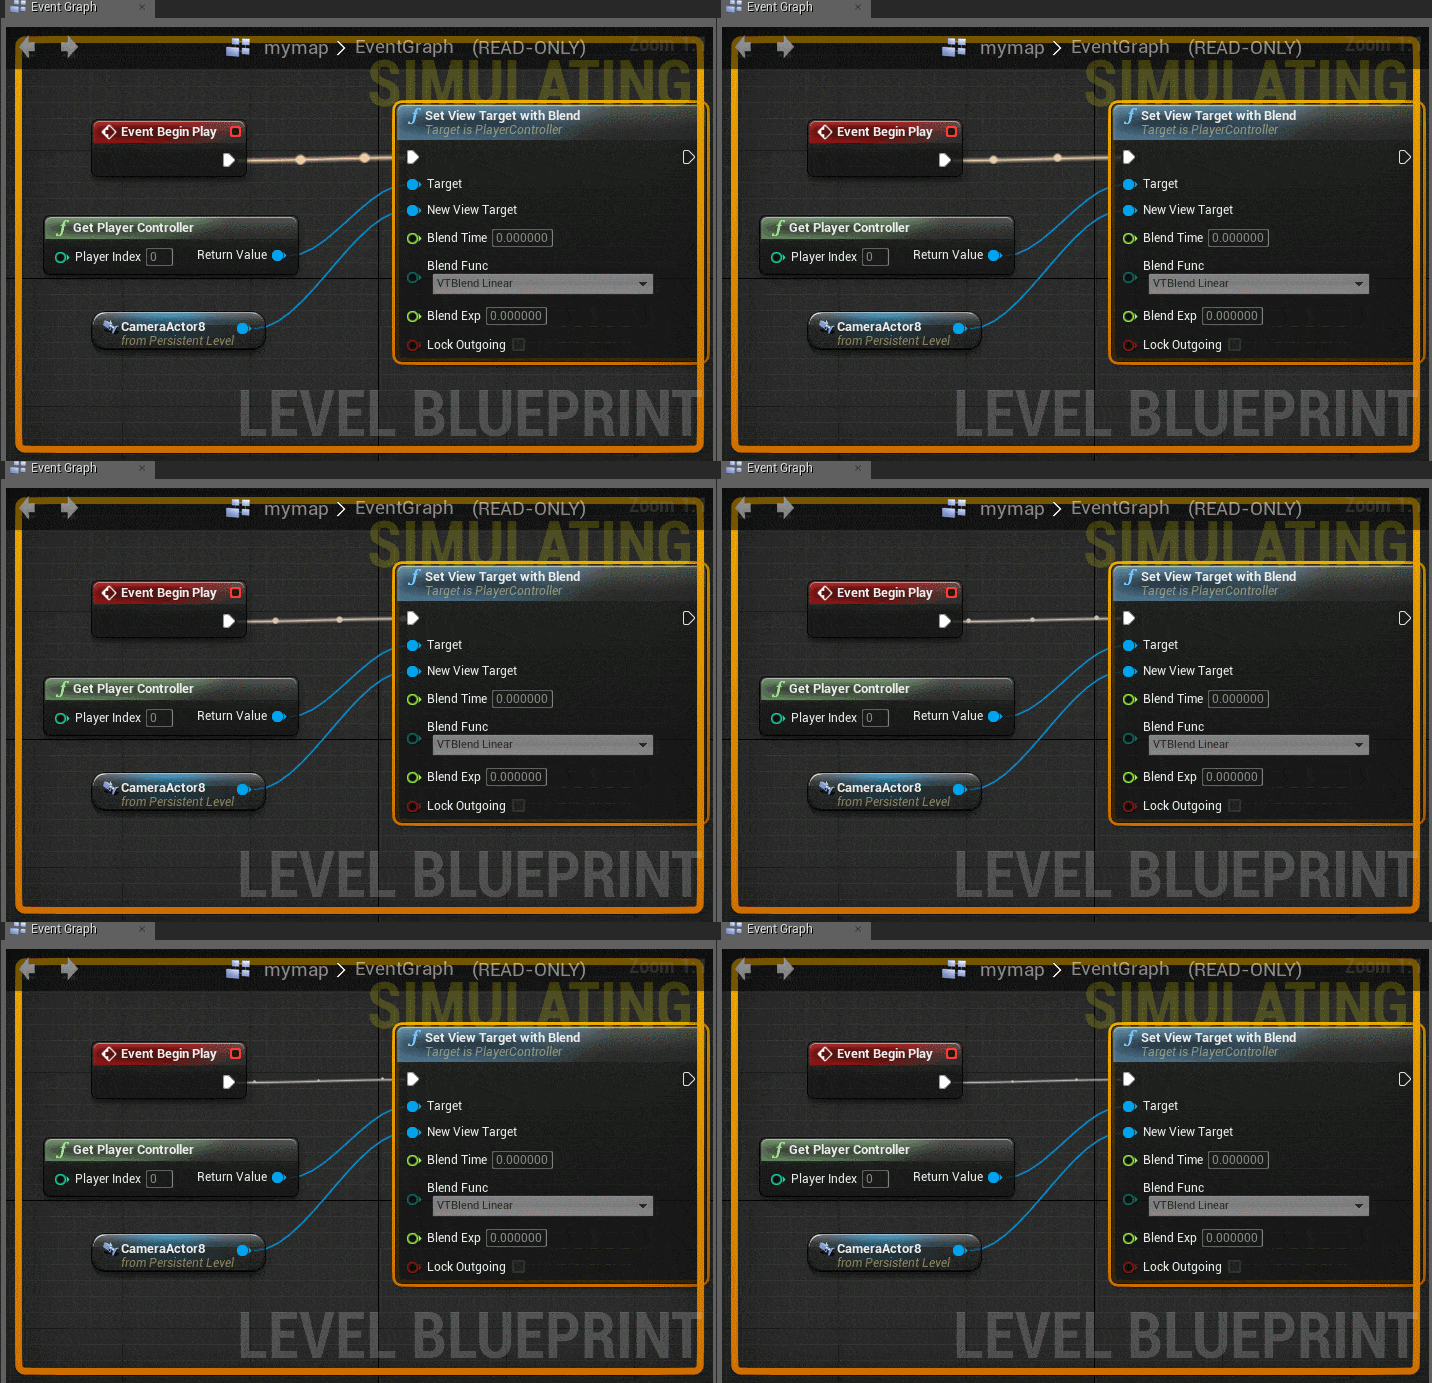
Obviously in much more complicated workflows, this simulation is much more useful.
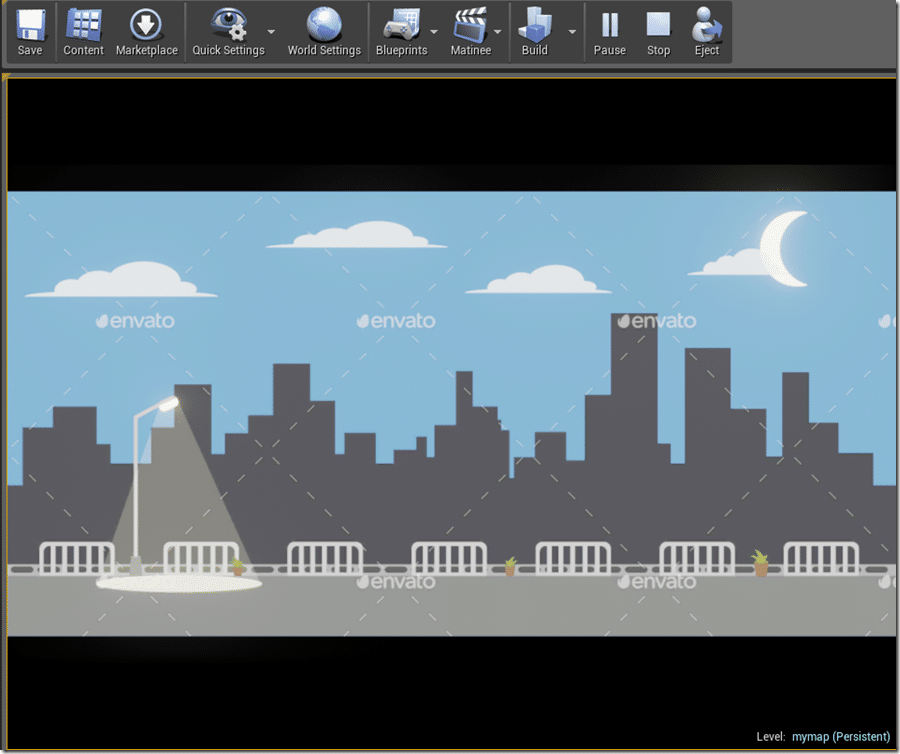
Now when we run out game, our camera will be set active when the game starts. Congratulations, you just created your first blueprint!
Click Play and you should see:
Adding the Hello to Hello World
We are almost to the end. One final thing we need to finish our application is well… Hello World.
Adding text to Unreal is extremely easy. In the Modes panel, enter “text” in the search field and select Text Render:
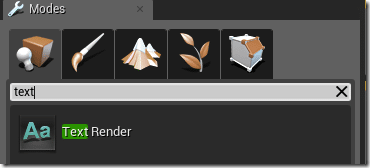
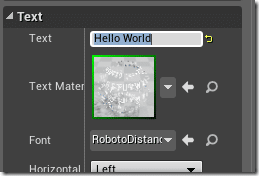
Drag one into your scene. Then in the details, set the Text to Hello World, like so:
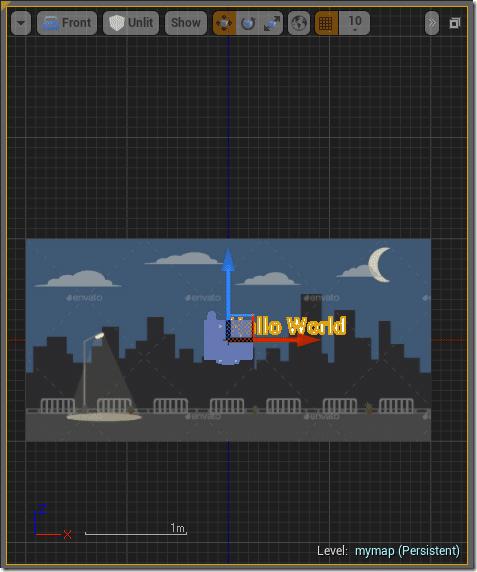
Your scene should now look something like this:
Now when you run it:
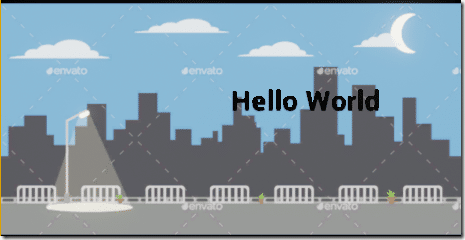
Congratulations! We have now finished our first ever Unreal Engine application!
There is one last very important thing to discuss before we finish here. When you added the Hello World text to your game, there is a very good possibility that it didn’t show up when you press play. This is because of the drawing order in your 2D game. While 2D games don’t have depth, they do have drawing order and this is important to determine what is drawn on top of what. In this case the Hello World text needs to be closer to the camera than the background, or the background will be drawn over top of it. It’s probably easiest to understand this if we look at the scene in 3D:
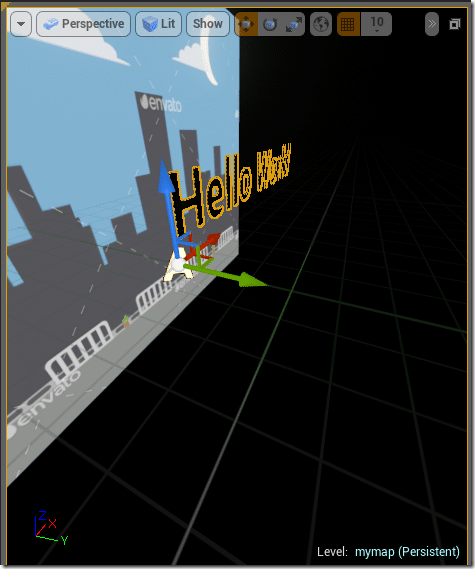
In practical terms, this means that things that need to be drawn over other things need to have a higher value on the Y axis. In this case our background image is drawn at y=0, while the Hello World text is drawn at Y=70.Which way is up?
This is an important and difficult to understand concept about Unreal engine, especially when working in 2D. You are probably used to X being left/right and Y being up/down, but that isn’t the way it works in Unreal, and that is because Unreal is a 3D engine and chose a Z-up coordinate system. This means that Z represents up and down on your screen, and Y represents depth or in/out if you could put your hand into the screen. Different applications use different coordinate systems and converting between them is common place. Often it’s simply a matter or rotating things 90 degrees.
Conclusion
We covered a fair bit there, I hope that was useful. We however did not cover Character Controllers, and the reality is, you generally will create a character controller which controls the camera. We also didn’t cover game modes, we will be covering both of these topics shortly! So while we didn’t do anything “wrong” in this example, keep in mind you generally will do things slightly differently in the end.
Finally, if when you press play you are seeing a circle drawn in front of your scene, don’t worry, this is the default pawn being drawn, another topic we will discuss shortly, and something that is easily removed.
