As you may have guessed from the title, it today’s tutorial we are going to look at working with Sprites using Unreal Engine. We already looked briefly at creating a sprite in the previous tutorial, but today we are going to get much more in-depth.
Before you can create a sprite, you need to have a texture to work with. Unreal Engine supports textures in the following formats:
- .bmp
- .float
- .pcx
- .png
- .psd
- .tga
- .jpg
- .dds and .hdr ( cubemaps only, not applicable to 2D )
That said, not all textures are created equal. Some formats such as bmp, jpg and pcx do not support an alpha channel. This means if you texture requires any transparency at all, you cannot use these formats. Other formats, such as PSD ( Photoshop’s native format ) are absolutely huge. Others such as BMP have very poor compression rates and should generally be avoid. At the end of the day, this generally means that your 2D textures should probably be in png or tga formats. Unreal also wants your textures to be in Power of Two resolutions. Meaning that width/height should be 2,4,8,16,32 … 512, 1024, 2048, etc… pixels in size. It will work with other sized textures, but MIP maps will not be generated (not a big deal in 2D) and performance could suffer(a big deal). Keep in mind, your sprite doesn’t need to use all of the texture, as you will see shortly. So it’s better to have empty wasted space then a non Power of Two size.
* Personally I’ve experienced all kinds of problems using PNG, such as distorted backgrounds, while TGA has always worked flawlessly.
Adding a Texture to your game
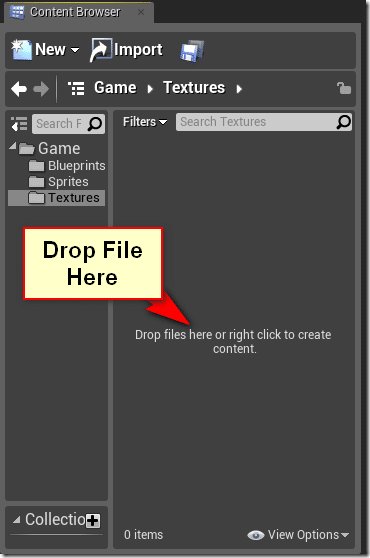
Adding a Texture is simple as selecting a destination folder on the left, then dragging and dropping the appropriate file type (from the list above) from Finder/Exporter to the Content Browser window, shown below:
Alternately, you can click New –> Import
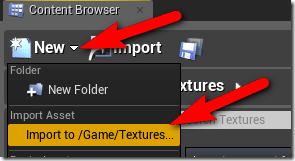
Then navigate to the file you wish to use and select it.
You texture should now appear in the Content Browser.
Texture Editor
Now that you have a texture loaded, you can bring it up in the Texture Editor by either double clicking or right clicking and selecting Edit. Here is the texture editor in action. It is a modeless window that can be left open indepently of the primary Unreal Engine window.
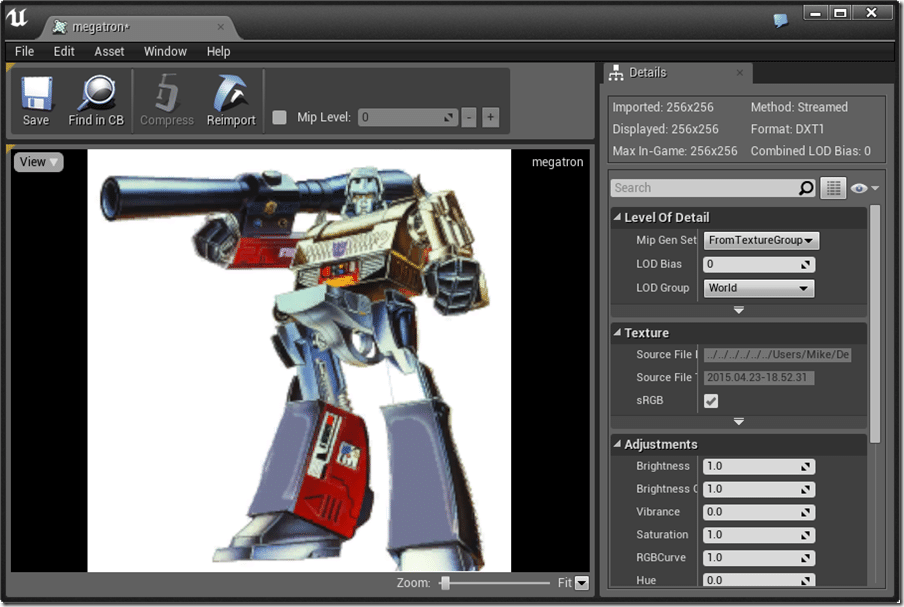
The Texture Editor enables you to make changes to your image, such as altering it’s brightness, saturation, etc… you can also change compression amounts here. However, for our 2D game, we have one very critical task… turning off MIP maps.What’s a MIP Map?
History lesson time! MIP stands for multum in parvo, Latin for “much in little”. Doesn’t exactly answer the question does it? Ok, lets try again. Essentially a MIP map is an optimiziation trick. As things in the 3D scene get further and further from the camera, they need less and less detail. So while right up close to an object you may see enough detail to justify a 2048×2048 resolution texture. However, as the rendered object gets farther away in the scene, the texture resolution doesn’t need to be nearly as high. Therefore game engines often use MIPMaps, multiple resolution versions of the same texture. So, as the required detail gets lower and lower, it can use a smaller texture and thus less resources.
You know when you are playing a game and as you move rapidly, often textures in the background “pop” in or out? This is the mipmapping system screwing up! Instead of seamlessly transitioning between versions, you as the user are watching the transition occur.
Support for MIP maps is pretty much automatic in Unreal Engine. However in the case of a 2D game, you don’t want mipmaps! The depth never changes, there should never be different resolution versions of each texture. Therefore, we want to turn them off, and the Texture Editor is the place to do it. Simply select Mip Gen Setting and select NoMipmaps.
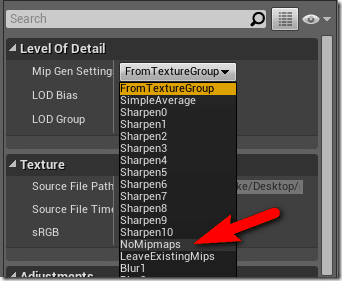
Before you close the Texture Editor, be sure to hit the Save button.
Creating A Sprite
Now that we have a Texture, we can create a sprite. This is important, as you can’t otherwise position or display a Texture on it’s own. So, then, what is a Sprite? Well the nutshell version is, it’s a graphic that can be positioned and transformed. The name goes back to the olden days of computer hardware, where there was dedicated hardware for drawing images that could move. Think back to PacMan… Sprites would be things like PacMan himself and the Ghosts in the scene.
In practical Unreal Engine terms, a Sprite has a texture ( or a portion of a texture, as we will see shortly ) and positional information. You can have multiple sprites using the same texture, you can have multiple sprites within a texture, and the sprites source within a texture can also change. Don’t worry, this will make sense shortly. In the meantime, you can think of it this way… if you draw it in 2D in Unreal Engine… it’s probably a Sprite!
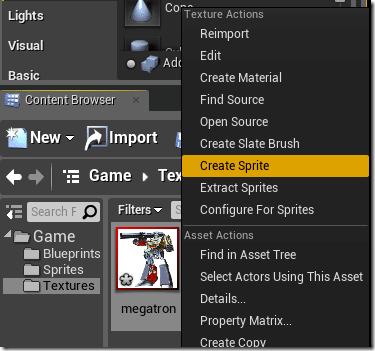
Once you have a Texture in your project, you can easily create a sprite using the entire texture by right clicking the Texture and selecting Create Sprite, like so:
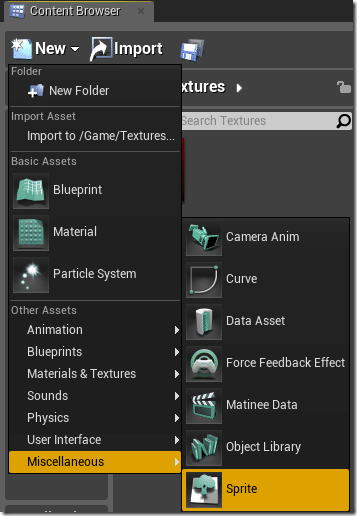
You can also create a new sprite using New->Miscellaneous->Sprite
This will then open up the Sprite Editor. If you created the Sprite using an existing texture, the texture will already be assigned. Otherwise you have to do it manually. Simply click the Texture in the Content Browser. Then click the arrow icon in the Details panel of the Sprite Editor on the field named Source Texture:

Your texture should now appear like so:
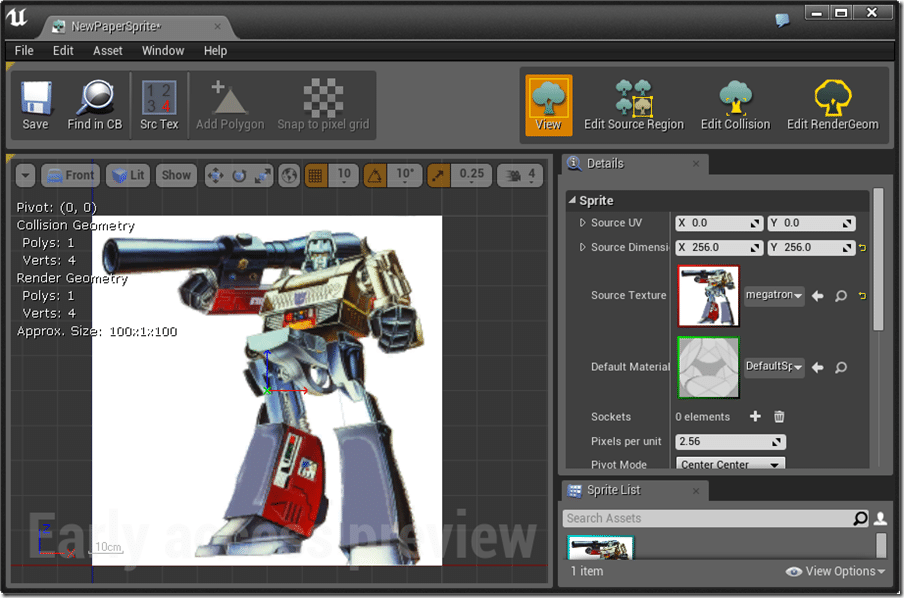
You can pan and zoom the texture in the view window using the right mouse button and the scroll wheel.
Now remember earlier when I said “all or part of the texture”? Well a Sprite can easily use a portion of a texture, and that’s set using the Edit Source Region mode:

This changes the view panel so you can now select a sub rectangle of the image to use as your sprite source. For example, if you only wanted to use Megatrons head, you could change it like:
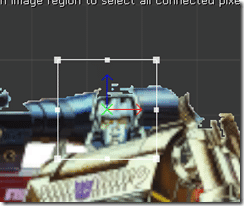
Then when you flip back to View, your texture will be:
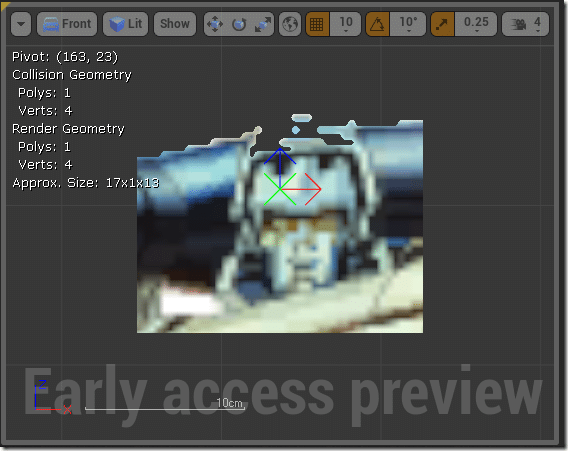
When dealing with sprite sheets, this becomes a great deal more useful, as you will see shortly.
There are a couple other critical functions in the Sprite Editor that we will cover later. Most importantly, you can define collision polygons and control the physics type used. We will look at these functions later on when we discuss physics.
Two very important settings available here are:

Pixels Per Unit and Pivot Mode.
Pixels per unit is exactly what it says… a mapping from pixels to Unreal units, which default as mm. So right now, each pixel is 2.56mm in size. Pivot Mode on the other hand determines where a sprite is transformed relative to. So when you say rotate 90 degrees, you are rotating 90 degrees around the sprites center by default. Sometimes top left or bottom left can be easier to work with, this is where you would change it.
The final important point here is the Default Material, seen here:

This part is about to look a lot scarier than it is! Just know up front, if you prefer, you can ignore this part of Unreal Engine completely!
Materials
Every mesh in Unreal Engine has a material attached, and when you peel back all of the layers, a Sprite is still ultimately a mesh… granted, a very simple one. There are two default options available to you included in the engine, although depending on how you created your project, you may have to change your view settings to access them:
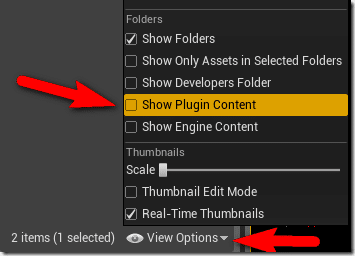
Then you will find the two provided materials for sprites:
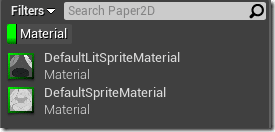
The name kind of gives away the difference… DefaultLitSpriteMaterial takes into account lighting used in the scene. DefaultSpriteMaterial ignores lighting completely. Unless you are using dynamic lighting, generally you will most likely want the DefaultSpriteMaterial. You can edit the Material by double clicking:
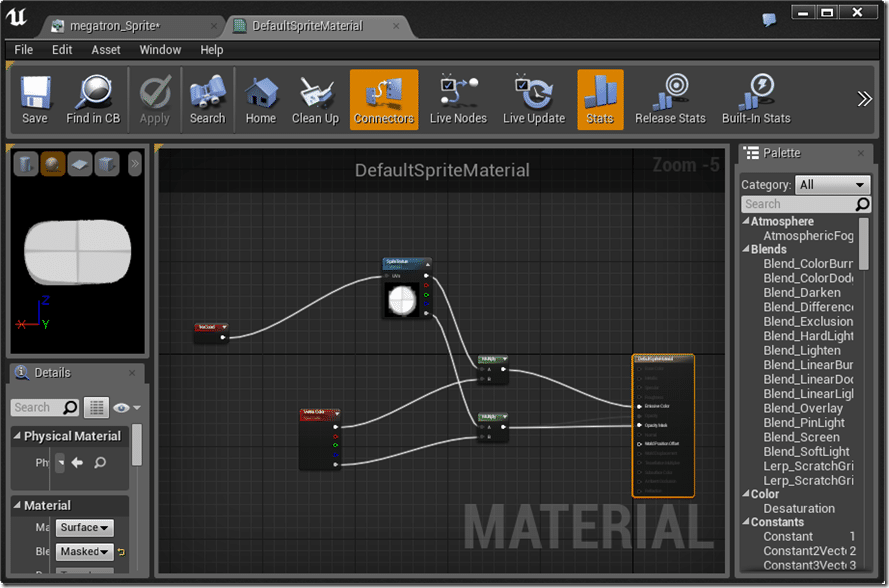
This is the Material Editor and it is used to create node based materials. Basically it’s a visual shader programming language, behind the scenes it ultimately is generating a GLSL or HLSL shader in the end. Truth is the process is way beyond the scope of what I can cover here and in most cases you will be fine with the default shader. If you do want to get in to advanced graphic effects, you will have to dive deeper into the Material Editor.
Creating a Sprite
Now that we have our texture and made a Sprite from it, it’s time to instance a Sprite. That is, add one to our scene. This is about as simple as it gets, simply drag a Sprite from the Content Browser to the Scene, like so:
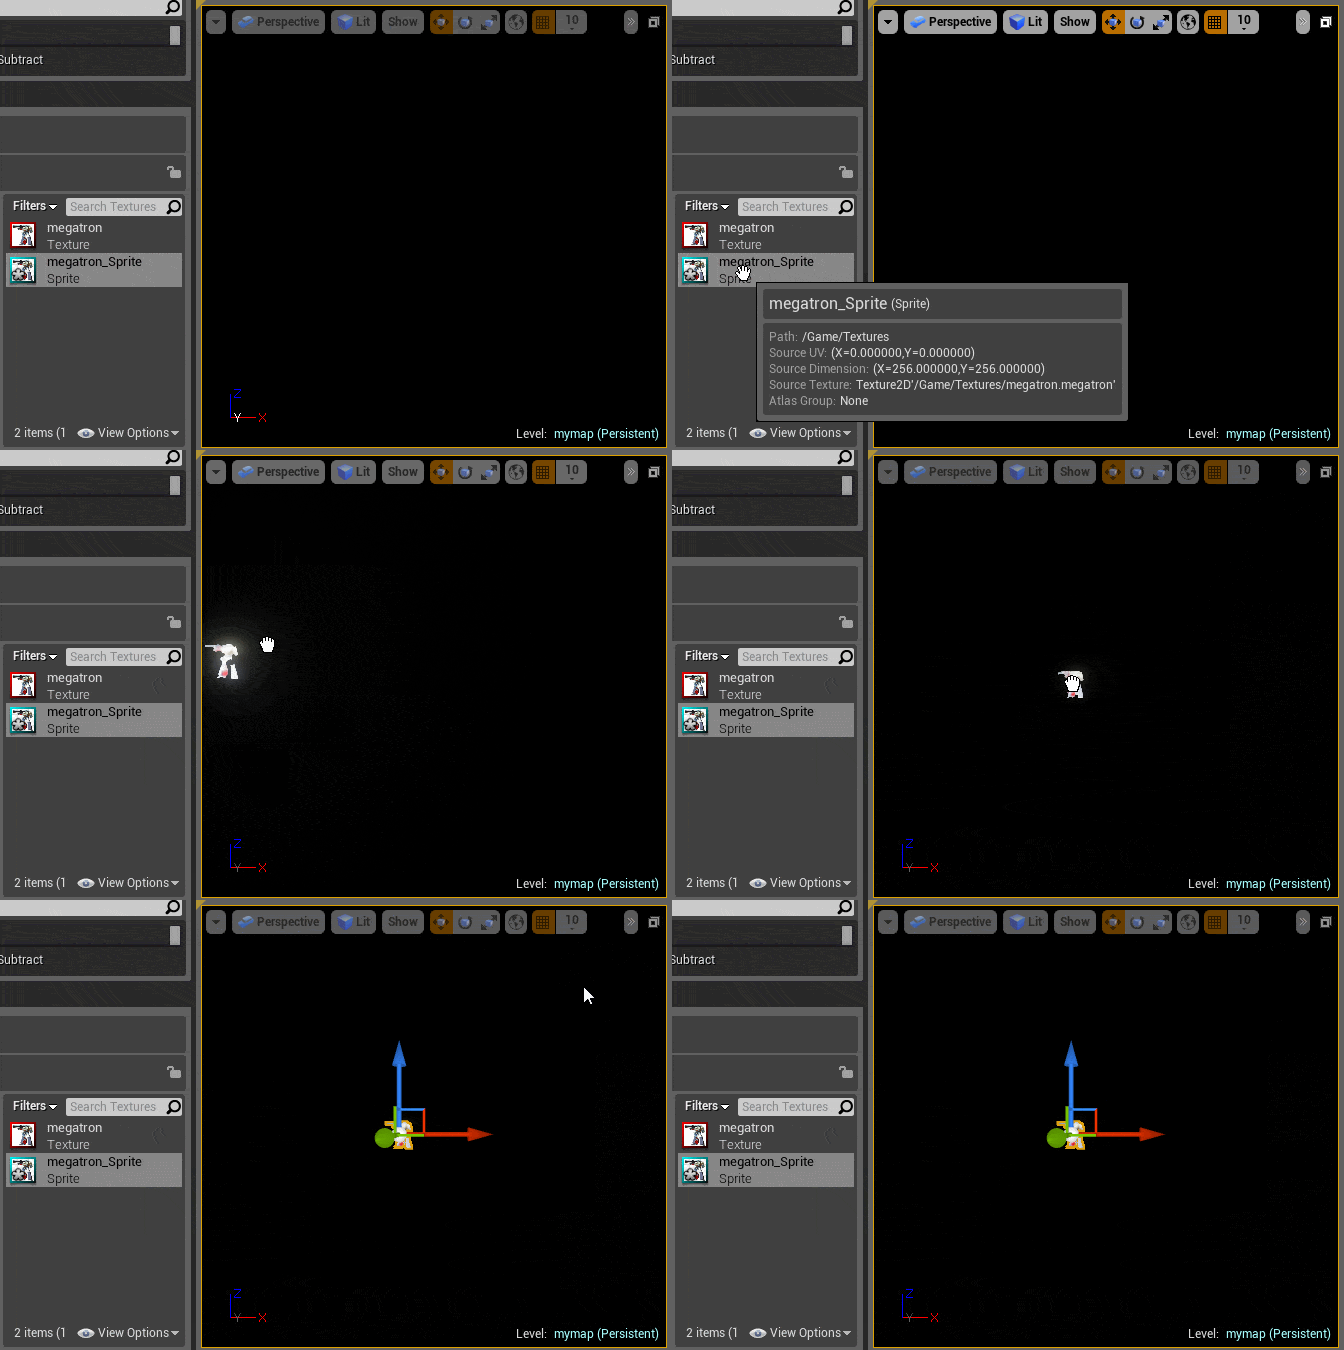
Now that you’ve created a Sprite, you will notice that there area number of details you can set in the Details panel:
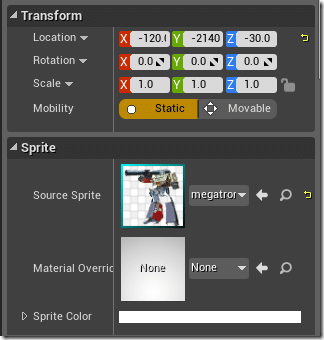
All sprites by default share the same source sprite and material, but you can override it on an instance by instance basis. For example, if you wanted a single sprite to be lit and all the others to be unlit, you can change the Material Override on that single sprite. Obviously using Details you can also set the sprites positioning information and some other settings we probably wont need for now.
Next up, we will look at sprite animation using a flipbook.
