Let me start off by saying that exporting from Blender is always a pain in the ass. This experience didn’t prove to be an exception. I will describe the process in some detail.
First and foremost, Blender 2.69 DIDNT work. At least not for me, not matter what I did, Blender 2.69 would not export texture information in FBX format. This cost me many hours of my life. Once I switched to 2.68 everything worked. Your mileage may vary, but in my experience, 2.69 simply would not work. Another thing, something I lost another couples hours to… you need to use GL2 in LibGDX!
A lot of this process takes place on the Blender end. I obviously don’t go into depth in how to use Blender. If you are completely new to Blender, I highly suggest you run through this tutorial, it will teach you pretty much everything you need to know to follow along.
STEP 1: Model your … model
This step is pretty straight forward, you need to model an object to be exported. I created this:
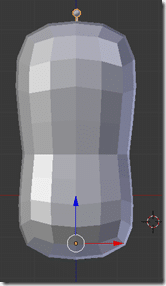
I took a standard cube, went in edit mode, extrude the face, select all and sub-divided it.
STEP 2: Texture your model
Not complete sure why, but every model that is exported to FBX seems to require a texture. Once again, YOU NEED A TEXTURE.
Next, FBX does NOT include the texture information. This means you have to save your texture to an image file, and add that image to the assets folder of your project.
You need to UV Unwrap your object. In Edit mode you can accomplish this by selecting all, then UV Unwrap->Smart UV Project. In the UV/Image window, it should look like:
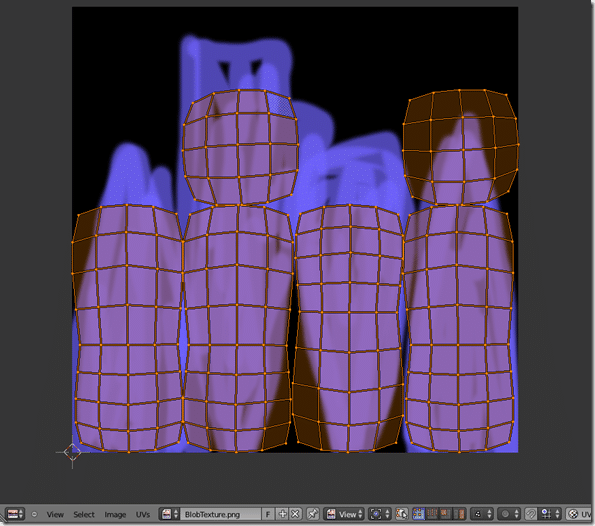
There are a couple limitations here. You need to make sure you texture face enabled:
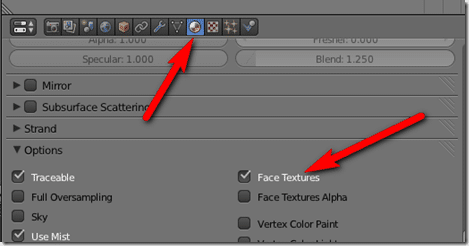
With your object selected, in materials, make sure Face Textures is selected.
Next be sure to select a texture:
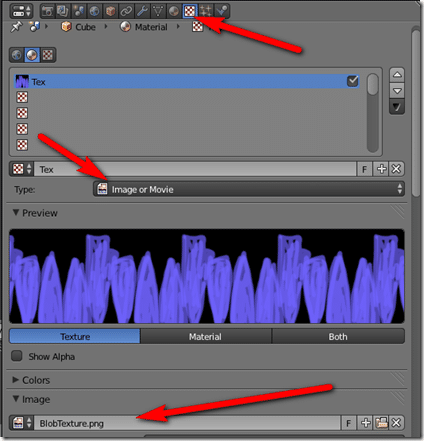
Type is Image, then under the Image section, select your texture image. This is the file that needs to be added to your assets folder.
Scroll down to Mapping, change Coordinates to UV, select your UVMap from the drop down, leave Project as flat:

At this point you can check if your texture is right by switching over to GLSL in the properties panel ( hit N key ) of the 3D View.
STEP 3: Set up your rig
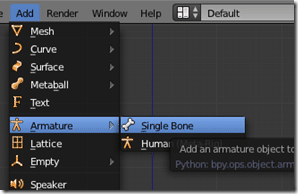
This part is a bit tricky if you’ve never done it before. You can create a series of named animations that will be exported. You animate by setting key frames. First you need to setup up your skeleton. Simply select Add->Armature->Single Bone.
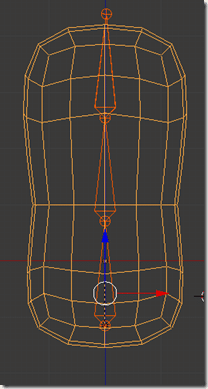
Position the bone within your model. Switch into edit mode and select the end “knob” of the bode and select Extrude ( E ) to create more bones. Repeat until it looks like this: ( FYI, you can use Z to make a model see through, handy when placing bones ).
Next you want to set the bones to manipulate the underlying mesh.
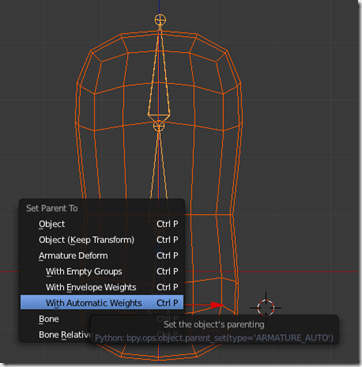
In Object mode, select your mesh, then shift click select the underlying bones. Now parent them by hit CTRL + P and select “With automatic weight”
STEP 4: Animate your model
Now you can set up your animations. Since we want multiple animations in the same file we are doing this slightly differently.
First set up your duration. In the timeline, set end to the last frame of your longest animation:

Bring up a dopesheet view, then select the Action Editor:

Click the + icon, or new button ( depending if you have any existing animations, your options will change )

Name the animation.
Now go to your first frame ( Frame 1 using the controls in timeline ).
Select your bone/armature and switch to POSE mode. Press A to select all bones.
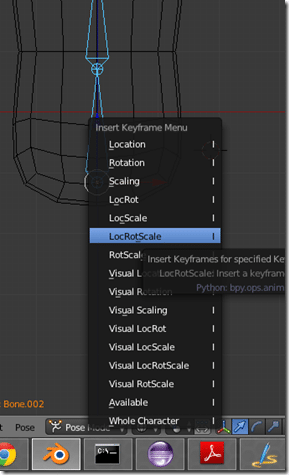
Create a keyframe by hitting I ( as in “eye” ) then in the resulting menu select LocRotScale ( as in, Location, Rotation and Scale ), which will create a keyframe tracking those three things.
Now advance to the next frame you want to create a keyframe upon, rotate, scale or move your bone, then select all bones again and create another key.
You can create multiple named animation using the same process. SImply click the + Icon, name another animation, go back to frame 1, position it, set a keyframe, animate, setting key frames.
STEP 5: Exporting to FBX
This part is pretty hit or miss. You have a couple options, you can select just your mesh and armature, or simply export everything.
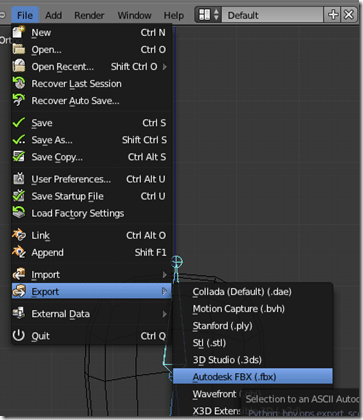
Then select File->Export->Autodesk FBX:
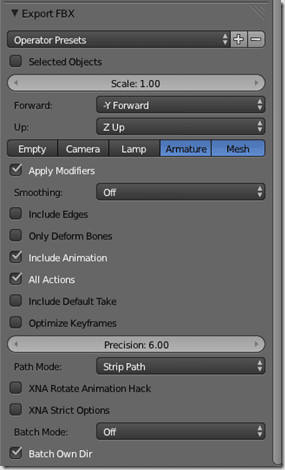
The documents say to stay with the default axis settings and the FBX converter will take care of the rest. Frankly I could never get this to work.
These are the settings I am currently using:
STEP 6: Convert to 3dgb format and add to Eclipse
Open a command prompt where ever you exported the FBX. Make sure your texture file is there as well. If you haven’t already, make sure to download fbx-conv, extract that file to the directory you exported your FBX to. Open a command prompt and CD to that directory. Next type:
fbx-conv-win32 –f yourfilename.fbx
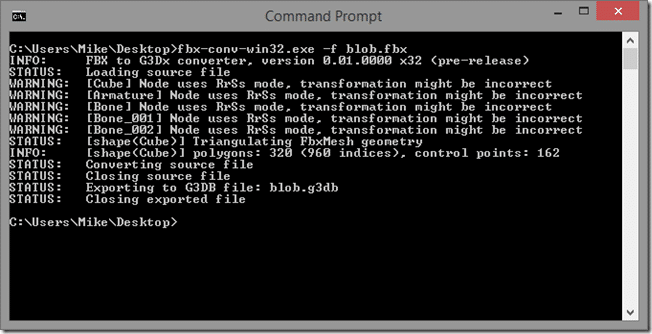
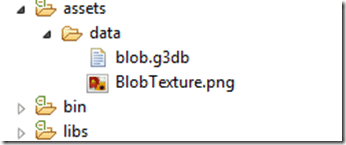
This should generate a g3db file. Copy it and your textures to the assets/data directory of your android project:
STEP 7: The code
This code demonstrates how to load a 3D model and play multiple animations. There is no description, beyond the code comments. If you have any questions the comments dont cover, ask them below!
package com.gamefromscratch;

import com.badlogic.gdx.ApplicationListener;
import com.badlogic.gdx.Files.FileType;
import com.badlogic.gdx.Gdx;
import com.badlogic.gdx.graphics.GL10;
import com.badlogic.gdx.graphics.PerspectiveCamera;
import com.badlogic.gdx.graphics.g3d.Environment;
import com.badlogic.gdx.graphics.g3d.Model;
import com.badlogic.gdx.graphics.g3d.ModelBatch;
import com.badlogic.gdx.graphics.g3d.ModelInstance;
import com.badlogic.gdx.graphics.g3d.attributes.ColorAttribute;
import com.badlogic.gdx.graphics.g3d.loader.G3dModelLoader;
import com.badlogic.gdx.utils.UBJsonReader;
import com.badlogic.gdx.graphics.g3d.utils.AnimationController;
import com.badlogic.gdx.graphics.g3d.utils.AnimationController.AnimationDesc;
import com.badlogic.gdx.graphics.g3d.utils.AnimationController.AnimationListener;


public class ModelTest implements ApplicationListener {
    private PerspectiveCamera camera;
    private ModelBatch modelBatch;
    private Model model;
    private ModelInstance modelInstance;
    private Environment environment;
    private AnimationController controller;

    @Override
    public void create() {
        // Create camera sized to screens width/height with Field of View of 75 degrees
        camera = new PerspectiveCamera(
                75,
                Gdx.graphics.getWidth(),
                Gdx.graphics.getHeight());

        // Move the camera 5 units back along the z-axis and look at the origin
        camera.position.set(0f,0f,7f);
        camera.lookAt(0f,0f,0f);

        // Near and Far (plane) represent the minimum and maximum ranges of the camera in, um, units
        camera.near = 0.1f;
        camera.far = 300.0f;

        // A ModelBatch is like a SpriteBatch, just for models.  Use it to batch up geometry for OpenGL
        modelBatch = new ModelBatch();

        // Model loader needs a binary json reader to decode
        UBJsonReader jsonReader = new UBJsonReader();
        // Create a model loader passing in our json reader
        G3dModelLoader modelLoader = new G3dModelLoader(jsonReader);
        // Now load the model by name
        // Note, the model (g3db file ) and textures need to be added to the assets folder of the Android proj
        model = modelLoader.loadModel(Gdx.files.getFileHandle("data/blob.g3db", FileType.Internal));
        // Now create an instance.  Instance holds the positioning data, etc of an instance of your model
        modelInstance = new ModelInstance(model);

        //fbx-conv is supposed to perform this rotation for you... it doesnt seem to
        modelInstance.transform.rotate(1, 0, 0, -90);
        //move the model down a bit on the screen ( in a z-up world, down is -z ).
        modelInstance.transform.translate(0, 0, -2);

        // Finally we want some light, or we wont see our color.  The environment gets passed in during
        // the rendering process.  Create one, then create an Ambient ( non-positioned, non-directional ) light.
        environment = new Environment();
        environment.set(new ColorAttribute(ColorAttribute.AmbientLight, 0.8f, 0.8f, 0.8f, 1.0f));

        // You use an AnimationController to um, control animations.  Each control is tied to the model instance
        controller = new AnimationController(modelInstance);
        // Pick the current animation by name
        controller.setAnimation("Bend",1, new AnimationListener(){

            @Override
            public void onEnd(AnimationDesc animation) {
                // this will be called when the current animation is done.
                // queue up another animation called "balloon".
                // Passing a negative to loop count loops forever.  1f for speed is normal speed.
                controller.queue("balloon",-1,1f,null,0f);
            }

            @Override
            public void onLoop(AnimationDesc animation) {
                // TODO Auto-generated method stub

            }

        });
    }

    @Override
    public void dispose() {
        modelBatch.dispose();
        model.dispose();
    }

    @Override
    public void render() {
        // You've seen all this before, just be sure to clear the GL_DEPTH_BUFFER_BIT when working in 3D
        Gdx.gl.glViewport(0, 0, Gdx.graphics.getWidth(), Gdx.graphics.getHeight());
        Gdx.gl.glClearColor(1, 1, 1, 1);
        Gdx.gl.glClear(GL10.GL_COLOR_BUFFER_BIT | GL10.GL_DEPTH_BUFFER_BIT);

        // For some flavor, lets spin our camera around the Y axis by 1 degree each time render is called
        //camera.rotateAround(Vector3.Zero, new Vector3(0,1,0),1f);
        // When you change the camera details, you need to call update();
        // Also note, you need to call update() at least once.
        camera.update();

        // You need to call update on the animation controller so it will advance the animation.  Pass in frame delta
        controller.update(Gdx.graphics.getDeltaTime());
        // Like spriteBatch, just with models!  pass in the box Instance and the environment
        modelBatch.begin(camera);
        modelBatch.render(modelInstance, environment);
        modelBatch.end();
    }

    @Override
    public void resize(int width, int height) {
    }

    @Override
    public void pause() {
    }

    @Override
    public void resume() {
    }
}
Now if you run it, you should see:
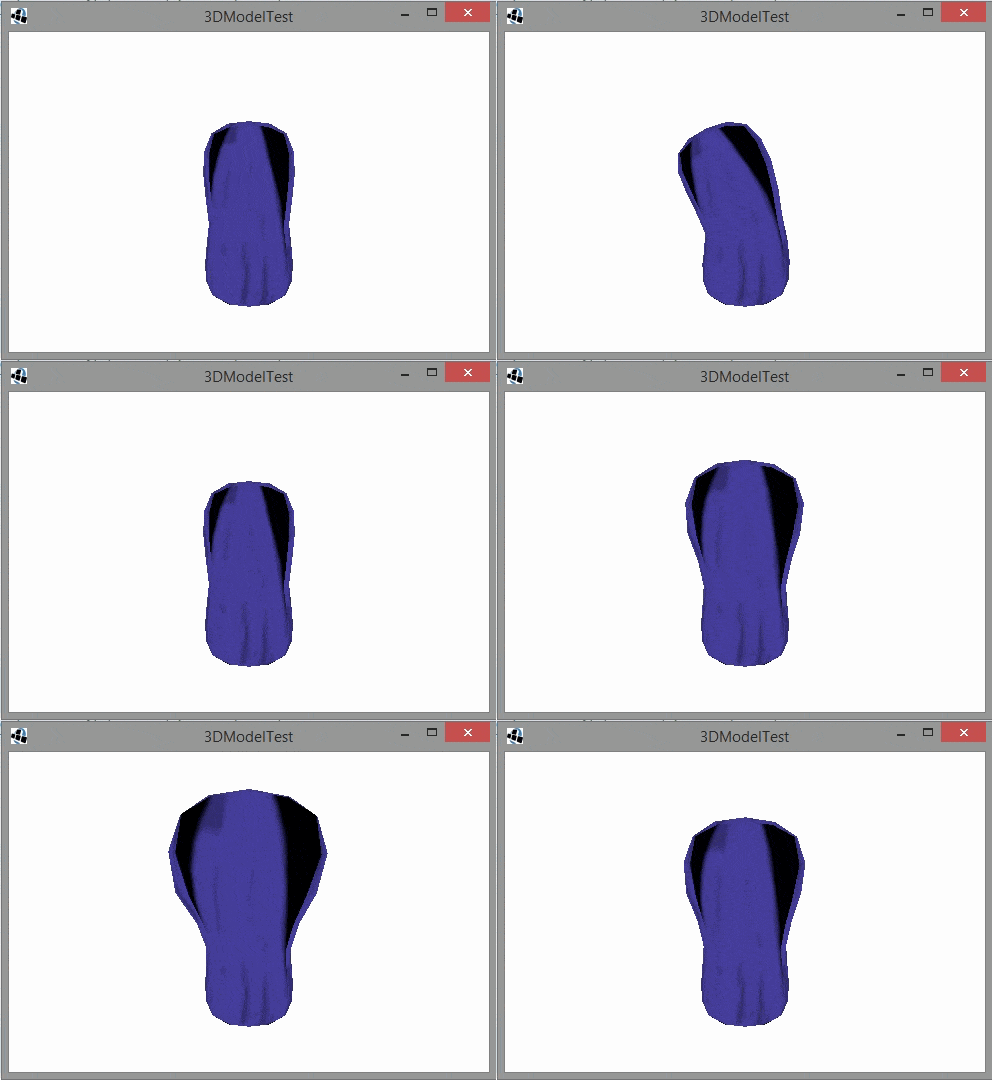
And that, is how you get a textured animated 3D model from Blender to LibGDX.
VIDEO EDITION!
Ok, that might have been a bit confusing, so I decided to screen capture the entire process. The following video shows creating, texturing, animating then exporting a model from Blender to LibGDX. There is no instruction beyond what is above, but it might help you seeing the entire process, especially if something I said above didn’t make sense, or if your own export doesn’t work out.
The video on YouTube is much higher resolution than the embedded one below.
Let me know if you have any questions.
