Welcome to another episode in the ongoing Closer Look At game engine series. This series combines an overview, review and getting started guide into a single document and hopefully let you evaluate in minutes instead of days if a game engine is the right fit for you. Today we are going to be looking at the Stingray Engine from Autodesk.
As always, there is an HD video version of this review available here.
About The Stingray Engine
The Stingray Engine started life as BitSquid by a company called FatShark. That company was acquired by Autodesk in 2014 and then finally released in 2015. Stingray is an attempt to compete with the likes of Unreal Engine and Unity and has already been used to ship a number of commercial games including Magicka Wars, Warhammer : End Times – Vermintide and HellDivers.
As Autodesk make a number of important content creation applications such as Maya and 3D Studios Max, Stingray is well supported. Additionally Autodesk have directly integrated their Scaleform technology into the engine, a topic we will discuss shortly.
Stingray is priced somewhat differently than it’s competitors. It is licensed on a monthly basis, with the current pricing shown below:
There is no additional royalty. The vast majority of people will not however license the Stingray engine in this manner. Instead it will more often be acquired together with Maya LT, an indie game developer focused version of their Maya 3D application, purchasable only via subscription. A MayaLT subscription however includes a license for Stingray. Current Maya LT pricing is shown below:
Stingray tooling is available only on Windows 7 and higher, while it is capable of targeting Windows, iOS, Android as well as PS4 and Xbox One with the appropriate developer license. Stingray also offers HTC Vive and Oculus Rift VR support. Notably there is no Mac OS, HTML or Linux support among the target platforms.
Both Maya LT and Stingray have 30 day trials available. In fact, it’s a 30 day trial I am using for this review and as a result I do not believe I have any access to the underlying C++ source code. Alright, let’s jump in.
The Stingray Editor
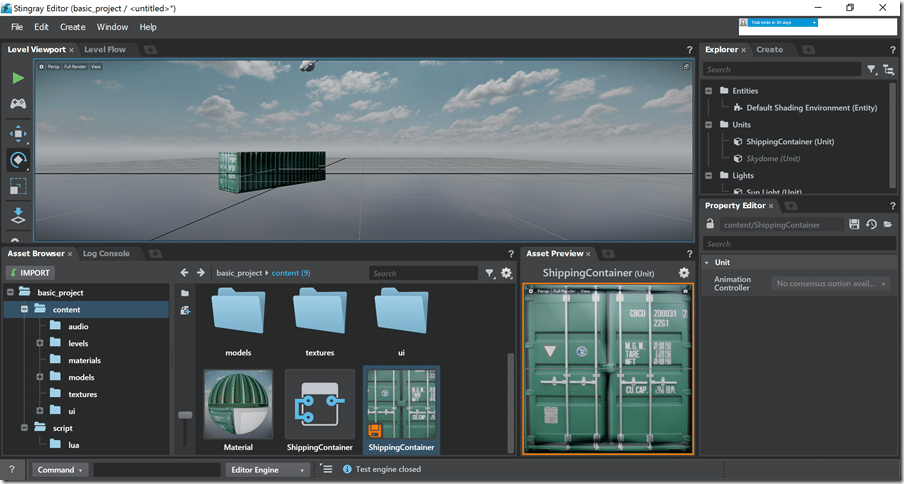
This is Stingray:
First off the engine is in a single word clean. Compared to Unity or Unreal, the interface is incredibly streamlined and especially compared to Unity, it is extremely customizable. Any window can be torn off, resized, docked, run floating, on multiple monitors etc. Performance is fine, the UI responds quickly enough. I did however find on occasion that certain windows stopped refreshing manually and required me to resize or minimizing the UI to get them to draw properly again. The main window works just fine on High DPI displays, although oddly enough some of the stand alone tools such as the do not. Hopefully these will be fixed in time.
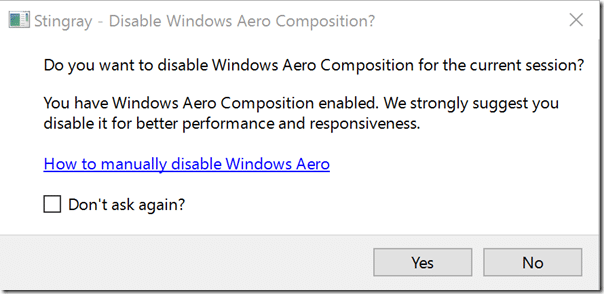
I am running on Windows 10, and receive the following dialog when starting up Stingray:
I have never received this message from any other application since upgrading to Windows 10.
Oh, and one very unpleasant note about the Stingray installation process… it installs this application:
I view Akamai in the same realm as malware and am certainly not happy about it being on my machine. As soon as this review is done, it will be uninstalled. I have no idea if the main application is hindered by it’s removal, so I have begrudgedly allowed it to remain. I know many people will not take the same attitude.
Now let’s break down the starting UI.
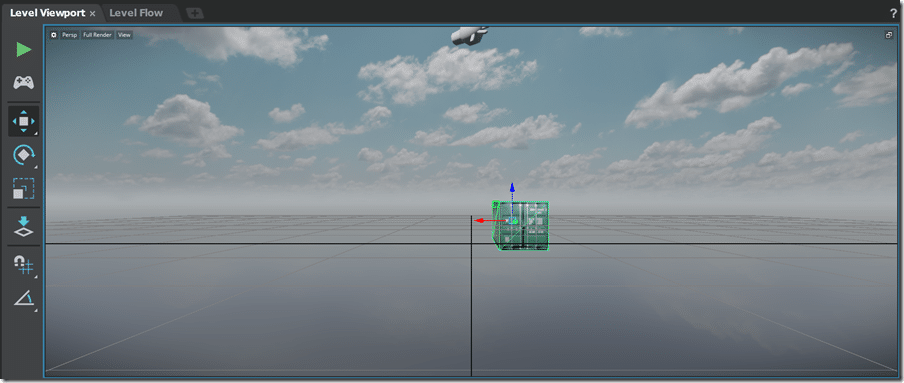
Level Viewport:
This is where you compose your 3D by placing entities (Units). The toolbar across the left offers the standard object manipulators for scaling, translating and rotating and use the standard Maya QWERTY hot key scheme. Additionally there is a placement mode, support for snapping and rotation intervals. The view itself can be manipulated using the ALT key plus various mouse combinations, such as ALT + MMB to pan, ALT + LMB to Orbit and ALT + Scroll to zoom.
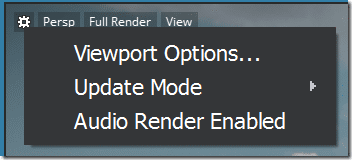
You can toggle viewport overlays, settings and more using the various labels in the top left of the view:
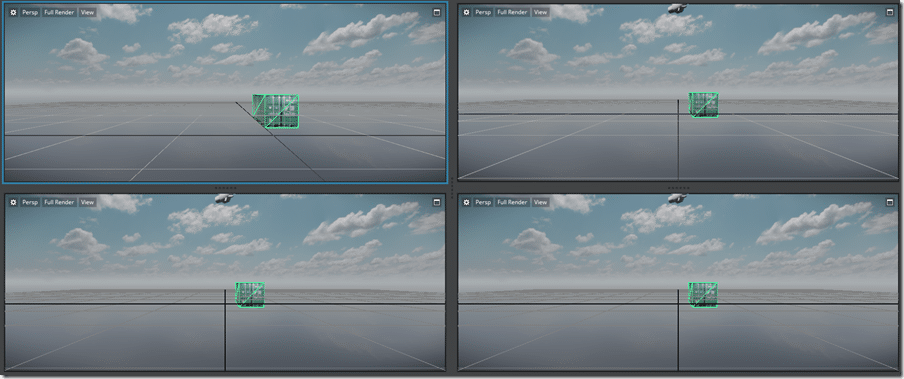
On the top right hand corner of the view there is a toggle enabling you to switch between a single view and a quad view, like so:
Notice the tabs across the top. They can be used to “float” a window or to organize multiple windows into a single tab via drag and drop:
There are also several editor windows that can be launched via the + icon:
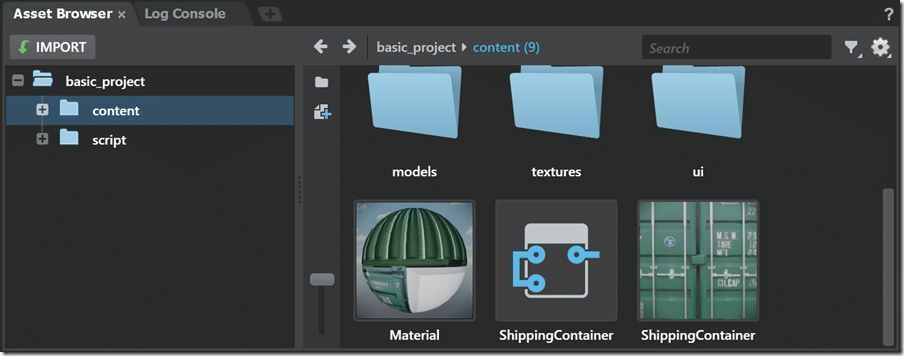
The asset browser enables you to import and organize the assets used by your game:
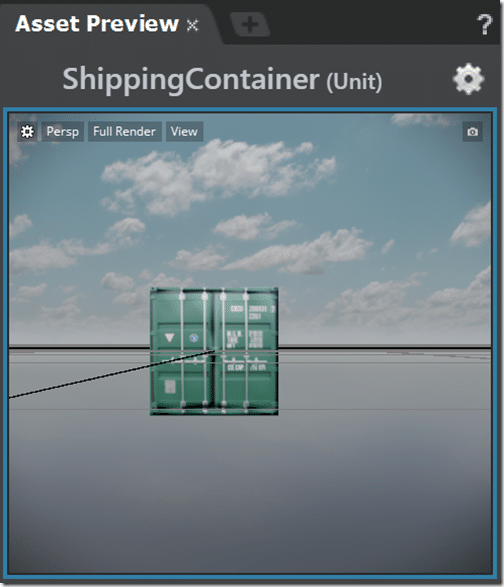
Where it makes sense ( materials, FBX models, etc ), a live preview thumbnail is generated. Additionally selecting an asset will show it in the asset previewer:
This viewer can be manipulated in the same was as the main 3D scene, allowing you to zoom, orbit, etc..
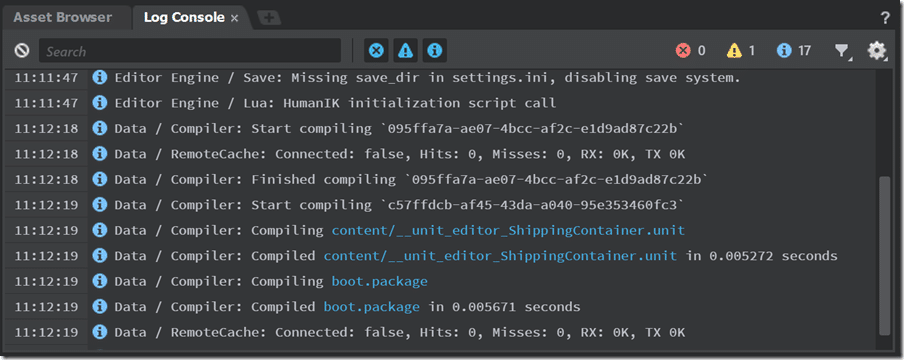
The Log Console enables you to see warnings, errors, etc., as well as serving as the standard Lua console.
The results can be filtered by type, searched, cleared, etc. This is an invaluable tool and will be spending a lot of time up on screen. Somewhat unfortunately there is no link between code errors and the code editor, so clicking a syntax error message will not bring you to the appropriate line of code. Hopefully this is fixed in the future.
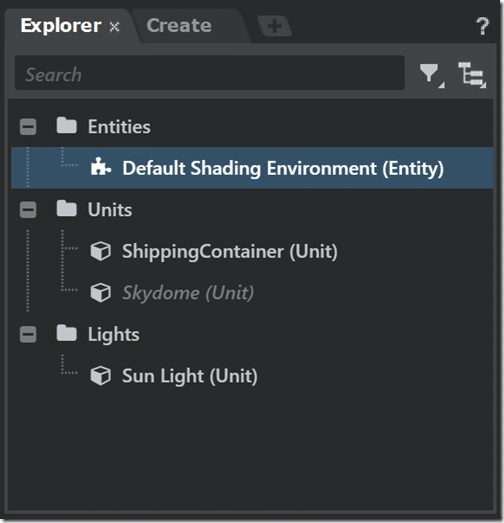
The Explorer view is your typical scene graph, showing a breakdown of entities and units in your current level:
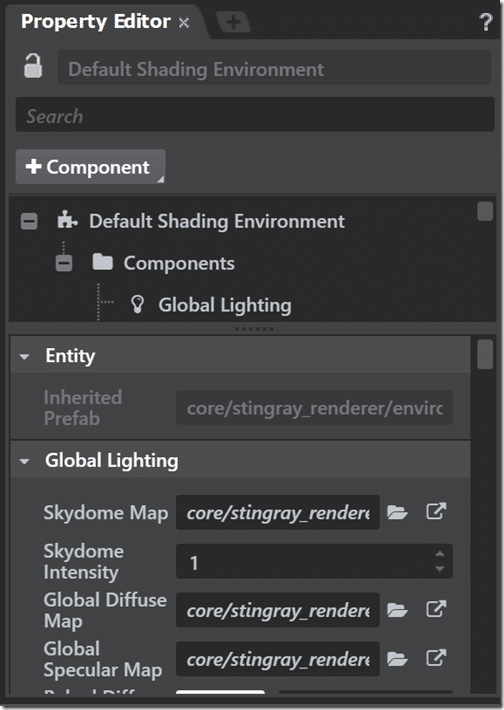
Depending on what you have selected in the Explorer, the properties window changes:
This window enables you to configure the appropriate properties and in the case of Entities, add or remove components.
So, what’s the difference between Entities and Units… well, this is a bit confusing, more so than it should be in my opinion.
A Unit is a scene graph node, often called an actor or node in other game engines. It’s a thing that can be placed in the world and basically represents the stuff that exists in your game world. The player, enemies, obstacles, etc..
An Entity on the other hand is a container for components, and components are reusable chunks of “stuff”. Wasn’t that a helpful description? A component is simply a way of describing properties and methods in a reusable way. You bundle together the data and methods required for lighting as a light component for example. In most modern game engines the entity/component relationship is pretty much the defacto way of doing things. In Stingray, entities currently consist of the terrain and environment, while Units represent the rest of “stuff” in the world. This is an artificial and confusing divide and is part of a transition to an ECS system as evidenced by this post:
Currently, our “basic object” is a unit. That .unit file will contain all the info about that unit including physics, animations, mesh data, etc … The entity system, which currently consists of the terrain and the environment, will have a scene graph make up ( a basic node hierarchy ), that will hold all the components of that entity. Moving forward, we will be iterating on the entity system and how that works with a component library of sorts. That would mean you could have an entity, like a space ship, and have multiple components ( turrents, weapons, wings, engines ) inside of it that you could control via flow or scripting.
Anyways… back to our UI tour…
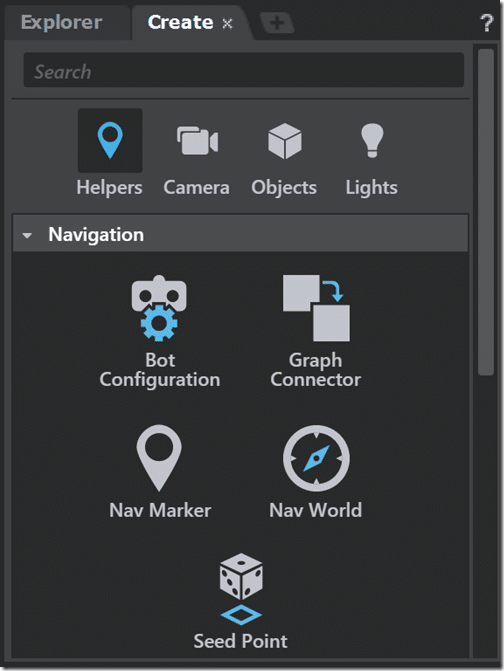
We have the Create dialog, for creating various units in your scene:
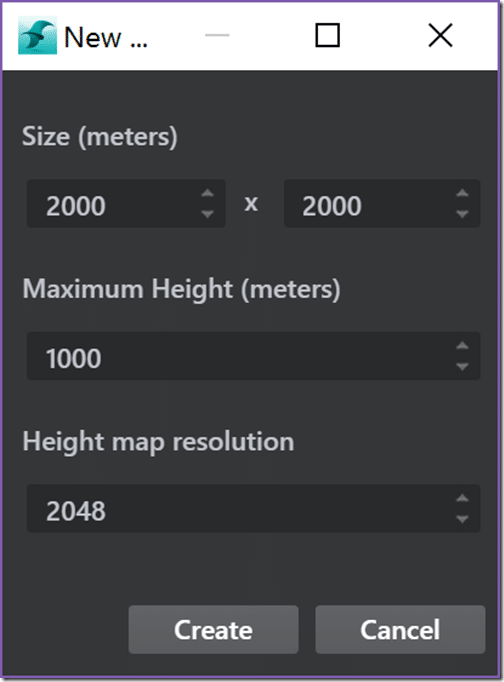
Instances are created by simply clicking in the Create dialog then placing in the 3d view. Once created the properties can be configured in the properties view. Instancable objects include AI type Helpers such as Nav Markers, cameras, lights and geometric primitives such as cubes, cylinders and spheres. You can also create splines, prototypes and terrain maps this way.
Prototypes are simple cube objects for rapidly prototyping level geometry ( or as invisible actors for physics objects ), while terrain creates a new height map as well as a corresponding unit.
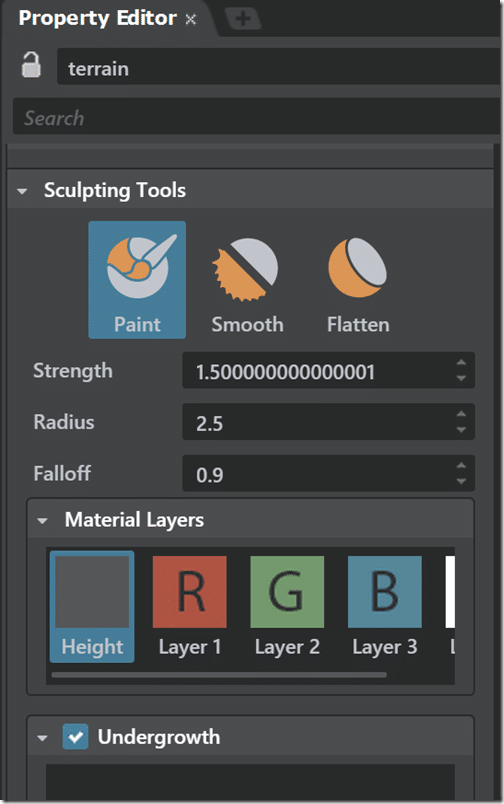
Then when you select the newly created Terrain unit, in the Property Editor, you now have access to additional terrain sculpting tools:
You can sculpt, flatten and smooth the terrain, as well as paint the RGB and alpha channels of the terrain texture. You’ve also got the options of importing the height map and texture from an existing terrain generation tool.
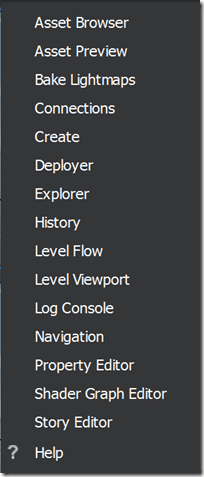
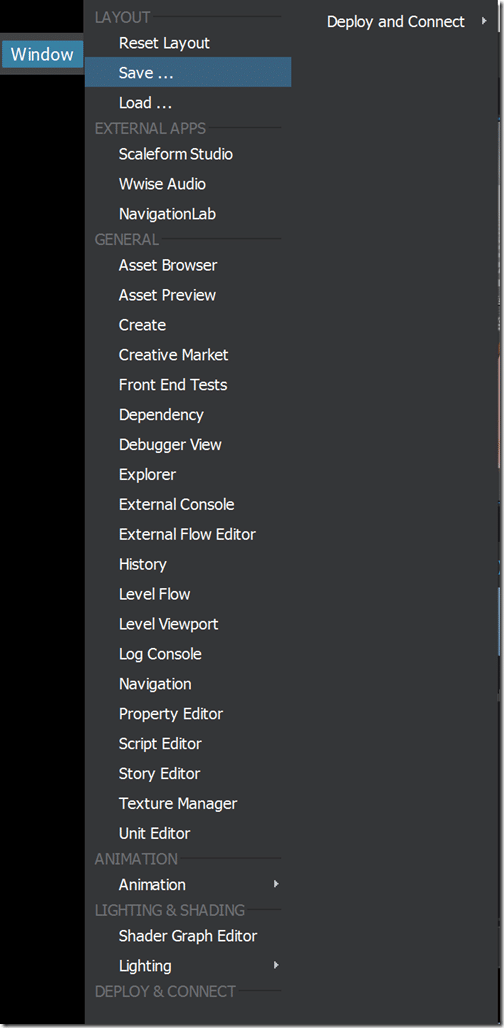
That completes the tour of the primary UI of the Stingray Engine, but leaves an absolute ton of tools uncovered, as you can see from the Window menu:
Many of these windows we have already covered, although several we have not.
Coding in Stingray
Next let’s move on to look at the workflow for coding in Stingray. There are three ways to develop in Stingray. The engine itself it written in C++ and can be extended in C++ if desired. New C++ code can be exposed to both Flow and Lua code, so slots seamlessly in with the rest of the engine. I will not be discussing C++ development in Stingray any further as I frankly have no access currently. This is also the workflow more intended for extending the engine itself, not as a primary means of development. For example, there is virtually no C++ related documentation or reference materials available. This leaves the other two options.
The first is Lua development and the second is using Flow, a visual graph based programming language. We will look at both below, starting with Flow.
Programming In Flow
If you’ve used Blueprints in Unreal Engine, you immediately have an idea of what flow is. You visual create graphs of nodes that control certain events. Flows can be created both at the scene/level and unit level. (Ok, confusing choice of terms there…)
You may have noticed in the 3D view of the default scene, there was another tab there:
This can be used to create Flow graphs for that selected level. These respond to various inputs and events and are called back at various points in time by the game engine. We will in this example instead look at creating a Flow for a unit. Select any unit in your world, or create one either using an imported FBX object, using the Create dialog to create a primitive like a Cube or Sphere, it doesn’t really matter. It just matters that you have a Unit we can attach a Flow to.
Now select the menu Window->Unit Editor.
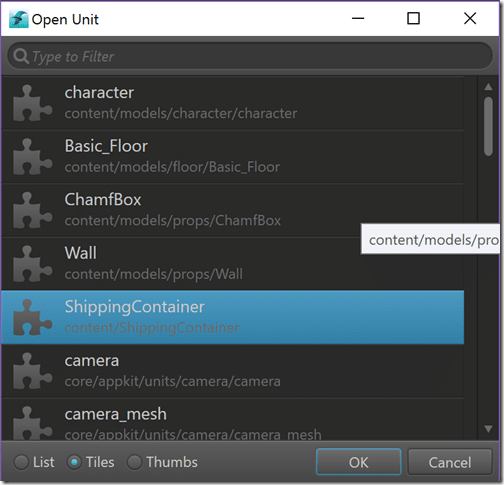
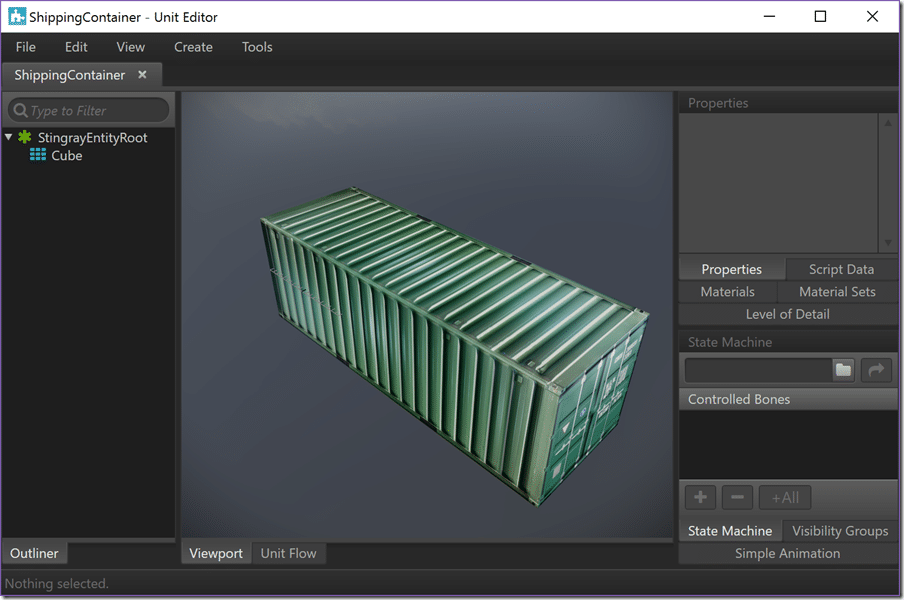
This will bring up a stand alone window. In the new windows menu select File->Open and locate your Unit:
The Unit editor should now look something like:
Notice at the bottom it says Unit Flow. Click that to bring up the Unit Flow editing canvas.
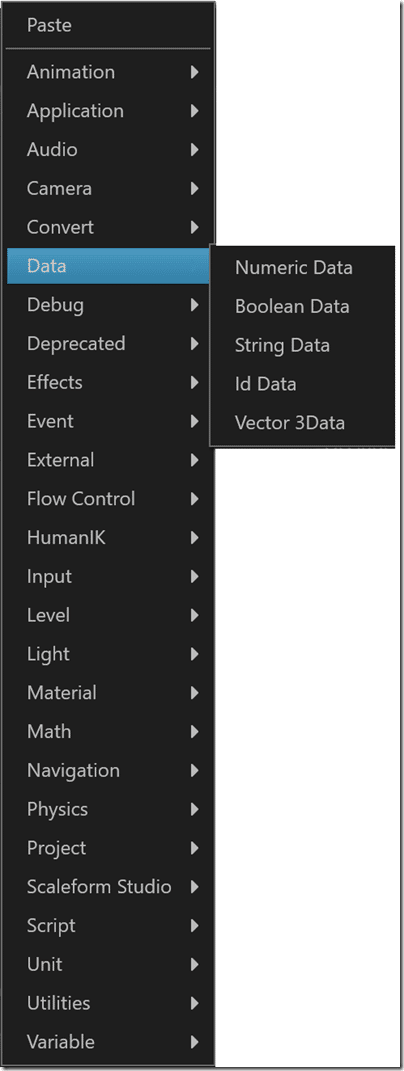
Right clicking brings up a menu that presents the various nodes you can create.
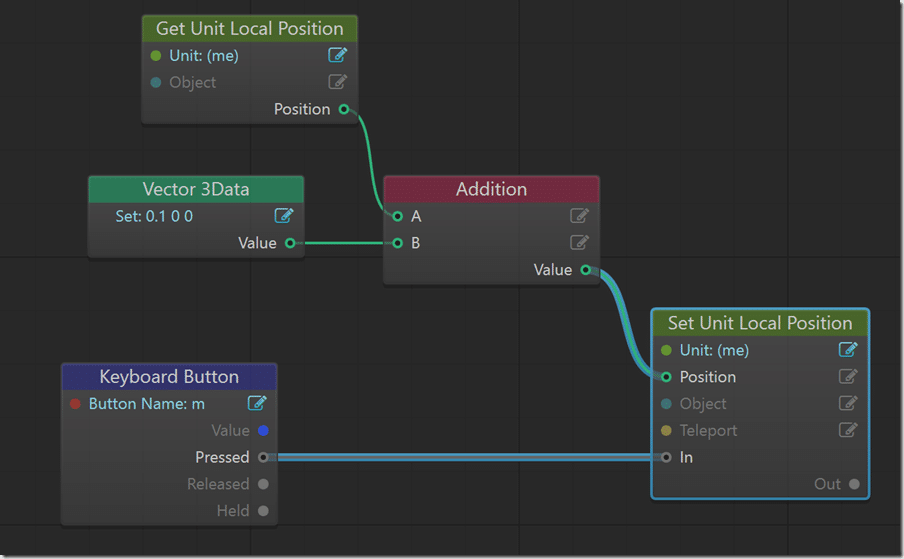
It is by connecting together these nodes we program the execution of our program. We respond to various events, either game based callbacks, or respond to input events. You then wire these nodes together as either input or output to other nodes. Here is a very simple example:
This flow is called in response to the Keyboard Button “m” being hit. This in turn is wired to the In event of the Set Unit Local Position. The Position input of our selected Unit is then set through a combination of nodes. In this case we query it’s current position, create a Vector with the value (0.1, 0, 0) and add them together with an add vector node. The results of this action are pipes into the position parameter of the Set Unit Local Position node. You will notice inputs are on the left side, outputs are on the right side and compatible nodes are color coded. Essentially this is how Flows are programmed. You can create a flow on a unit by unit basis, or a level by level basis. Flows also have a node capable of calling or being called from a Lua script, enabling you to mix and match the two programming concepts if you wish.
Programming In Lua
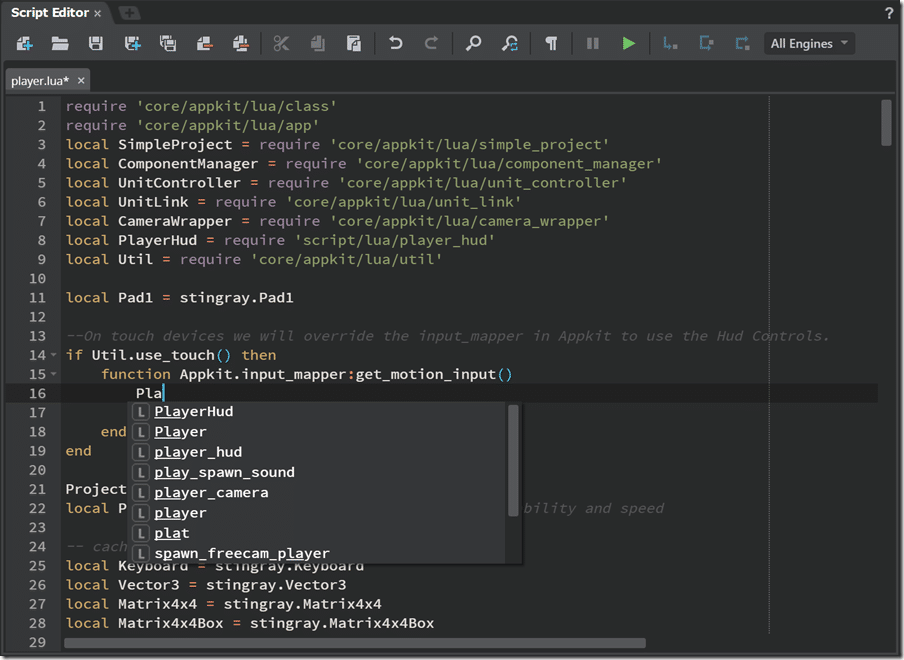
Lua is the other major option for programming in Stingray. When you chose a Basic Project from the starting template, you get a basic implementation of a game in Lua. In this example however, we will look at the minimal implementation of a game loop using Lua. There is an integrated Lua code editor in Stingray:
Even if you create an empty project, at it’s root you will see a configuration file named settings.ini. This file can be edited using the Script Editor. The following setting tells Stingray what script to use as your application “main” if you will:
// The script that should be started when the application runs. //boot_script = "core/appkit/lua/main" boot_script = "script/lua/player"
You can see we commented out the default implementation and replaced the entry for boot_script to script/lua/player. This is the path within our project to the .lua file controlling our game, with file extensions removed. Note the commented out core/appkit entry. We will get back to that in a moment.
Now let’s look at the implementation of player.lua:
package = nil world = nil viewport = nil shading_environment = nil camera = nil box = nil function init() world = stingray.Application.new_world() viewport = stingray.Application.create_viewport(world, "default") shading_environment = stingray.World.create_shading_environment(world, "core/stingray_renderer/environments/midday/midday") stingray.World.set_shading_environment(world, shading_environment, "core/stingray_renderer/environments/midday/midday") local camera_unit = stingray.World.spawn_unit(world, "core/units/camera") camera = stingray.Unit.camera(camera_unit, "camera") stingray.Camera.set_local_position(camera, camera_unit, stingray.Vector3(0,-10,2)) world:load_level("content/levels/scene1") box = stingray.World.unit_by_name(world,"myCube") end function update(dt) stingray.World.update(world, dt) local pos = stingray.Unit.local_position(box,1) pos.x = pos.x -0.01 stingray.Unit.set_local_position(box,1,pos) end function render() stingray.Application.render_world(world, camera, viewport, shading_environment) end function shutdown() --stingray.Application.release_world(world) end
The boot_script implements several callbacks that are called by the Stingray engine over the lifecycle of the game, startup, ending and per frame for updating and rendering. In this script we set up the environment, camera etc. Then you can see we load a level with a call to world:load_level(). We then get a reference to a Unit we created in the level with the name “myCube”. Each frame update is called, and during that call we simply move the x value of our box slightly each frame.
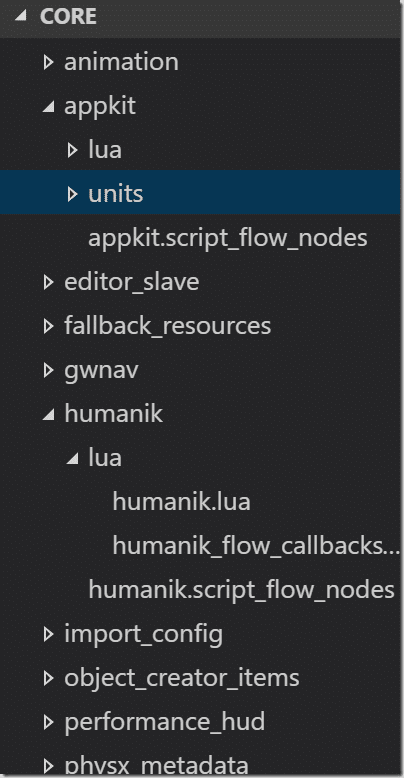
Remember the core/appkit call earlier. This is a framework to a game and series of Lua bindings available in your Stingray directory. You should take a moment to peruse it’s contents:
In addition to all the lua bindings, simple application implementations etc, there are also sample shaders, materials, etc.. Like in Flow, Lua scripts can also be attached to Units and units can be controlled that way. Flow’s can also be attached at the Level um… level. Lua and Flow are also able to communicate with each other, as well as underlying C++ code. Full details of Lua and Flow programming are far beyond the scope of this review. Check the Documentation section however for more information.
Art and Assets
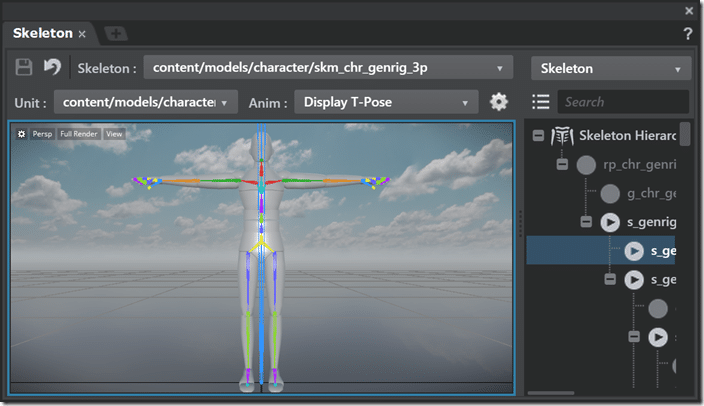
I suppose it should come as no surprise that the tool is heavily coupled with Autodesk’s tools, specifically Maya. While there are tools such as the Skeleton Preview tool (shown below) and Asset Preview we saw earlier, all modeling, animation and texturing is done in your DCC tool. I have however imported FBX files generated in Blender without issue.
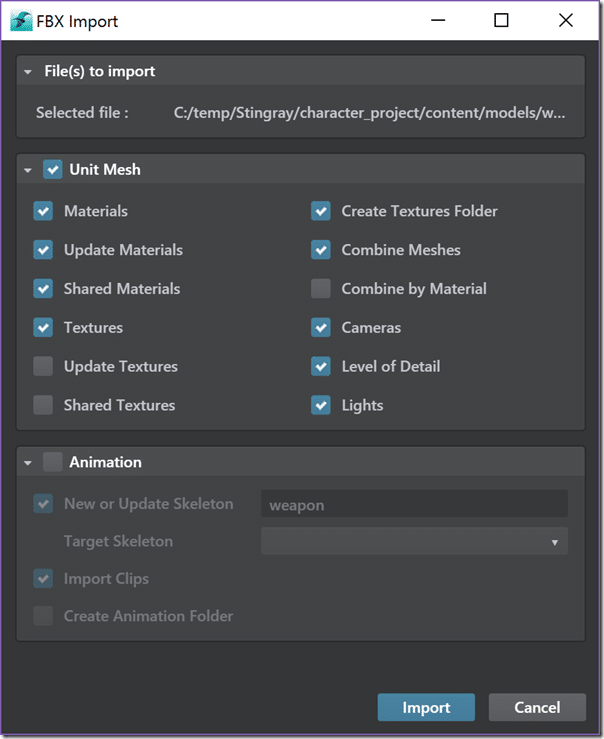
Assets are imported via the Import button in the Asset Browser, and presents several options:
As FBX is Autodesk’s interchange format of choice, the results are pretty rock solid.
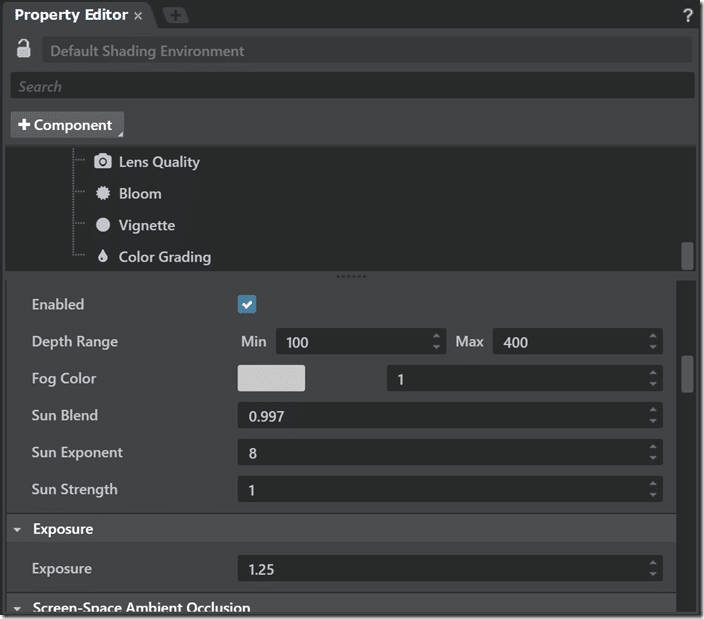
The artist also has control over the shading and lighting of a scene. As we saw earlier, lights can be instanced using the Create panel. Each scene also has a shading environment that can be configured:
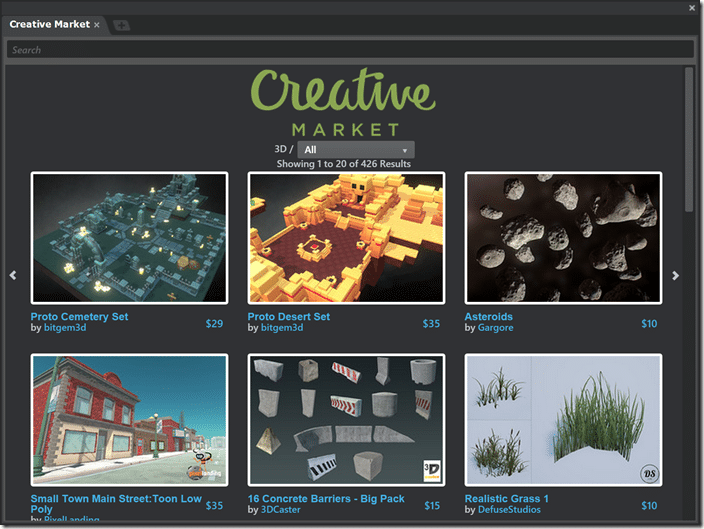
Finally, one major feature of the Stingray Engine, and increasingly a huge aspect of modern game engines, is the inclusion of an asset store. This can be accessed via the Creative Market:
Currently holding only 426 items, it is a fraction of the size of the Unity asset store, but nice to see none the less.
There is one elephant in the room… 2D. How good is this engine at 2D games? Well that’s a tricky question to answer. On the one hand the engine essentially has ZERO 2D support. Any 2D done in the engine is essentially faked in 3D and it doesn’t really contain any tools to make this process simpler. On the other hand, Stingray fully integrates and even includes Scaleform and this is the recommended route for supporting or integrating 2D into your game. Scaleform can essentially be thought of as Flash optimized for games, which is exactly what it is. It’s a special version of the Flash player that was designed for games and has commonly been used for implementing UI overlays in AAA games. In more recent years Autodesk have also been pushing it as a 2D game engine with mixed success. Scaleform is WAY beyond the scope of this review, but if you want more information on Scaleform go here. The Stingray engine heavily integrates the Scaleform engine and can be used with Lua or Flow coding.
Documentation and Community
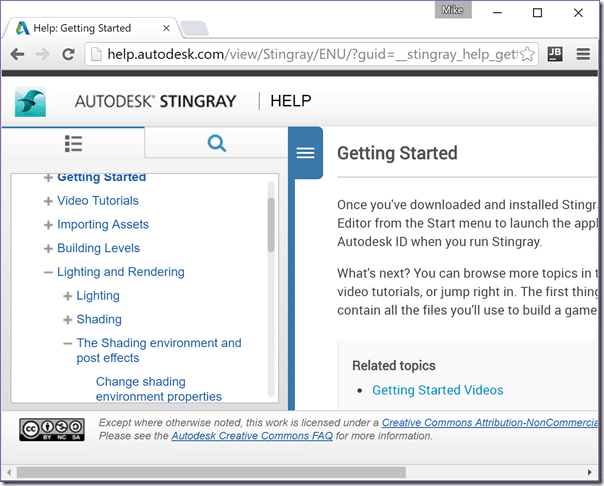
So, how is the documentation for Stingray? In a word, great. All of the documentation is online, containing both a good user manual as well as comprehensive reference materials.
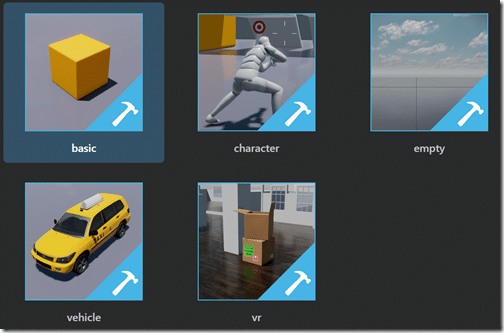
They have also created a series of getting started videos available on YouTube. The LUA Api Reference is available here, while the Flow reference is available here. When creating your project there are a couple of templates you can start with:
Hopefully more templates come soon.
The community is forum based, while not extremely large, questions are answered.
Summary
I did run into some annoyances, ranging from minor to major in my time with Stingray. I am not sure if High DPI displays are to blame here, but I ran into many off screen issues. When running my application it appeared in the bottom right corner of the screen and can’t easily be resized. I had to maximize (alt + enter) and minimize the window to have it display properly. I also had windows that simply didn’t fit on the screen at all, in the case of the Property editor, it took up the entire screen and the problem persisted between sessions making it impossible to continue without resetting the default layout. As mentioned earlier, some stand alone editors such as the external flow editor looked terrible on my display. This is also the only area where I experienced crashes. From a usability perspective, being prompted to save every single time I ran my application, even though I already did, and even though the application runs with a saved copy anyways, got very tiresome quickly. There should be a setting to remove this behavior. For the most part though, usability and stability were both very good. None of these gripes even approach being deal breakers.
At the end of the day Stingray is a very competent, feature complete and relatively streamlined game engine for making 3D games. If you are looking for a 2D or 2.5D solution, you are probably better served looking elsewhere. This is a production proven, easily to learn and capable 3D game engine however, easily able to compete toe to toe with the likes of Unity or Unreal. In the end it is probably going to come down to a combination of supported platforms, preferred programming languages and yes, ultimately cost, that is going to decide if Stingray is right for you. It is certainly worth checking out, especially if you already work with Autodesk’s suite of applications.
The Video

