So, now we have a functioning game loop and a screen to draw on, let’s add some more functionality. This time we are going to add a menu and a welcome splash screen. We are going to take a consistent approach in that all “screens” are in charge of handling their own input.
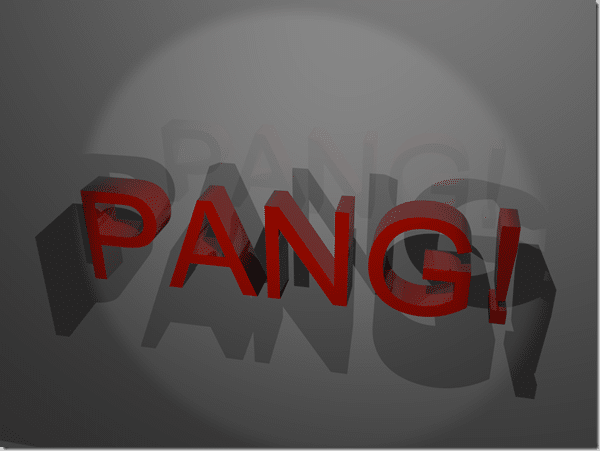
Alright, let’s start by adding a SplashScreen for when you start the game. First of all, you are going to need an image to display as the splash screen. Keep in mind the game is running at a fixed resolution of 1024×768, so ideally you want to make an image that size. It is outside of the scope of this tutorial to create that image, but after playing around in Blender for a couple of minutes, I came up with this:

Click here to download full-size version of SplashScreen.png
… what can I say, I am a programmer. You can use this image or create your own it really doesn’t matter, although to follow along with the code, name it SplashScreen.png if you do decide to create your own. Now that we have our image, let’s write some code.
First, create a new header file in the Header Files folder named SplashScreen.h. Now add the following code:
#pragma once
class SplashScreen
{
public:
    void Show(sf::RenderWindow& window);
};
Click here to download SplashScreen.h
Simple enough right? After the last section, there should be nothing new here. We are simply creating a class called SplashScreen with a single public function Show(), which takes a RenderWindow as a parameter. Save your changes.
Now we want to create SplashScreen.cpp in the Source Files folder. Once created, add the following code:
#include "StdAfx.h"
#include "SplashScreen.h"


void SplashScreen::Show(sf::RenderWindow & renderWindow)
{
    sf::Image image;
    if(image.LoadFromFile("images/SplashScreen.png") != true)
    {
        return;
    }

    sf::Sprite sprite(image);

    renderWindow.Draw(sprite);
    renderWindow.Display();

    sf::Event event;
    while(true)
    {
        while(renderWindow.GetEvent(event))
        {
            if(event.Type == sf::Event::EventType::KeyPressed
                || event.Type == sf::Event::EventType::MouseButtonPressed
                || event.Type == sf::Event::EventType::Closed )
            {
                return;
            }
        }
    }
}
Click here to download Splashscreen.cpp
This code is also pretty straight forward. First thing we do is load the splashscreen image from disk and simply return if it doesn’t exist, meaning of course nothing will be shown. With SFML an image is not seen on screen, that is the job of a sprite. An image represents the actual pixel data from a file, but a sprite represents displaying that information on screen. Why, you might wonder would you bother creating two different classes? Mostly because you could have multiple sprites using the same image. For example, our game is going to have at least two paddles, but we are going to use only a single image. Also, in the case of a sprite sheet you often have multiple images in a single image file.
One the sprite is loaded, we simply draw it to the screen. We don’t need to worry about coordinates because the sprite and the renderWindow are the same size. Next we simply call RenderWindow.Display() which displays our image on screen.
As I said earlier, all windows are responsible for their own event handling, which exactly what happens starting on line 18. On 19 we declare an infinite loop, then each pass through we check for available events and if the user presses a key, clicks a mouse or closes the window we exit the function, thus closing the splash screen window.
The main menu works very similarly but has a couple of key differences. The menu is essentially just an image that is displayed similar to the splash screen. Let’s take a look at it now. Create a file called MainMenu.h ( note, you can use Add Class because MainMenu is a reserved class name in MFC… again, stupid bug. ) and add the following code:
#pragma once
#include "SFML\Window.hpp"
#include "SFML\Graphics.hpp"
#include <list>

class MainMenu
{

public:
    enum MenuResult { Nothing, Exit, Play };

    struct MenuItem
        {
        public:
            sf::Rect<int> rect;
            MenuResult action;
        };

    MenuResult Show(sf::RenderWindow& window);

private:
    MenuResult GetMenuResponse(sf::RenderWindow& window);
    MenuResult HandleClick(int x, int y);
    std::list<MenuItem> _menuItems;
};
Click here to download MainMenu.h
First thing you may ask is “Why isn’t <list> declared in stdafx?”. The answer is, you’re right, it should be. As you know from earlier, any header file you include but aren’t actively being changed should be included in stdafx to accelerate the build process. For sample code purposes though, it was better to show it included locally instead of having to show stdafx.h over and over.
MainMenu is a fairly straight forward class. First off it defines an enum type that contains the various possible return values the menu could return. Next, it declares a struct called MenuItem that represents the individual menu items on the menu. This struct is exceedingly simple, containing a sf::Rect<int> that represents the dimensions of the MenuItem. It also contains a MenuResult enum presenting the value to return if that MenuItem is clicked.
Optional Information
What’s with the <int> ???
You may have just encountered your first line of templated code. In MainMenu.h we declared: sf::Rect<int> rect; sf::Rect is a templated class. In this case we are declaring an instance of sf::Rect using the type of int. In place of int we could have used many other numeric data types, such as float or double or even your own class, as long as it supported all of the operators that sf::Rect requires.
In essence, templates allow a class such as sf::Rect to become more generic by removing the requirement of them to know about the datatype they are operating on. So instead of having to for example, implement three Add() methods for eac int, float and double, they can simply write one.
This is an extremely simple and incomplete explanation of templates. Templates are of extreme importance to C++ and are becoming more and more important with every revision, so it is a very good idea to familiarize yourself with how they work. Such a discussion is well beyond the scope of this work, so you may wish to consult a site such as this or consult a book such as C++ Templates The Complete Guide, an excellent book on the subject.
You should be able to make it through this tutorial with minimal knowledge of templates, but if you are going to become proficient in C++, it is an area you will need to know extremely well.
Next MainMenu declares a single public function Show() that returns a MenuResult enum type. Finally are the private functions and data. GetMenuResponse() is used internally and will be explained shortly, as is HandleClick(). The last line item is a list of type MenuItem, which will hold the various MenuItems that compose MainMenu. std::list is a templated class from the Standard Template Library. If you are unfamiliar with STL, you should rectify that as soon as you get the chance. There are some good book and link suggestions for learning C++ in the C++ section of the Beginners Guide if you wish to learn more.
That’s about it for MainMenu.h. Most of this will make more sense in a few minutes. I thought I would take a moment to explain something about the design of MainMenu, the nested structs/enums. You may be wondering why I nested the definition of MenuItem and MenuResult inside of MainMenu and the simple answer is because they belong to MainMenu, so we want to scope them within MainMenu. Truth of the matter is, those items are of absolutely no use when not dealing with MainMenu, so there is no sense polluting the global namespace with a number of classes with no use to anything but a MainMenu object. This is a key aspect of object oriented programming, encapsulation.
This leads to another conversation, the design of MainMenu itself. Don’t menus share enough functionality they should derive from a common base class and a generic MenuItem class that isn’t specific to a specific type of menu? The answer is very much yes! In your own game, if you have multiple menus this is exactly what you would want to do. In the case of Pang, however, we are only going to have a single menu, so I went this route in order to keep the code smaller/easier to understand. Don’t worry, later in the tutorial we will cover inheritance in more detail.
Optional Information
Why a struct?
You may have noticed that MenuItem is a struct instead of a class and may wonder why that is. The simple answer is, it just as easily could have been a class, but struct is a slightly better choice.
First off, the biggest difference between a class and a struct is that a class defaults to private while a struct defaults to public. Since MenuItem contains entirely public members, choosing struct saves a bit of typing “public: “.
The second reason is more a convention thing, but is no less important, especially if you are dealing with other coders. When dealing with fully publicly available POD types ( Plain Old Data ) that has no member functions, the norm is to use struct. Finally, it is common to use struct for functors but you can forget about that for now, we will cover it later. There are some advantages to POD types ( like no vtables ) but they are well beyond the scope of what we are dealing with and are generally an example of premature optimization.
In short, you could have used class instead and been just as right, struct was just a slightly better fit.
Now let’s implement MainMenu. Create a new file called MainMenu.cpp and add the following code:
#include "stdafx.h"
#include "MainMenu.h"


MainMenu::MenuResult MainMenu::Show(sf::RenderWindow& window)
{

	//Load menu image from file
	sf::Image image;
	image.LoadFromFile("images/mainmenu.png");
	sf::Sprite sprite(image);

	//Setup clickable regions

	//Play menu item coordinates
	MenuItem playButton;
	playButton.rect.Top= 145;
	playButton.rect.Bottom = 380;
	playButton.rect.Left = 0;
	playButton.rect.Right = 1023;
	playButton.action = Play;

	//Exit menu item coordinates
	MenuItem exitButton;
	exitButton.rect.Left = 0;
	exitButton.rect.Right = 1023;
	exitButton.rect.Top = 383;
	exitButton.rect.Bottom = 560;
	exitButton.action = Exit;

	_menuItems.push_back(playButton);
	_menuItems.push_back(exitButton);

	window.Draw(sprite);
	window.Display();

	return GetMenuResponse(window);
}

MainMenu::MenuResult MainMenu::HandleClick(int x, int y)
{
	std::list<MenuItem>::iterator it;

	for ( it = _menuItems.begin(); it != _menuItems.end(); it++)
	{
		sf::Rect<int> menuItemRect = (*it).rect;
		if( menuItemRect.Bottom > y
			&& menuItemRect.Top < y
			&& menuItemRect.Left < x
			&& menuItemRect.Right > x)
			{
				return (*it).action;
			}
	}

	return Nothing;
}

MainMenu::MenuResult  MainMenu::GetMenuResponse(sf::RenderWindow& window)
{
	sf::Event menuEvent;

	while(42 != 43)
	{

		while(window.GetEvent(menuEvent))
		{
			if(menuEvent.Type == sf::Event::MouseButtonPressed)
			{
				return HandleClick(menuEvent.MouseButton.X,menuEvent.MouseButton.Y);
			}
			if(menuEvent.Type == sf::Event::Closed)
			{
				return Exit;
			}
		}
	}
}
Click here to download MainMenu.cpp
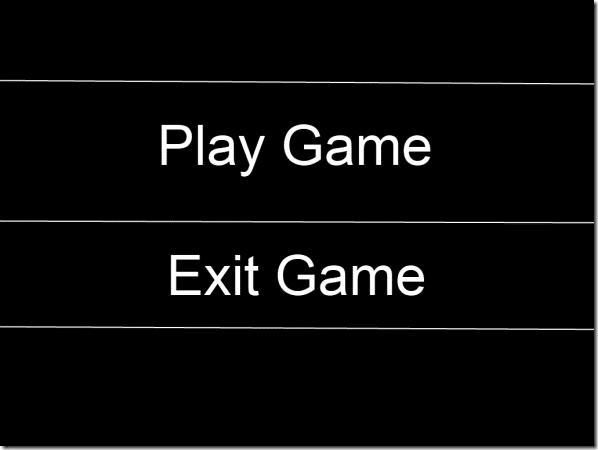
This code is fairly long, but not very complex. First off we implement Show(), which is very similar to SplashScreen from before. We load an image file “mainmenu.png” from the images folder and create a sprite to display it. Next, we create two MenuItem’s, which correspond with the location of their button’s physical locations within the mainmenu.png image file. Lastly, each MenuItem has an action, which is represented by the MenuResult enum we described earlier.
MainMenu.png:

Click here to download MainMenu.png
After defining the location rects and action type of both MenuItems, we then add them to the _menuItems list using push_back(), which adds to an item to a list in the final position. Next we draw our menu image to screen and tell the display to Display() just like we did in Splashscreen. Finally, we call the function GetMenuResponse, returning it’s return value as Show’s return value.
GetMenuResponse() is the event loop for MainMenu. It works just like our other two eventloops, except it only handles sf::Event::Closed and sf::Event::MouseButtonPressed. In the event of close, it returns a value of MenuResult::Exit. In the event of a button press, it passed the coordinates into HandleClick() returning it’s results.
HandleClick() is a very simple method that might look very confusing to you if you are new to STL datatypes. First off, it declares an iterator, which is a datatype used for navigating through a collection of data. In the for loop the iterator “it” is initially assigned a location of _menuItems.begin() which is the first element in the list. Each pass through, the iterator’s ++ operator is called, which moves to the next item in the list, until the iterators location is equal to _menuItems.end(). One thing than can be a bit tricky is List.end() refers to a value past the end of the list, not to the last item in the list. Think of .end() like you would a file’s EOF. It does not represent a value, but instead the end of available values.
Iterators also represent a pointer to the underlying datatype contained within the list<>. Therefore when we dereference it ( using (*it) ) it contains a MenuItem type. We then check to see if the click location is within the MenuItem’s rect. If in fact the click was within MenuItem’s rect, we return the action (MenuResult).
Lastly, we need to make a few changes to Game.h and Game.cpp, which will illustrate the power of using a state driven game structure.
Change Game.h to contain the following:
#pragma once
#include "SFML\Window.hpp"
#include "SFML\Graphics.hpp"


class Game
{
public:
	static void Start();

private:
	static bool IsExiting();
	static void GameLoop();

	static void ShowSplashScreen();
	static void ShowMenu();

	enum GameState { Uninitialized, ShowingSplash, Paused,
					ShowingMenu, Playing, Exiting };

	static GameState _gameState;
	static sf::RenderWindow _mainWindow;
};
The only changes we made here were the two next new functions on line 15 and 16, as well as the two new states on lines 18 and 19. The purpose of these changes will be explained in a moment.
In Game.cpp, we want to edit Game::Start() to look like:
void Game::Start(void)
{
	if(_gameState != Uninitialized)
		return;

	_mainWindow.Create(sf::VideoMode(1024,768,32),"Pang!");

	_gameState= Game::ShowingSplash;

	while(!IsExiting())
	{
		GameLoop();
	}

	_mainWindow.Close();
}
The only real change here is line 8. This simply sets the state to ShowingSplash when the game starts up. Next up we just add two new states to Game::GameLoop, as follows:
void Game::GameLoop()
{
	switch(_gameState)
	{
		case Game::ShowingMenu:
			{
				ShowMenu();
				break;
			}
		case Game::ShowingSplash:
			{
				ShowSplashScreen();
				break;
			}
		case Game::Playing:
			{
				sf::Event currentEvent;
				while(_mainWindow.GetEvent(currentEvent))
					{
					_mainWindow.Clear(sf::Color(0,0,0));
					_mainWindow.Display();

					if(currentEvent.Type == sf::Event::Closed) _gameState = Game::Exiting;

					if(currentEvent.Type == sf::Event::KeyPressed)
						{
							if(currentEvent.Key.Code == sf::Key::Escape) ShowMenu();
						}
					}
				break;
			}
	}
}
All that we add here are the Game::ShowingMenu and ShowingSplash case handlers, which call ShowMenu() and ShowSplash() respectively. They are defined as:
void Game::ShowSplashScreen()
{
	SplashScreen splashScreen;
	splashScreen.Show(_mainWindow);
	_gameState = Game::ShowingMenu;
}

void Game::ShowMenu()
{
	MainMenu mainMenu;
	MainMenu::MenuResult result = mainMenu.Show(_mainWindow);
	switch(result)
	{
	case MainMenu::Exit:
			_gameState = Game::Exiting;
			break;
		case MainMenu::Play:
			_gameState = Game::Playing;
			break;
	}
}
Click here to download Game.cpp
Game::ShowSplashScreen() simply creates a SplashScreen object, calls its Show() method, then sets the game state to Showing Menu. Game::ShowMenu() creates a MainMenu object and calls it’s Show() method. In this case, it takes the returned MenuResults value and sets the game’s state accordingly. This is how we handle the progression from state to state within our game.
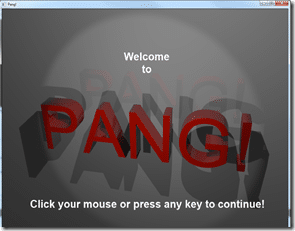
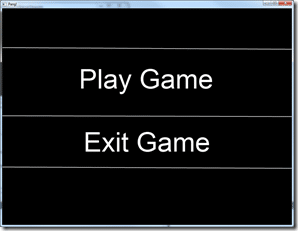
Pang running now:


Click any key or mouse button to get past the splash screen, then in the menu click either “Exit Game” to um… exit. That’s it for now. In the next section, we will work a bit more with graphics and delve a little deeper into object oriented programming.
You can download a completely updated project here.
